Every then and now you’ve heard about Photoshop if you want to be a graphic designer. Learning Photoshop is a key to success in a design world as many designers whether you are illustrators, concept artists, retouchers, and photographers use Photoshop to create amazing arts.
At the beginning, where you don’t know about anything in Photoshop, is going to be very difficult for you to learn Photoshop. To save your time and hard work, I put together an infographic showing you 9 key points to keep in mind that will help you learn Photoshop faster and in an efficient way. With each step I suggest some tutorials to learn more about what mentioned in the step because only showing brief steps won’t help you and you need to understand it thoroughly.
Here is the infographic:

Here are the takeaways from infographic to Learn Photoshop:
1. Get a Quick Tour of Photoshop Interface
2. Understand How Layers Work
3. Get Used to Photoshop’s Tools
4. Work with Layer Mask
5. Experiment with Blending Modes
6. Make Selections using Selection Techniques
7. Use Adjustment Layers
8. Apply Filters to Images
9. Edit Your First Photo
1. Photoshop Interface
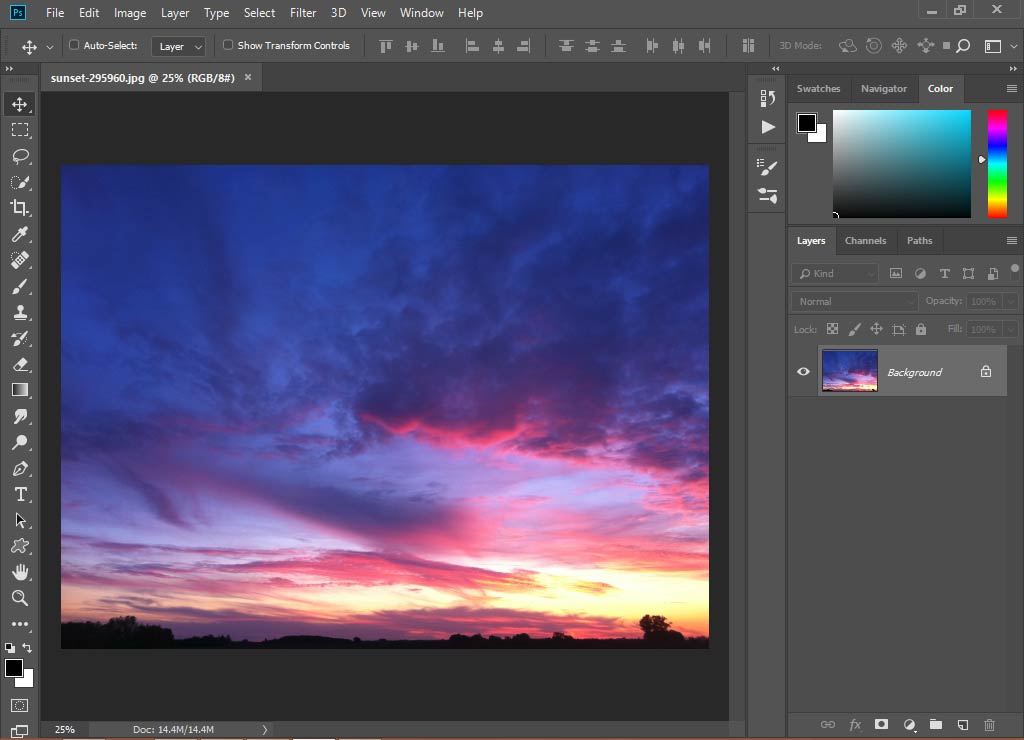
Take a quick tour of Photoshop interface and it’ll make you comfortable with Photoshop. You don’t need to worry about other things like layers, tools, adjustments layers work. Just move around and see where is the Photoshop’s tool panel, where you can find filters, layer mask, adjustment layers, options bar, and about the workspace.
Here are some tutorials that will guide you about Photoshop interface:
Learn Photoshop Step #1: Get a Quick Tour of Photoshop Interface!Click To Tweet2. Understand Layers
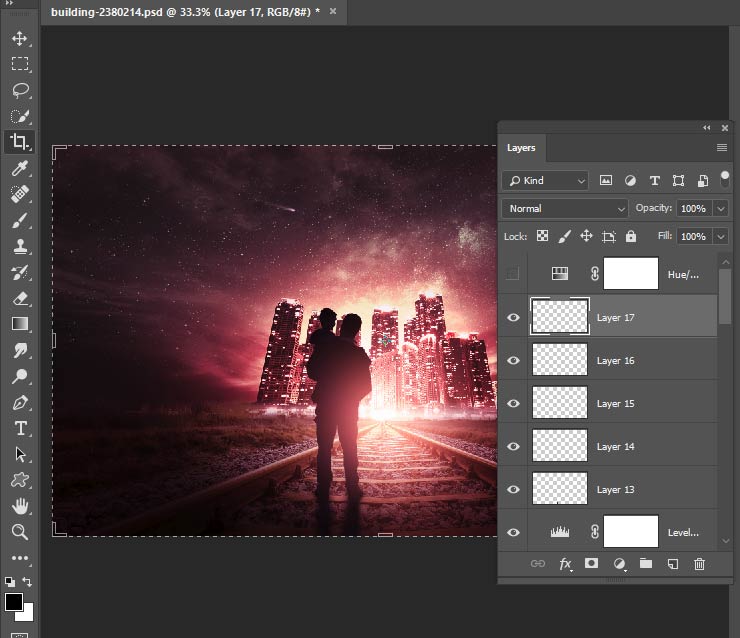
In order to work in Photoshop, you need to understand Layers. Without them, you can’t edit your images or create your designs. These are like pages of your notebook like you write separately on them or want to keep the thing separate in your pages, the same thing applies for Photoshop’s layers. You keep different stuffs on each layer.
Layers can contain images, texts, vectors, and objects. Whenever you create a document by selecting File > New it creates a layer. You can place your images on them, texts and many other objects. I already have written a thorough tutorial on layers that how you can use them, how they work and the cheat sheet for layers.
Suggested Tutorials for Layers:
Learn Photoshop Step #2: Understand LayersClick To Tweet3. Get Used to Photoshop Tools
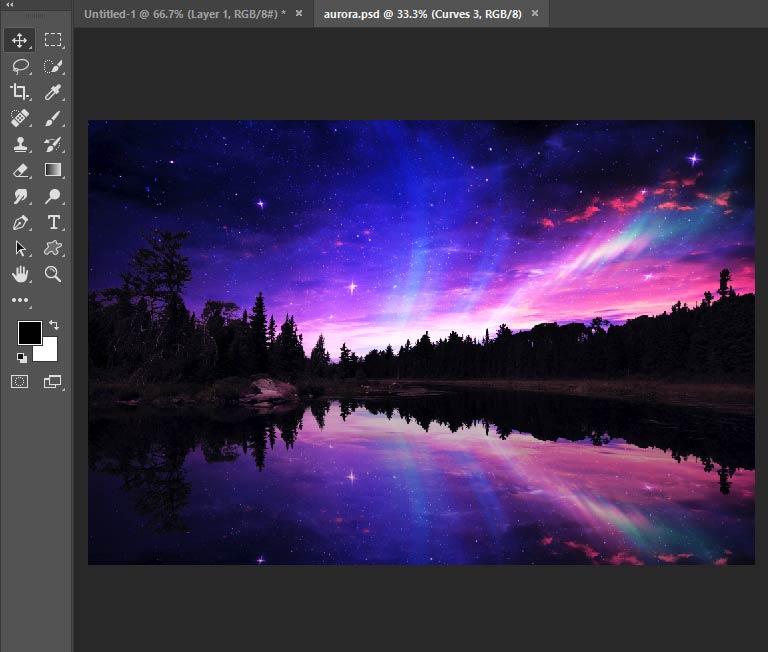
Just like Layers, Tools are the important things in Photoshop. You can find the tools panels on the left side of the screen. You’ll find a ton of tools there and each has a different purpose.
As a beginner you might get confused where should I start. Actually, you don’t need to learn all of them. Initially, I’d recommend learning the most important ones and this will help you faster your process of learning.
Some tools are easy to understand for example the Move Tool (V), Crop Tool (C), Blur Tool but others require a little bit more guidance like for Dodge and Burn Tool (0), Brush Tool (B) and many more. I got you covered once again with some helpful tutorials that will help understand the Tools properly. Obviously, when you gain more experience, you’ll learn with yourself about other tools.
Tutorials to Learn About Photoshop Tools:
Learn Photoshop Step #3: Get Used to Photoshop ToolsClick To Tweet4. Work with Layer Masks
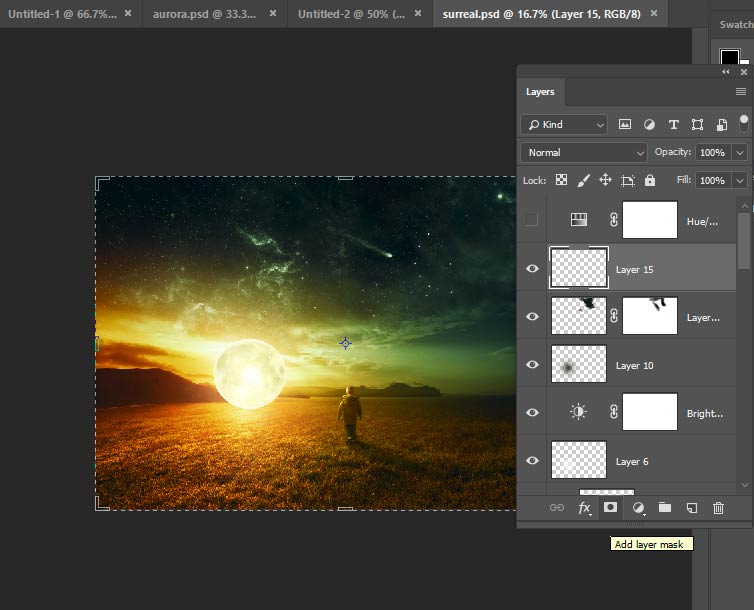
A Layer Mask controls the transparency or the visibility of a layer, either completely or partially. You can add a layer mask by selecting Layer > Layer Mask > Reveal All to any layer.
If you paint on a layer mask with white color then it will reveal the hidden parts of a layer and if you paint on a layer mask with black color then it will hide or mask the parts of a layer.
There are two types of layer mask:
Reveal All or Completely fill With the White color: That means the layer is completely visible and you can paint on the mask with black color if you want to hide any part.
Hide all or Completely fill With the Black color: That means the layer is completely invisible and you can paint on the mask with white color if you want to reveal any part.
So the purpose of a mask is to hide and reveal the layer parts. I already covered the concept of layer mask in my tutorials.
Learn more about Layer Mask:
Learn Photoshop Step #4: Work with Layer MaskClick To Tweet5. Experiment with Blending Modes
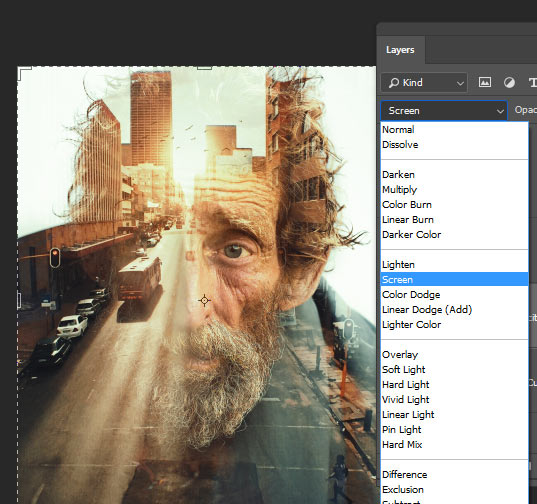
Blending Modes are always experimental and no one can’t predict what results you’ll get from them. Every layer whether it is a simple layer or an adjustment layer has a blend mode. You can blend two images in just one click if you know about the blend modes. They are very powerful and help you ease the process of blending images in just minutes.
Blend modes like Multiply and Darken always have the darken results. Color Dodge, Screen and Linear Dodge has a brighten result. Overlay, Soft Light and Hard light has both brighten and darken effect on the images or layers below.
Blending Modes Tutorials:
Learn Photoshop Step #5: Experiment with Blend ModesClick To Tweet6. Making Selections
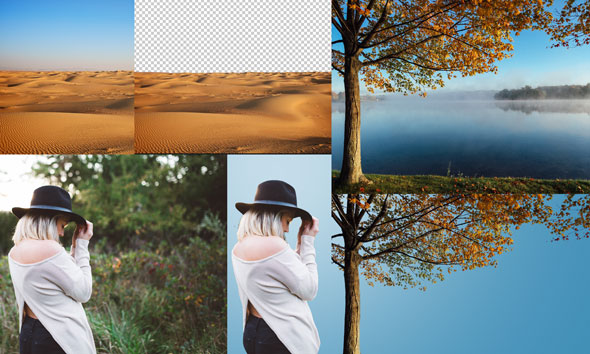
Making Selection is the hardest thing in Photoshop because it depends on the image and on a method to make a selection. There are many ways to make a selection that is why it is hard to choose which method works best for a particular image if you are a beginner. As you learn more about selection you’ll find yourself more confident with them, then you can master the selections.
Recently, Adobe released a new feature called Select Subject in Photoshop 19.1 Version that let you make a selection with one click. As a beginner, it’s like a boon but it won’t works in the background having more complex details.
On the other hand, there are many handy techniques like using Pen Tool (P), Quick Selection Tool (Q) and using Calculation & Channel Techniques to make complex selections is a good way to start with.
Here are some recommended tutorials to master selections:
- Top 3 Selection Techniques in Photoshop
- How to Remove a Background in Photoshop
- How to Use Photoshop Select Subject Feature
- Ultimate Guide for Cutting Stuff Out in Photoshop
- Advanced Hair Masking
7. Use Adjustment Layers
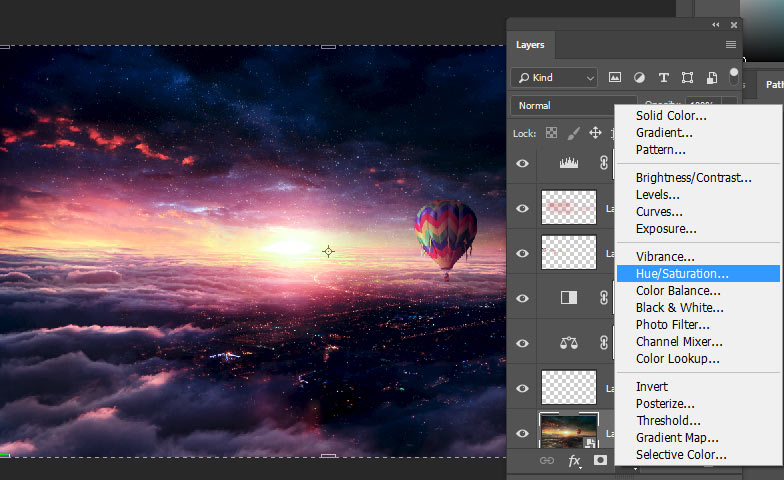
Adjustment Layers are very powerful and they help you set the light, colors, and mood of an image. You can make the color correction on an image, darken an image, brighten an image and you can add creative effect to images with them as well.
To Create an adjustment layer you can either go to Layer > New Adjustment Layers or just click on the third icon at the bottom of the layer panels to create an adjustment layer.
Some Adjustment Layers like Brightness/Contrast, Exposure and Photo Filter and Color Lookup are very easy to understand. Other like Curves, Levels, Color Balance and Selective Color are hard to understand. You can even target the specific tones with adjustments layers that is why they are very useful.
Here are some guides to understand Adjustment Layers:
Learn Photoshop Step #7: Learn How Adjustment Layers WorkClick To Tweet8. Apply Filters
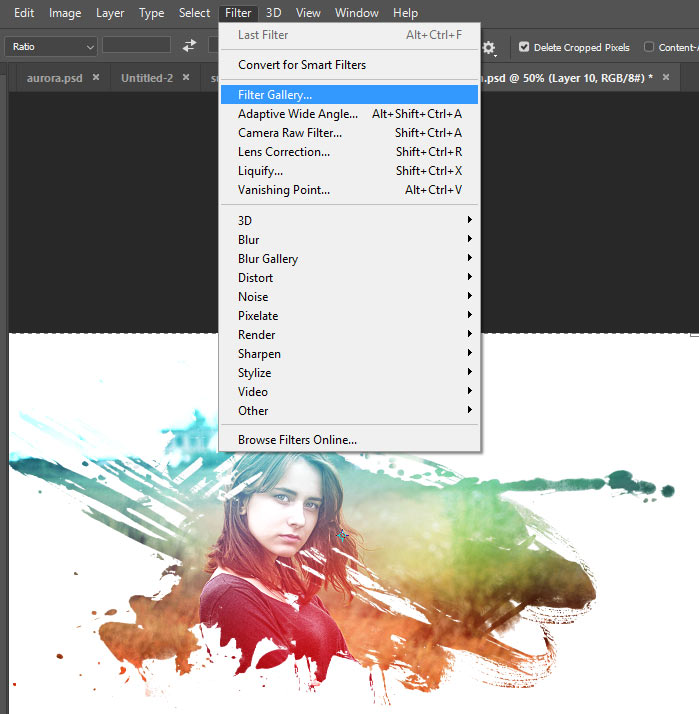
The Filters add different kinds of effect to images. Photoshop has a huge gallery of filters, you can check it out by going to Filter > Filter Gallery and you’ll find many filters there.
They can be used for a simple purpose like blurring the background, sharpening images and on the other hand, they can be also used for retouching images. They are very easy to understand and you can start with filter like Gaussian Blur, Motion Blur, Lens Flare, High Pass and Clouds Filter.
Here are some guides to understand Filters:
Learn Photoshop Step #8: Apply Filters to ImagesClick To Tweet9. Edit Your First Photo
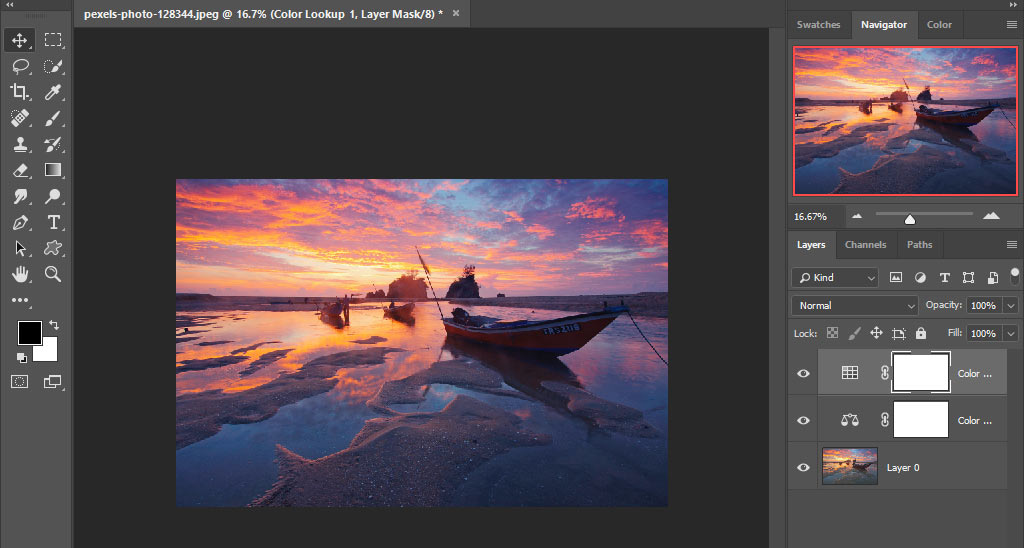
After learning about Photoshop you should have a great knowledge and confidence that you can edit your first photo. Obviously, there is more learn in Photoshop but if you edit a photo you can sum up the things which you’ve learned so far with your experience.
Try to go easy with your first editing, just pick an image and do some sort of color correction, add creative effects, improve lights and colors, or maybe remove the unwanted details which you don’t like.
I’d recommend following a photo effect tutorial. These tuts are really easy to understand and can brush up the things which you’ve learned. Below I am recommending some easy to follow photo effect tuts. If you are feeling more confident then you can also give a try to these Photoshop tutorials. This list is huge and has a variety of tutorials covering different categories like photo manipulation, photo effects, text effects, retouching and basics as well.
Tutorials:
Learn Photoshop Step #9: Edit Your First PhotoClick To TweetOver to You!
So I made this guide to help you learn Photoshop. I know that you won’t be able to master Photoshop in a short time but at least you have the right path to choose from and learn from if you are a beginner. But I guarantee you if you follow the steps outlined above you can master Photoshop in the long run.
It takes time to learn and master Photoshop. I know how it feels when you don’t know what to do or where to start but this guide will really help you. If you really like the infographic then do share it.

Leave a Reply