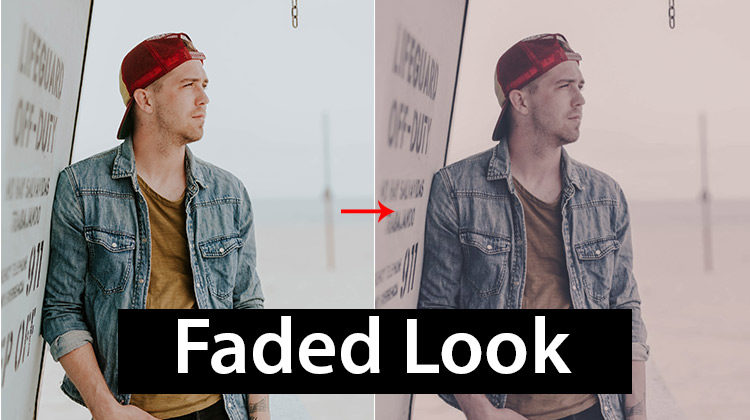
In this tutorial, you’ll learn how you can create Lightroom presets and use those presets on any image so you don’t have to waste time applying the same looks again & again from scratch. I am gonna show you how you can create faded presets, save it for future use, and test it on other images to make sure it is working as it meant to be. You’ll also learn about the best practices while creating your presets that you are proud of.
What Are Lightroom Presets?
Lightroom presets are the saved adjustments that you’ve made to an image in the Lightroom’s Develop Tab. Presets help a lot in post-processing as they serve a great starting point, to begin with, and allow us to achieve a consistent look across multiple images. You can save all the adjustments in a preset such as exposure, temp, contrast, split toning, tonal adjustments, curves, and many more.
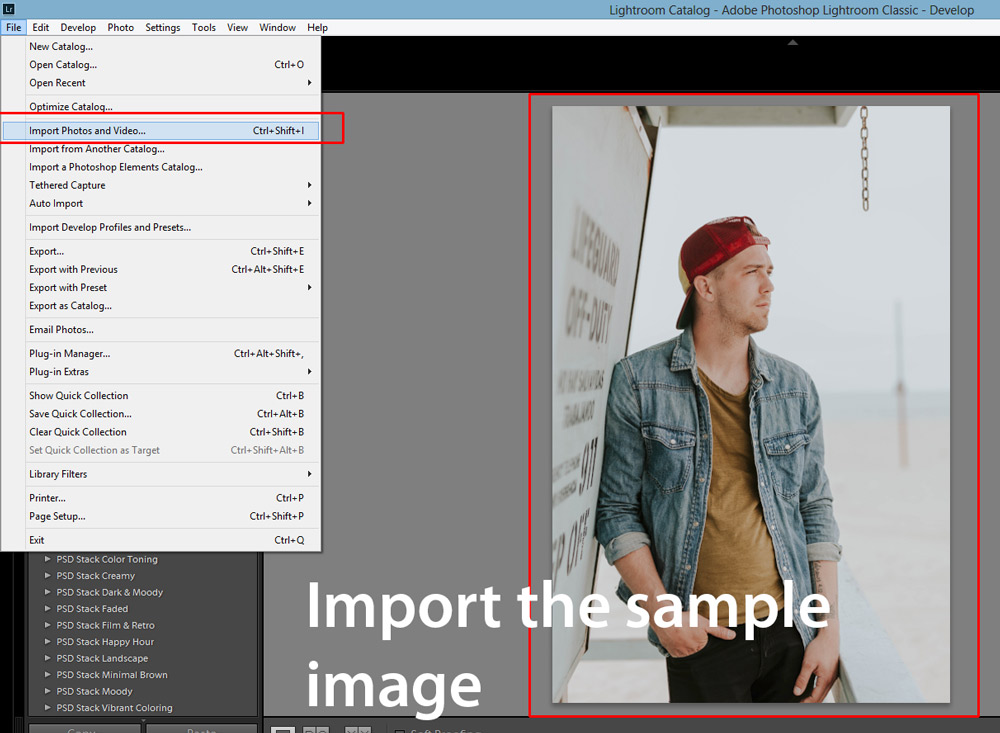
Step 1 – Import The Sample Image
First, import an image in Lightroom. To import the sample image, which you can download from Unsplash, go to File > > Import Photos And Videos, select the sample image, and then import the image in Lightroom Classic.
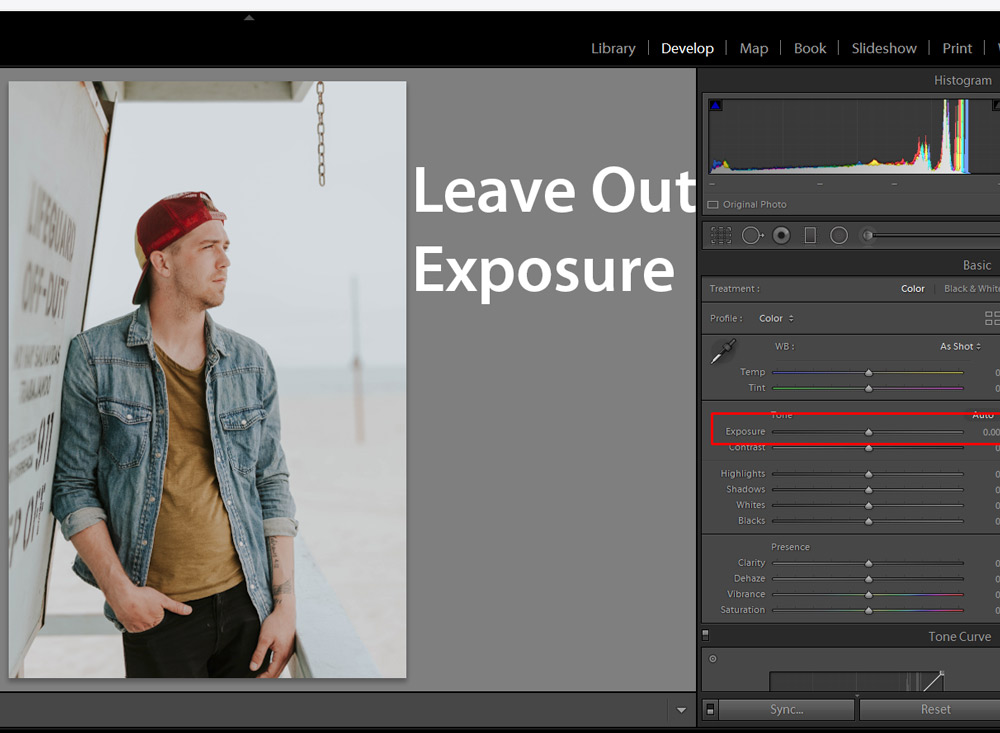
Step 2 – Leave Out Exposure
Usually, when I create free lightroom presets or premium I tend to leave out exposure because every image is different. Images can be overexposed or underexposed, let’s say that you are working on an underexposed image, and you have increased the exposure to fix the underexposed photo and saved your presets with increased exposure adjustments. But if you used that preset on an overexposed image it will blow out the highlights because you have increased exposure settings saved in the presets.
That’s why I don’t touch the exposure slider, it totally depends on images whether there is a need to increase/decrease exposure. If you buy a preset pack from us, you’ll see I don’t use exposure slider at all.
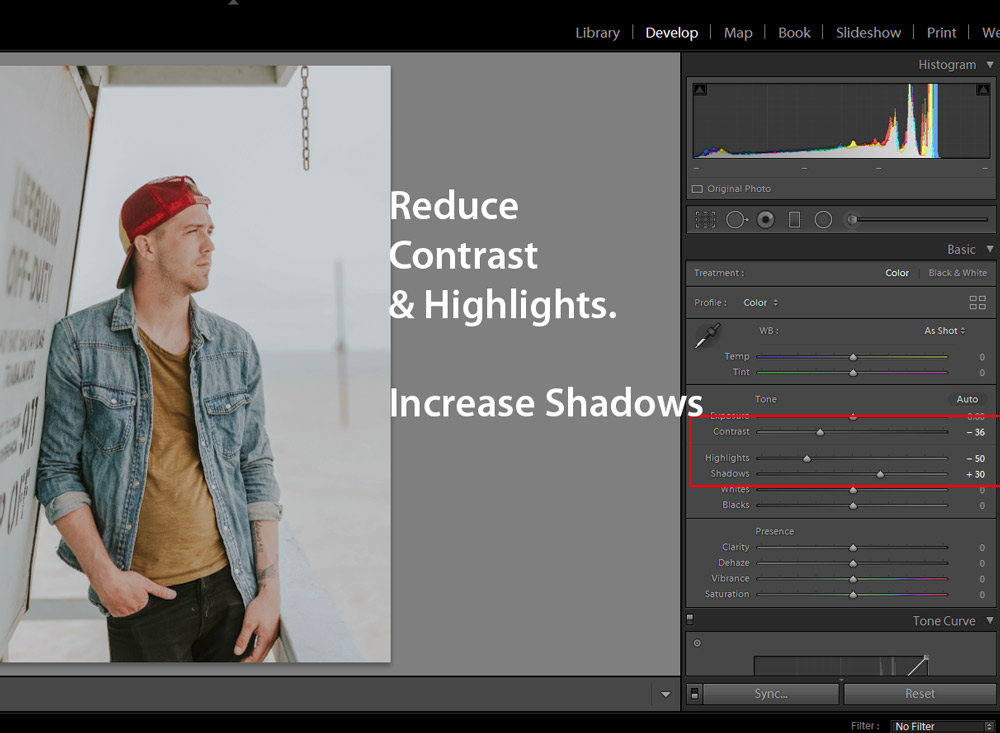
Step 3 – Start Making Basic Adjustments
Here you can decide the basic adjustments for your presets and it depends on what type of look you are trying to achieve. For example, I want to create a faded effect and in faded effect, you know that it kinda cut down shine in images and adds a soft look on shadows.
To keep that in my image, I decreased contrast to add a soft look to the image and decreased the Highlights as well to dial down the highlights. Next, I cranked up the shadows to add brightness to the shadows.
Step 4 – Protect Skin Tones
Whenever you create presets always try to protect skin tones. I want colors in the image to be muted but I don’t want to affect skin tones much. I used the Vibrance adjustment to mute all the colors except skin tones. It won’t affect skin tones much whereas Saturation will mute all the colors including skin color tones.
Try to use Vibrance as much as possible:

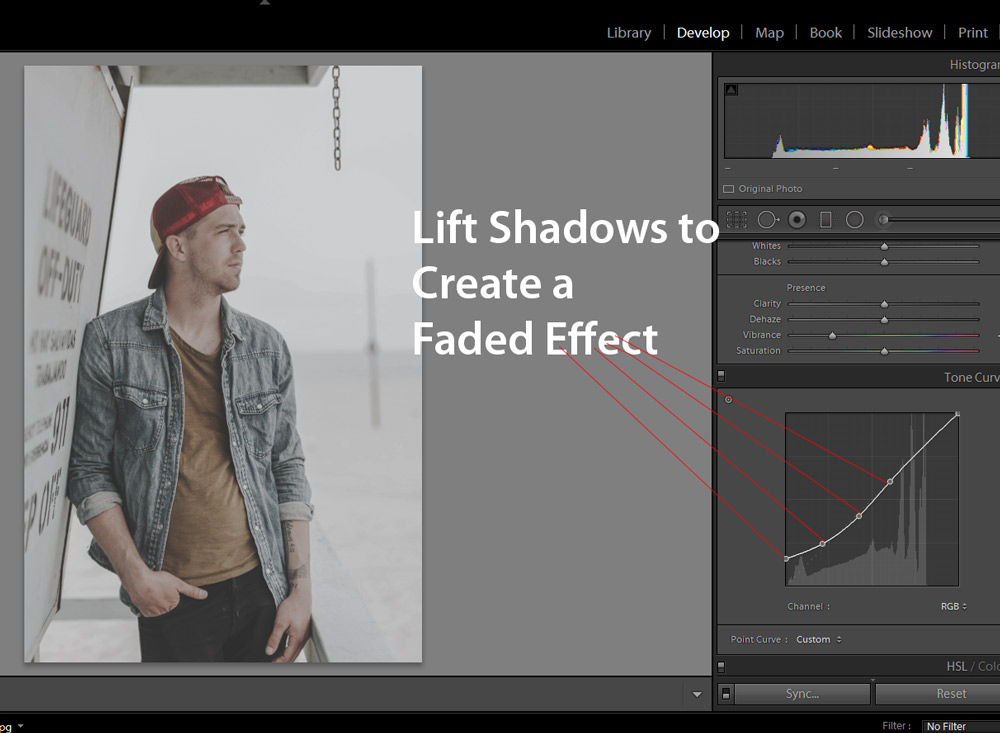
Step 5 – Adjust The Tone Curve
Next, we have the Tone Curve which is one of the best adjustments for applying literally any adjustment. I have a full detailed tutorial on the Tonal Curve which might worth reading if you want to learn more about it.
Since I am creating a faded effect, I lifted the shadows up to create a faded effect. You can see the settings below.
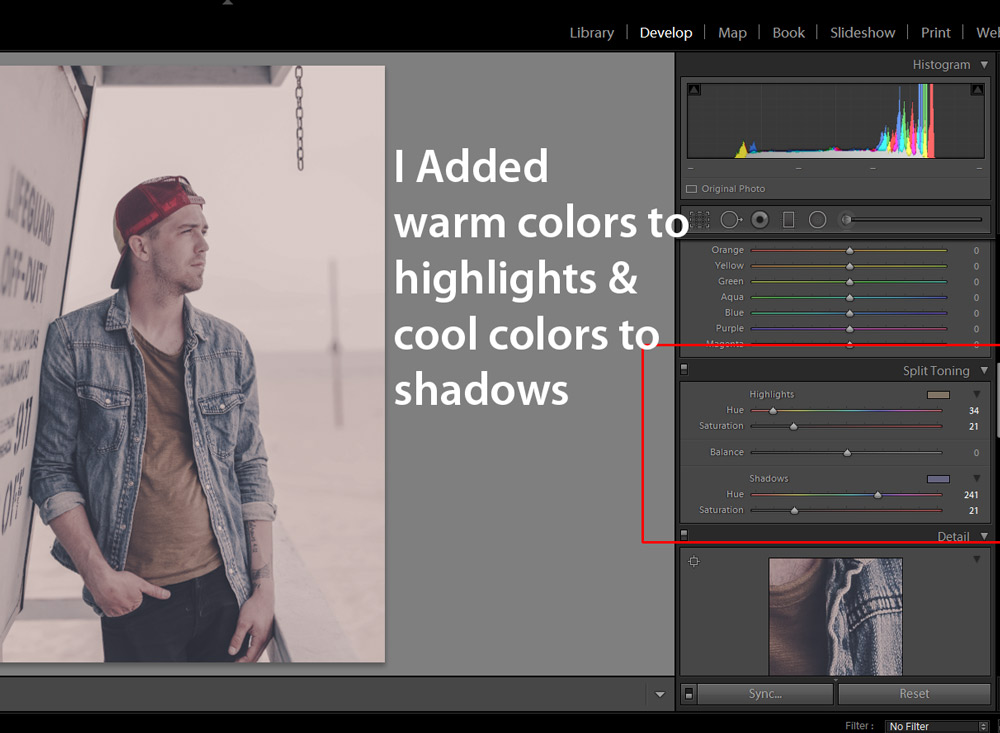
Step 6 – Split Toning
Split Toning as the name suggests is a great way to add colors to Highlights and Shadows. Make sure you always add warm color to highlights (to protect skin tones)unless you know what you are doing because highlights affect skin tones. You don’t want vibrant greens & blues on people’s skin tones. Feel free to use any color for shadows because you don’t need to worry about shadows to protect skin tones.
See the settings below:
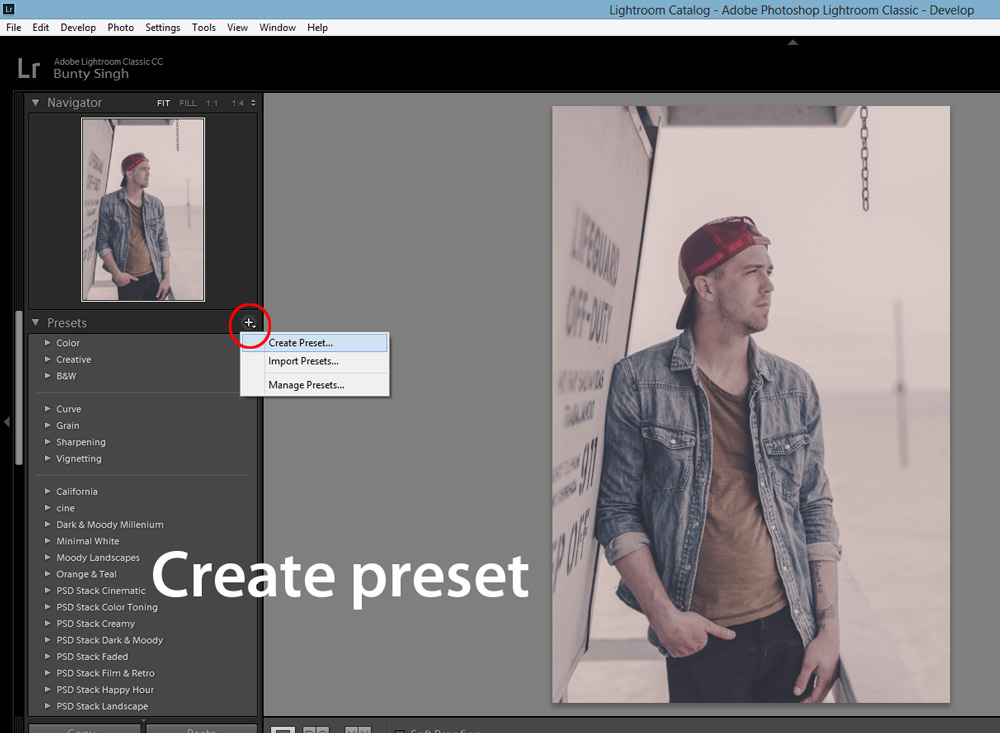
Step 7 – Create Your Presets
Once you are happy with the look that you achieved, you can save it as a preset. To do this, head over to the left of the screen, click on the (+) Icon & then select Create Preset on the Presets Tab to create your very first preset.
You can create a new group for your presets in the group section. Give the group a relevant name such as “PSD Stack FADE”.

Name your presets and make sure to give a descriptive title to the preset such as “Faded Warm & Cool”.
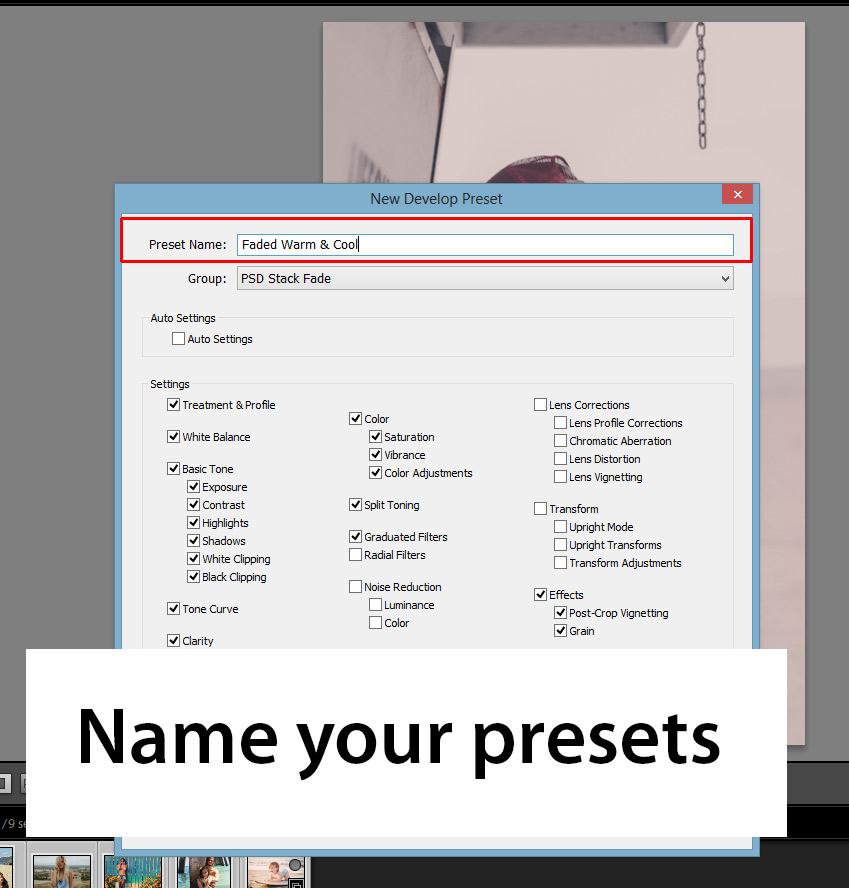
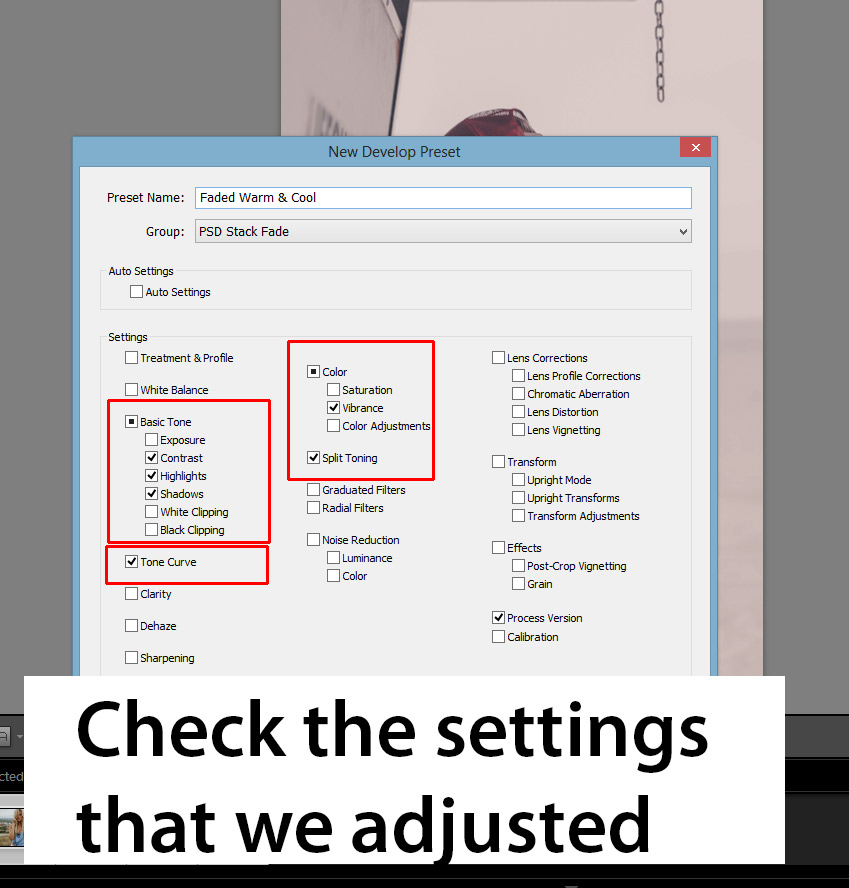
Step 8 – Check The Settings You Want In Presets
Just below the preset naming, you’ll find a section called Settings. You can check the settings that you’ve adjusted such as contrast, highlights, shadows, vibrance, tonal curve, and split toning. Only the checked settings will be included in the present instead of all the settings.
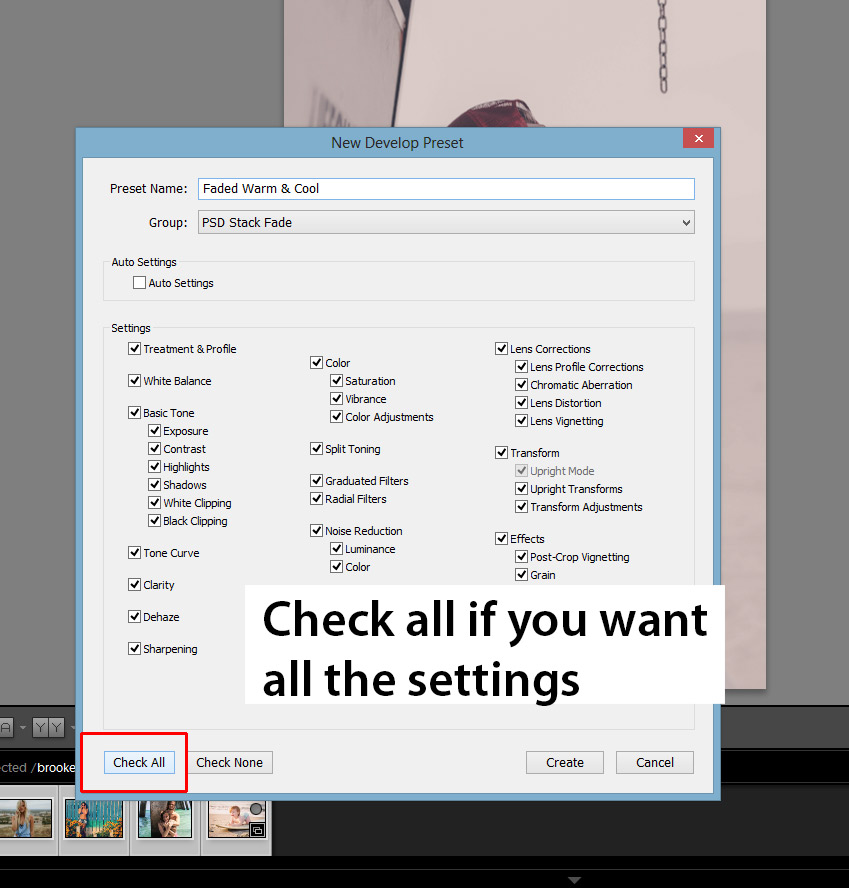
If you are like “oh, I don’t know which settings I have used & I want all the settings”, then just hit the Check All Button this will add all the settings to your presets even those that you have not adjusted.
Step 9 – Find Your Presets
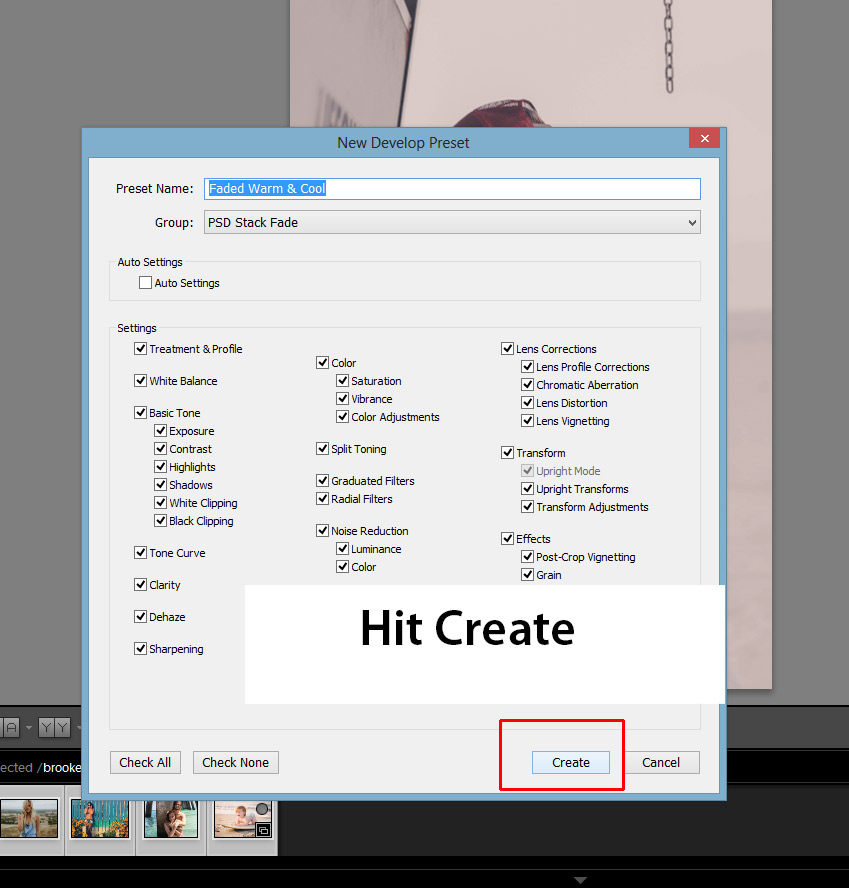
Once you have checked the settings that you want in your presets, Hit Create Button to create your lightroom presets.
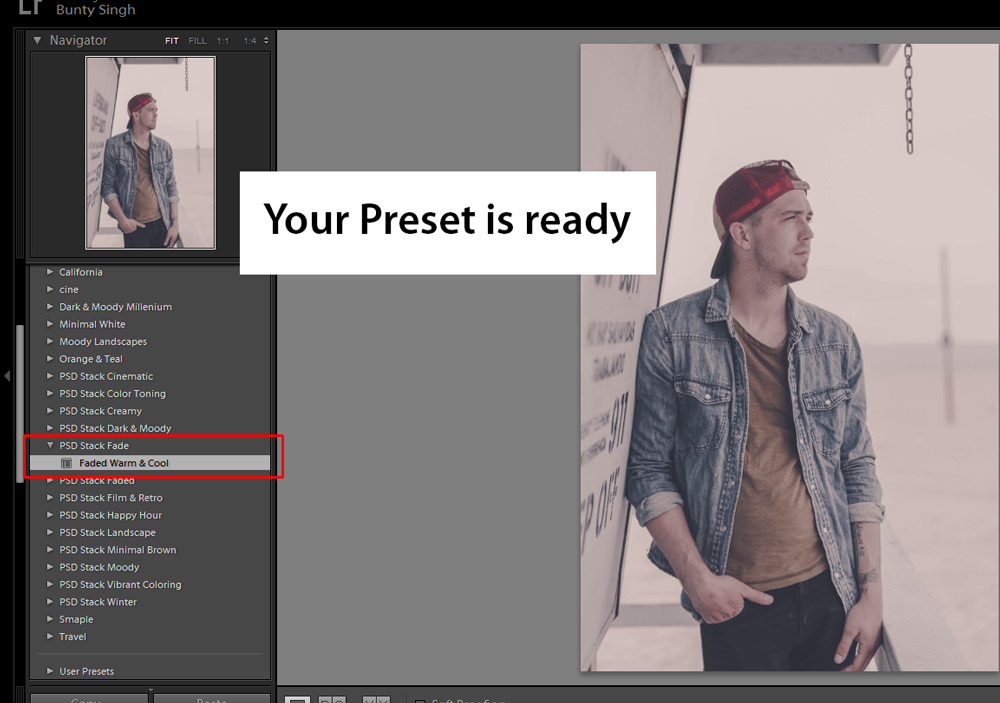
Under the Presets Tab you can easily find your presets just look for the group name and you’ll see your presets right under the group:
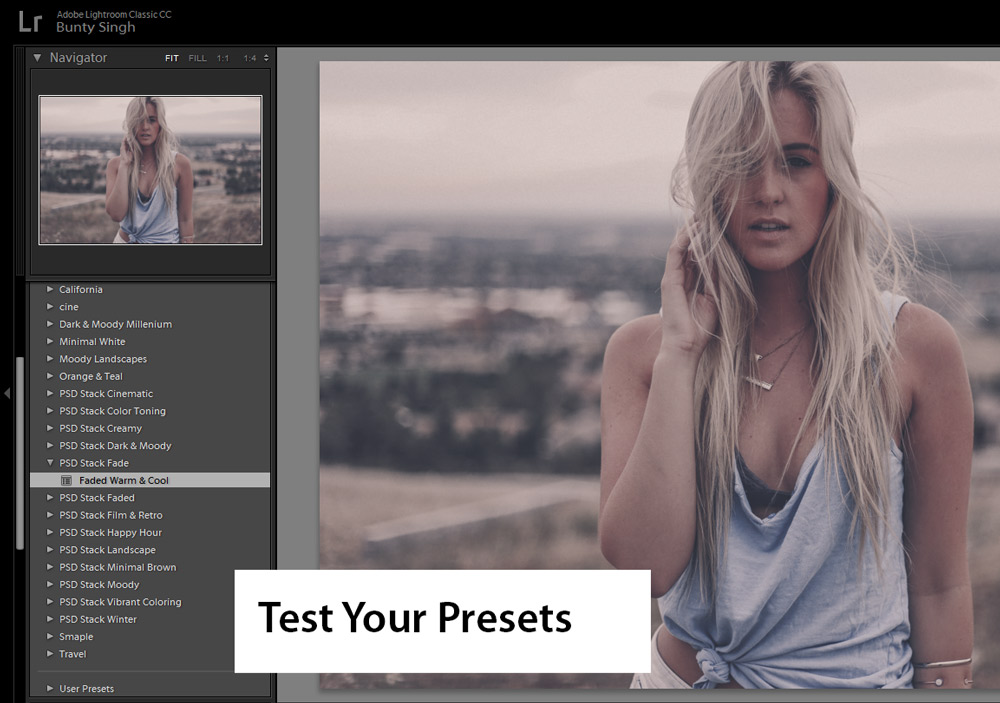
Step 10 – Test Your Presets
Now open other images, test the preset on any image to check it how it is working with other images.
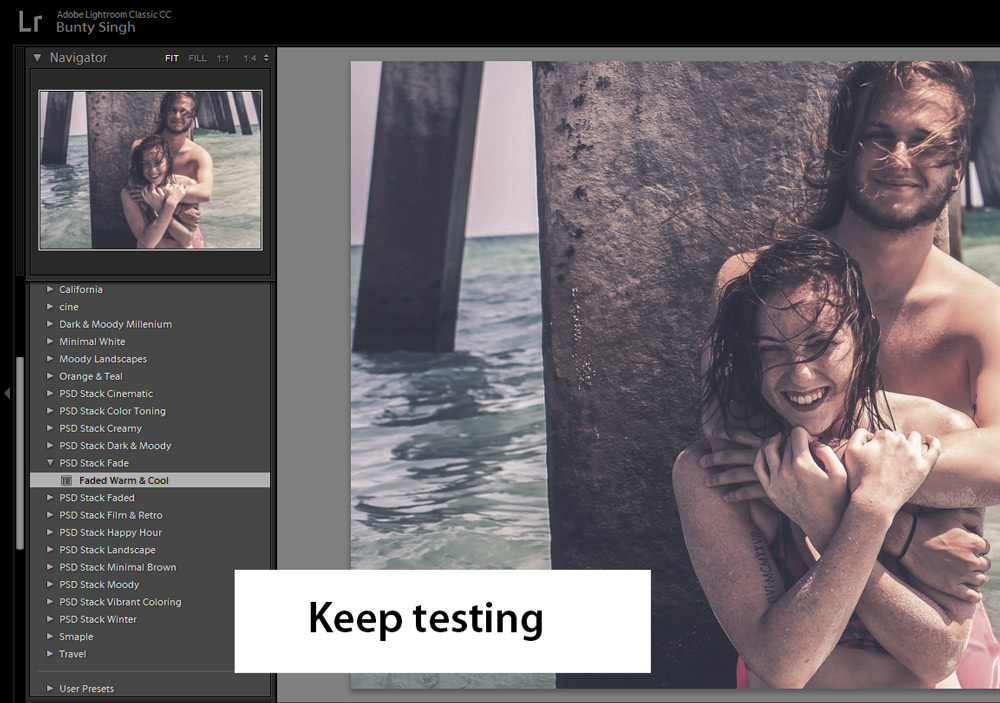
Keep testing until you are satisfied with the results:
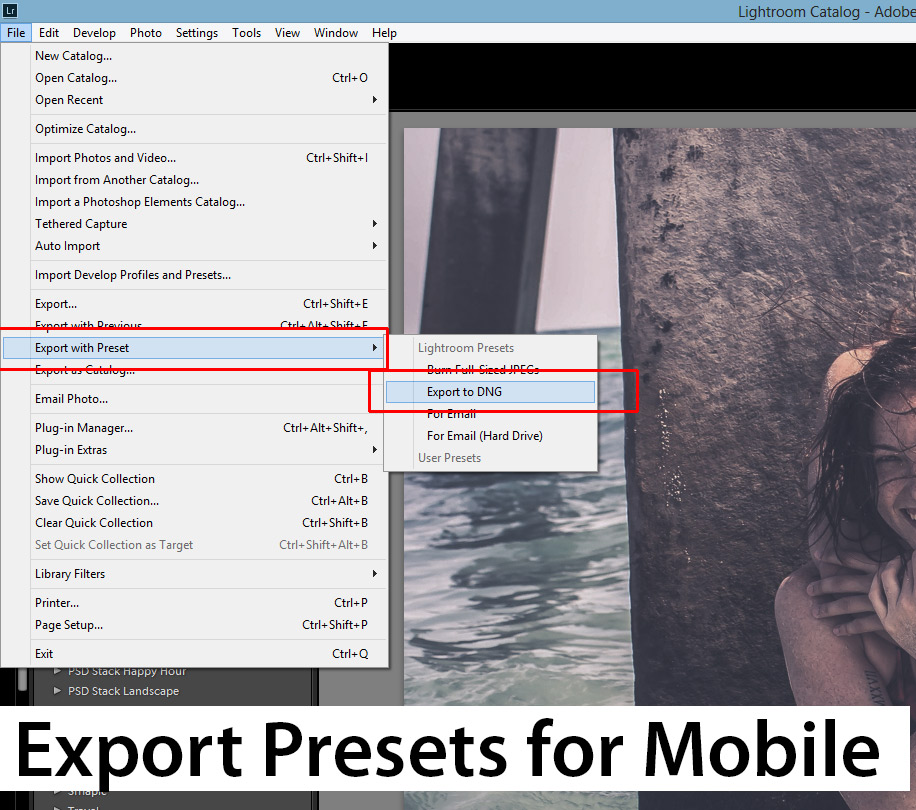
Step 11 – Export Presets for Mobile/Desktop
You can export presets for mobile and desktop version of Lightroom. To export your presets as Lightroom Mobile Presets, apply the preset first then go to File > Export With Preset > Export To DNG.
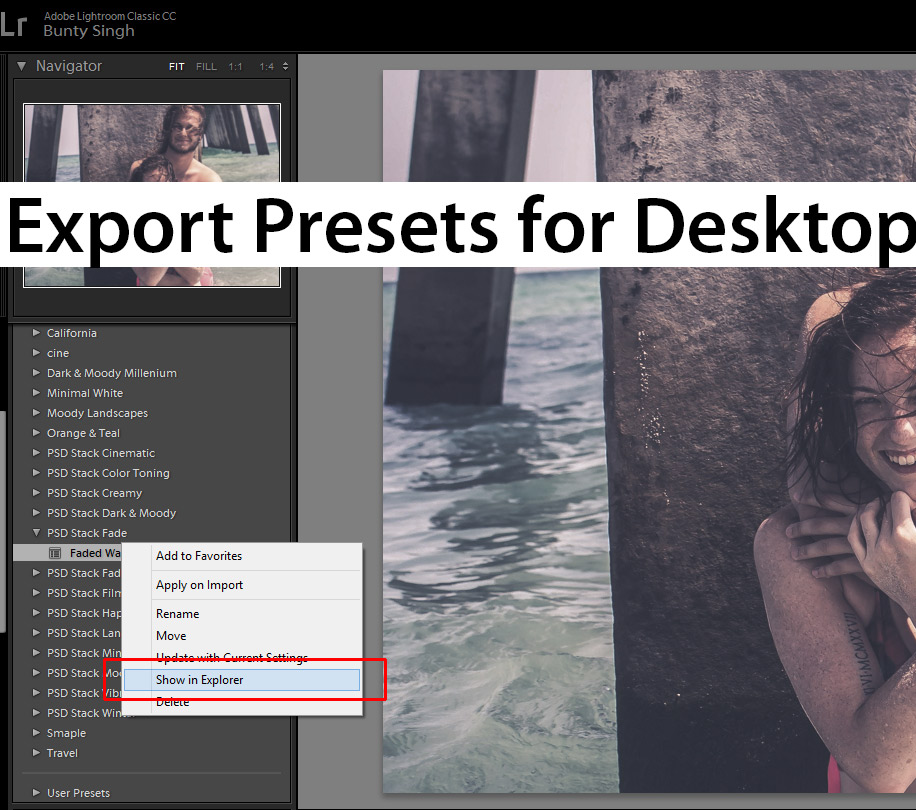
To export presets for Lightroom Desktop, you can right-click on the preset and choose Show in Explorer. In the latest version of Lightroom Classic, there is another option to export presets that is “click on the preset that you’d like to export” and choose “Export The Group”. Lightroom will export the presets group to your pc.
I hope you enjoyed the tutorial and learned something new today. If you have any feedback feel free to comment below in the comment section.
Leave a Reply