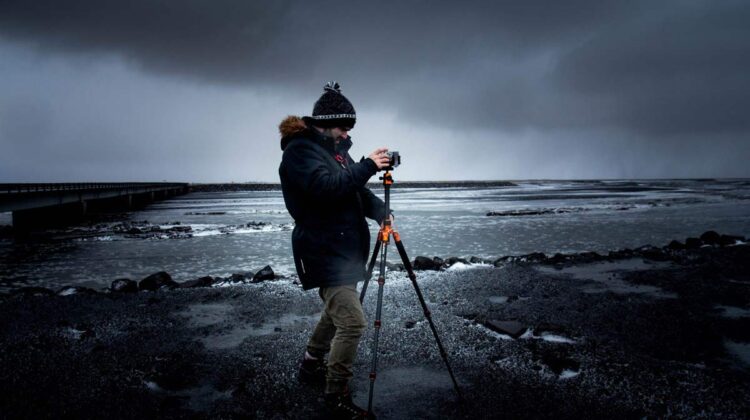
Shooting in manual mode is no easy task. It’s really difficult to use manual mode when you have been sticking with Auto Mode for a long period of time. The worst part, you gotta deal with Aperture, Shutter Speed and ISO manually to capture photos. But if you are not using the Manual mode, you may be leaving a lot on the table. In order to use your camera to its full potential, you gotta learn about Aperture, Shutter Speed & ISO.
In this article, you will learn how to understand how the main three settings interact with each other to make a proper exposure. These are known as shutter speed, aperture, and ISO. Each of these metaphorical levers affects how much light is needed to create a perfect exposure. If you push one lever forward, you will need to pull another to maintain the exposure equilibrium. Every situation will require a different combination of these three settings to get the look you’re going for. With a little practice, you will be able to understand how to make those decisions in a snap.
Shutter Speed
Shutter speed is the measure of how long the sensor receives light in a single image. Most digital cameras can shoot between 1/8000 of a second and 30 seconds using a physical mechanism, which consists of two thin metal curtains that slide across the camera sensor, much like a barn door. The smaller the space between the curtains, the faster the shutter speed will be.
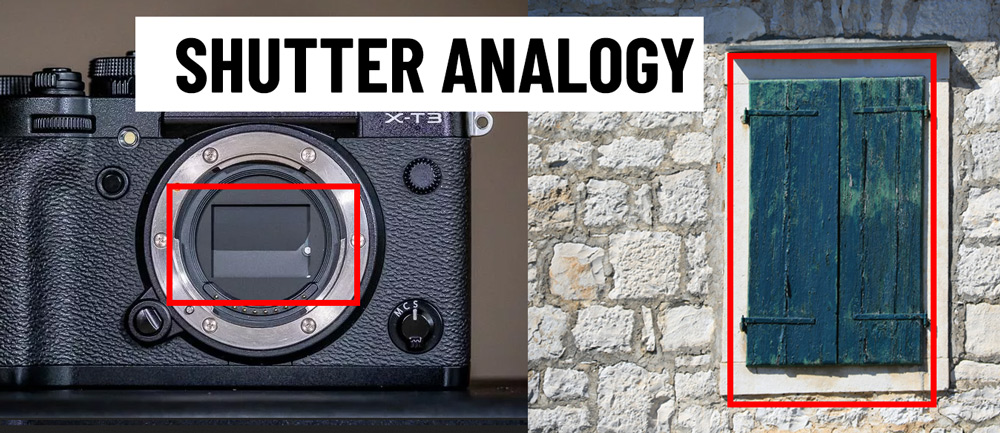
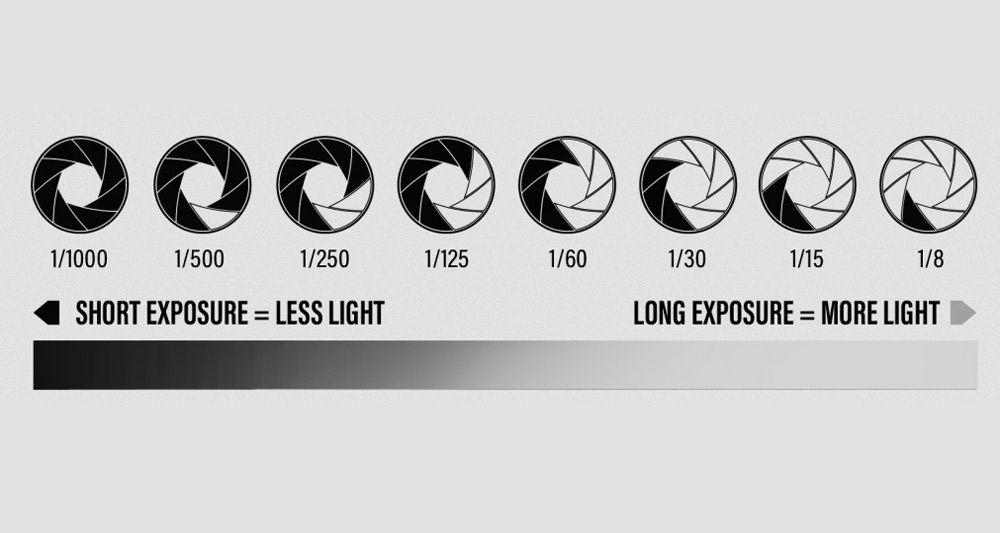
Using a slow shutter speed, like 1/30th of a second, will capture more light, because the shutter stays open longer. This creates a 64x brighter image than a fast shutter speed like 1/2000th of a second, which is open for such a brief amount of time that very little light is able to pass through. Any motion that happens during that fraction of a second will be blurry in the image. If you’re holding the camera instead of using a tripod, a slow shutter speed can create a blurry image because it’s impossible to hold a camera perfectly still in your hands.
How Shutter Speed Affects The Exposure?
Shutter speed affects the exposure in two ways: With a fast shutter speed let’s say 1/8000, camera shutters opens very quickly allowing less light into the camera that can lead to a dark photo. With a slow shutter speeds, it opens for a long period of time allowing a lot of light or enough light into the camera resulting in a bright photo.
How Shutter Speed Affects Motion Blur?
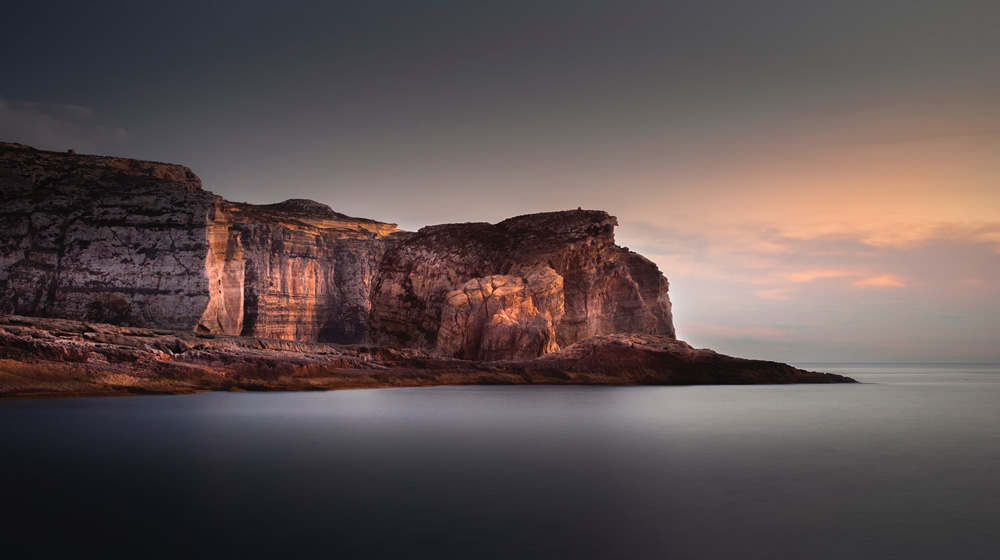
With Shutter speed, you can freeze an action or create dramatic effects such silky smooth water, star trails, or long exposure photography and so on….
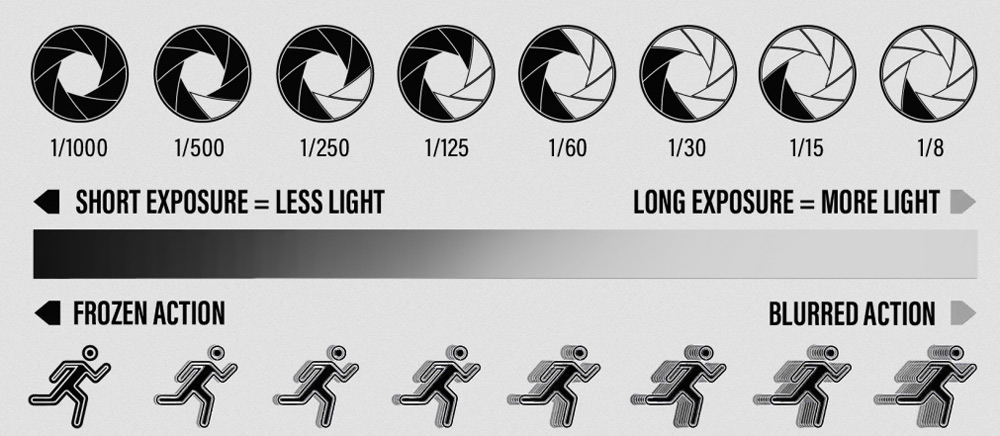
With a faster shutter speed, you can freeze the action of your subject. If you want to capture a bird in flight, use a faster shutter speed let’s say 1/2000 sec. This will allow the camera to capture any fast movement as the camera shutter shuts down very quickly thus resulting in a tack sharp photos.
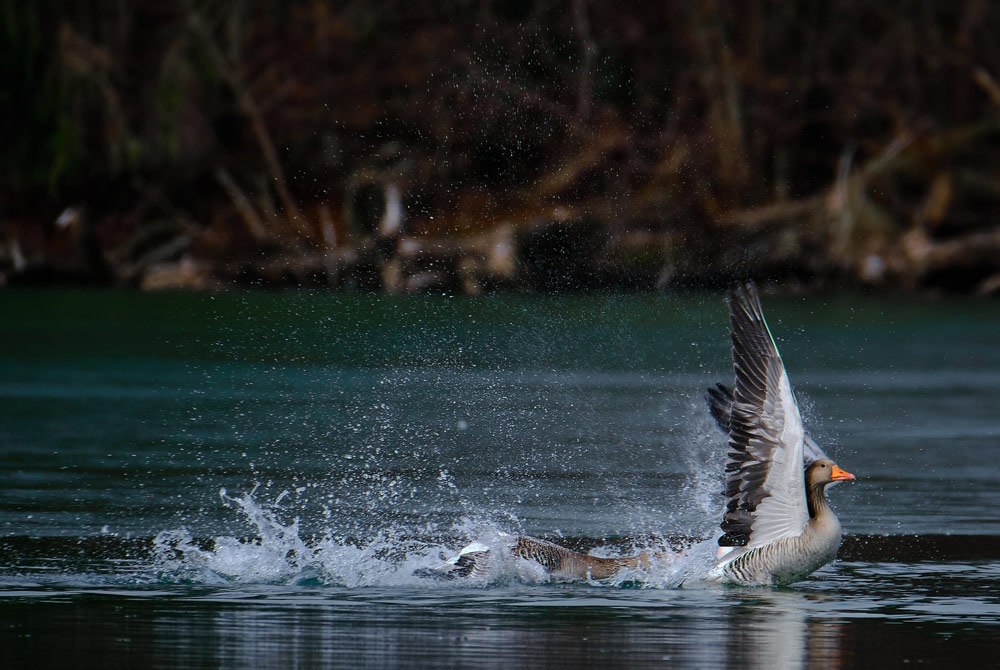
To create dramatic blur effects, you can use slower shutter speeds. For example if you want to blur the water, use a slower shutter speed.
Aperture
In a camera, the aperture is an opening that allows light to pass through before it hits the sensor. It spirals open and closed to let in more or less light. It can be counter-intuitive when you’re learning, but the smaller the aperture number, the wider open the aperture is.
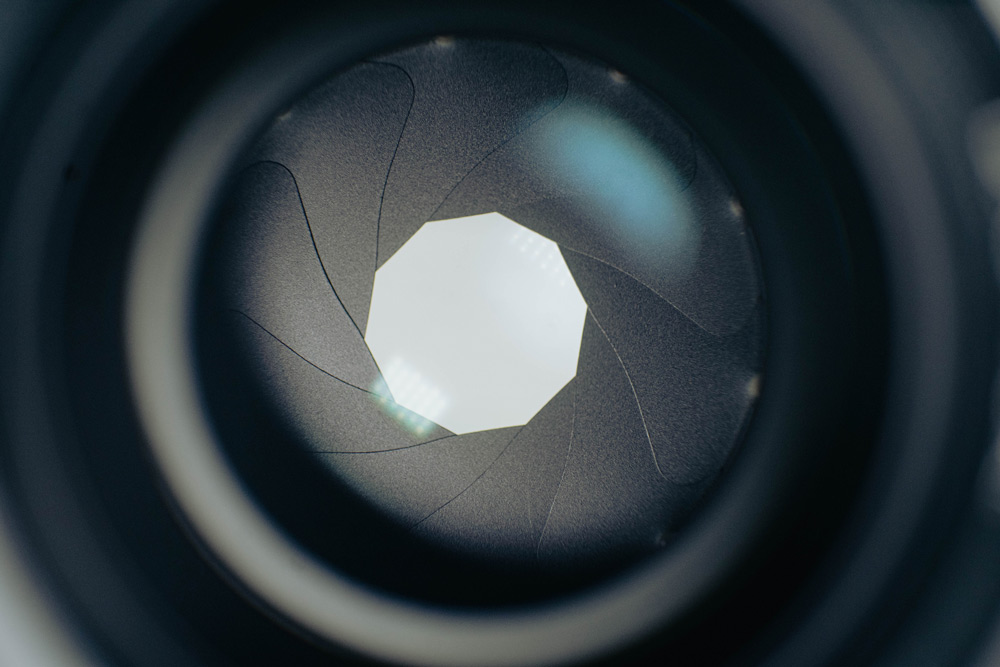
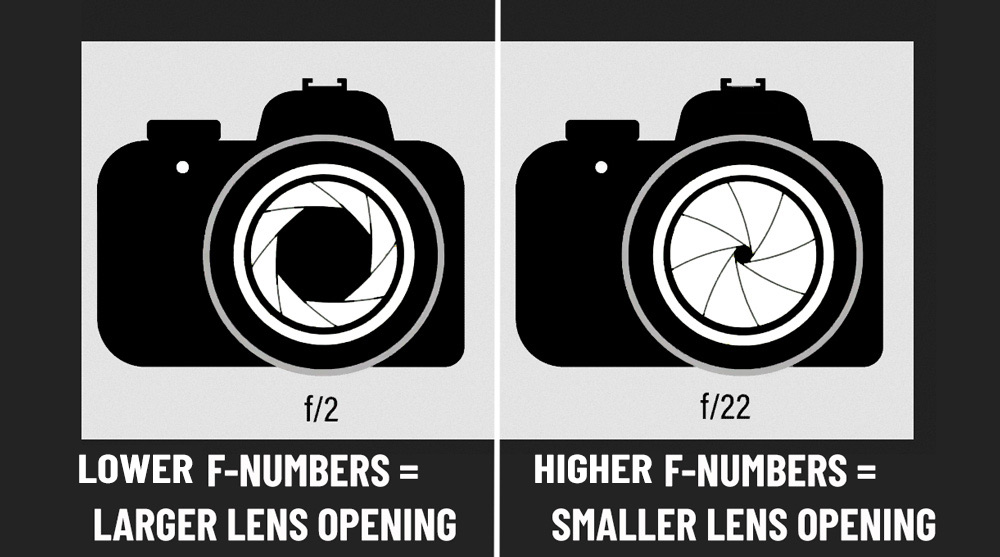
This means that a f/1.4 is letting in significantly more light than an f/16. The f/1.4 is wide open while the f/16 has been spiralled down to a small pinprick and the f/1.4 has a smaller “in focus” area than the f/16. Landscape, macro, portrait, and product photographers like to use a small aperture (small hole) to get more of the image in focus.
For portrait artists, using a large aperture (small f/#, like f/4 or f/1.8) allows them to blur the background so that all of the focus is on the subject of the image. Landscape photographers like to use small apertures like f/8 or f/16 to get everything in focus from the front to the back of an image
How Aperture Affects The Exposure
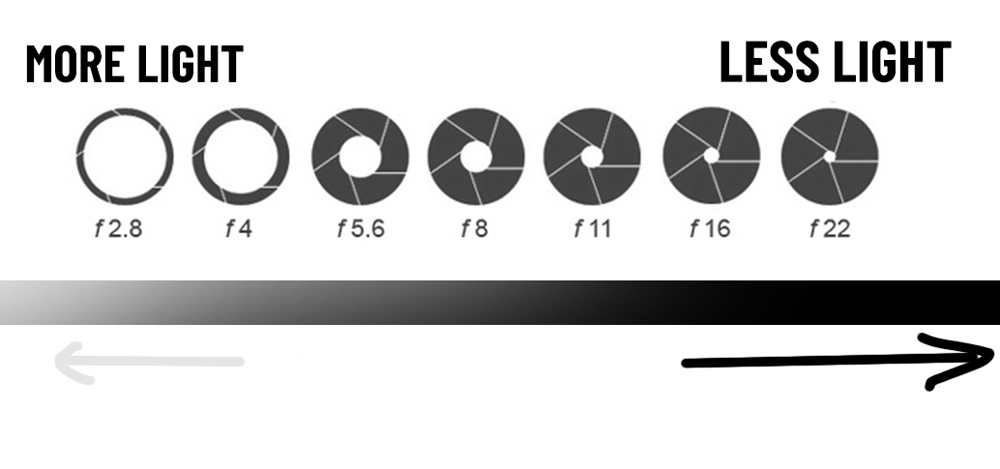
A smaller aperture number such as f/2 will lead to more light into the camera results in bright images as we have high exposure. On the other hand, the higher the aperture number, the darker the image will be because higher f-stops number allow less light into the camera.
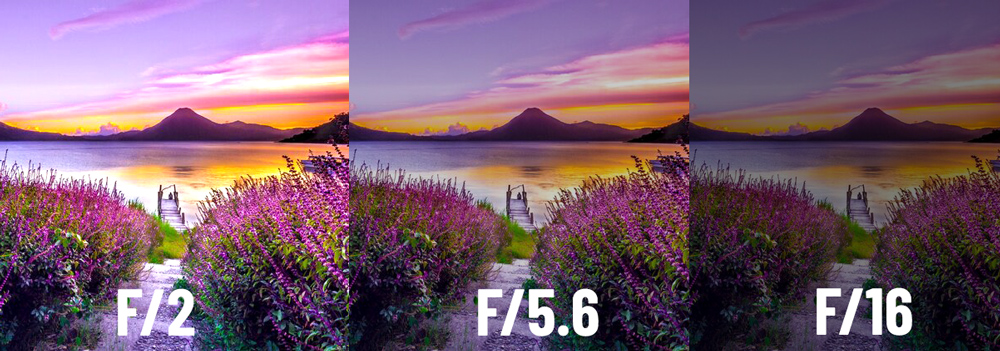
How Aperture Affects Depth of Field
Aperture also affects depth of field. In easy words, how much background there will be in a photo can be affected by the Aperture. Depth of field refers to the amount of the image in focus.
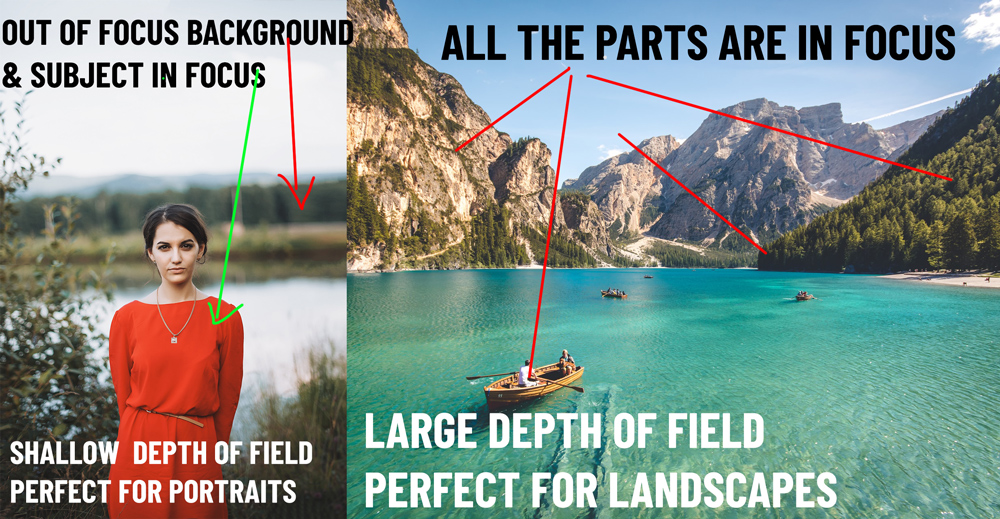
There are two type of depth of field.
- Shallow Depth Of Field: A shallow depth of field means only a part of the image will be in focus. This is great for portraits, or anything that requires subject in sharp focus.
- Larger Depth of Field: A large depth of field mean that the entire image will be in focus. This works best for landscape photography where you want every element in focus.
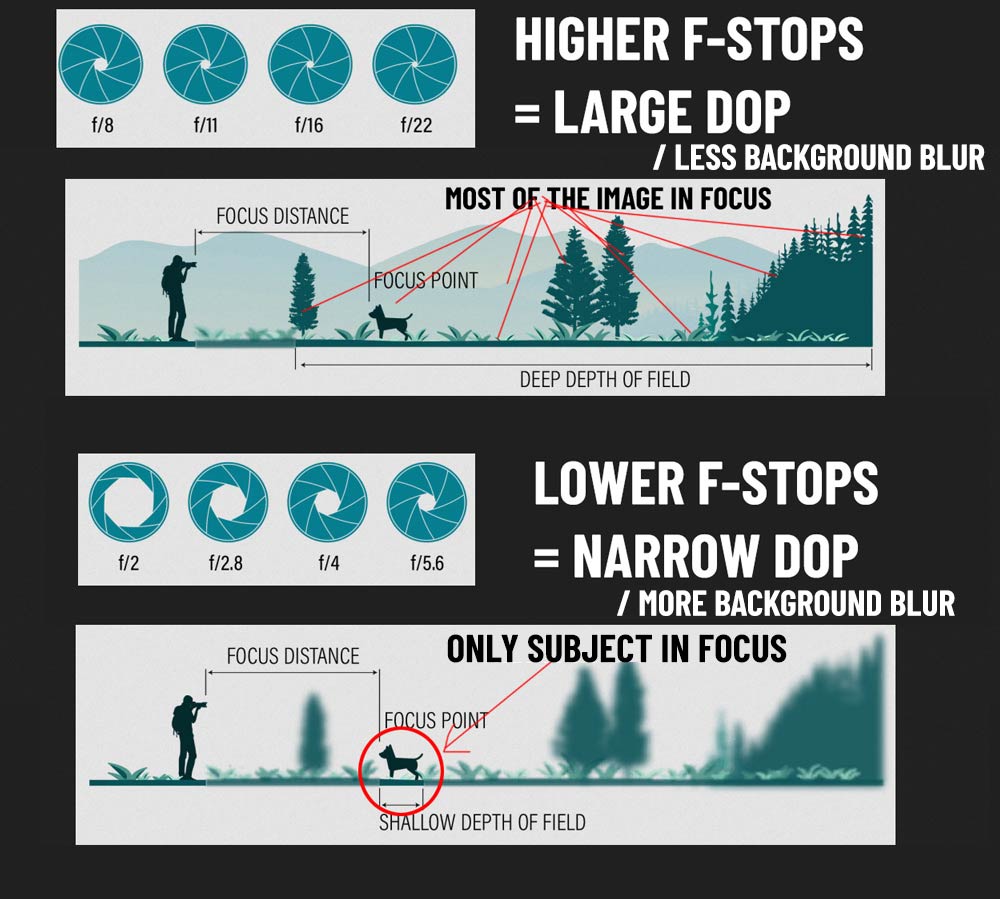
A lower f-stop number means Narrow depth of field whereas a higher f-stops number mean a large depth of field. A smaller f-stop number such as f/2.8 is great for producing background blur and keeping the subject in sharp focus. Whereas a higher f-stops such as f/8 or f/11 works charmingly to capture tack sharp landscapes.
ISO
ISO is the measure of the camera’s sensor’s sensitivity to light. ISO stands for International Standards Organization. At a higher ISO number, like ISO 6400, the camera will not have enough light to perfectly expose an image, so it will have to interpret, and boost the signals it receives to produce a properly exposed image.
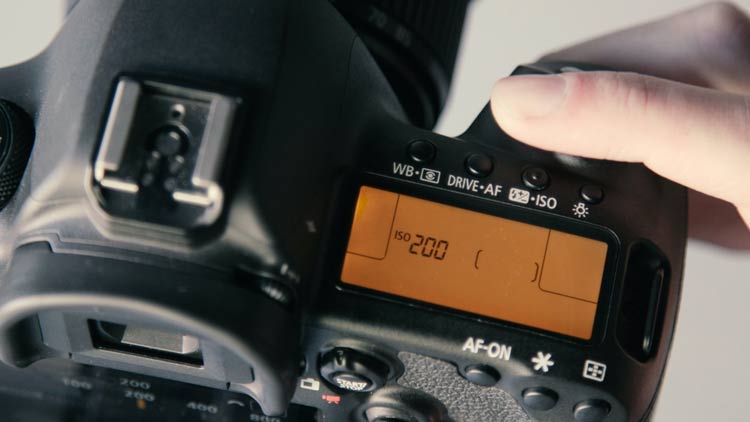
While sensors are getting better at interpreting an image with low light, there will always be uncorrectable artifacts that are created by using a high ISO value. Think of it like the gain knob on an electric guitar amp. When a musician turns up the gain, the guitar will sound deep and muddy, like Muddy Waters, The Rolling Stones, or The Who. But if you keep the gain low, the guitar will sound cleaner, almost like an acoustic guitar.
ISO works in the exact same way. Turn up the ISO, and you’ll make a gritty, noisy, less detailed image with colored specs throughout. Keep that ISO down, and you’ll produce a clean, sharp image with the fullest dynamic range possible.
ISO Values
Understanding when to use a high ISO or a Low ISO can help you capture great photos in a broad daylight or in dimly environment. You can use a low ISO value when you have good light conditions whereas a High ISO value is preferred where the light conditions are very low.
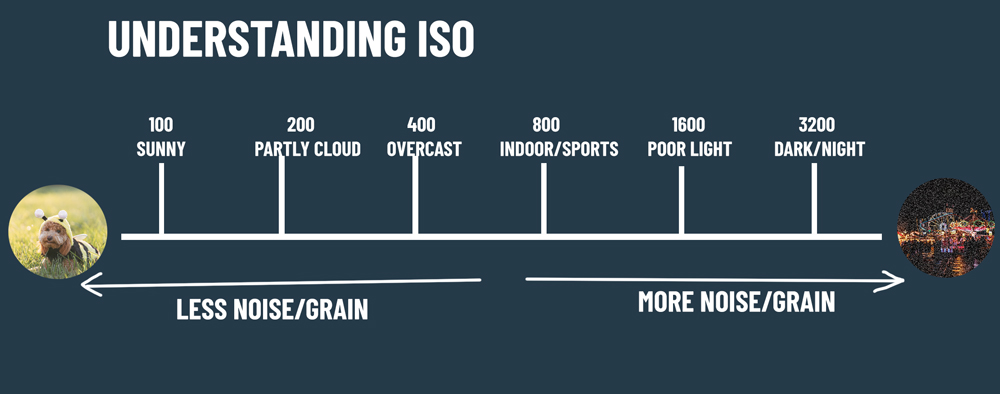
ISO can be used to unlock fast shutter speed and smaller aperture size. When you want to capture a fast moving subjects in low light conditions (you have to use a faster shutter speed), you can increase the ISO, that will allow more light into the camera, to capture the subject. Similarly, you can unlock a smaller aperture size by increasing the ISO when your camera is limited to a large aperture size due to light conditions.
A high ISO can result in grainy photos so make sure to use it when the light conditions are low. Some cameras can create almost perfect images even at ISO 3200, where others will start to become overly grainy at ISO 800. The only way to know for sure is to test your camera in different situations. For example, noise will be more distracting in the shadows than it will be in the highlights.
I hope this article helped you understand ISO, Aperture, & Shutter Speed. Do comment below if you have questions.

Leave a Reply