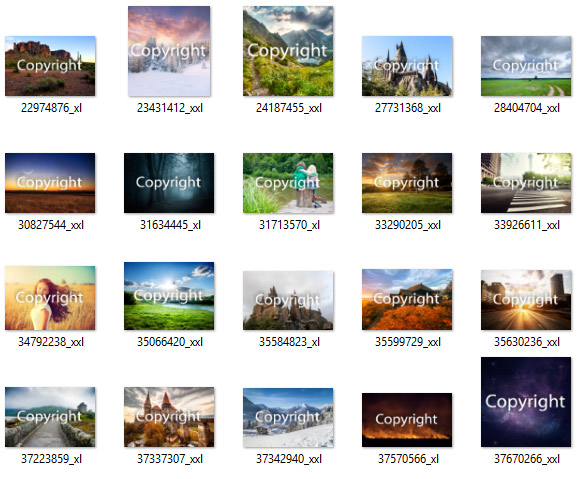
In this tutorial, I’ll be covering some steps in Lightroom to show you that how you can watermark, resize and optimize multiple images at once. This tutorial will save you a lot of time when it comes to handling multiple images which is not easy to do in Photoshop. So, we’ll use Lightroom for this purpose which is super easy to use.
Step 1 – Open the Lightroom
For this tutorial, I assume you’ve installed either Lightroom CC or Lightroom Classic in your PC. I am using Lightroom Classic for this tutorial as Lightroom CC requires at least Window 10 and I am using Window 8.
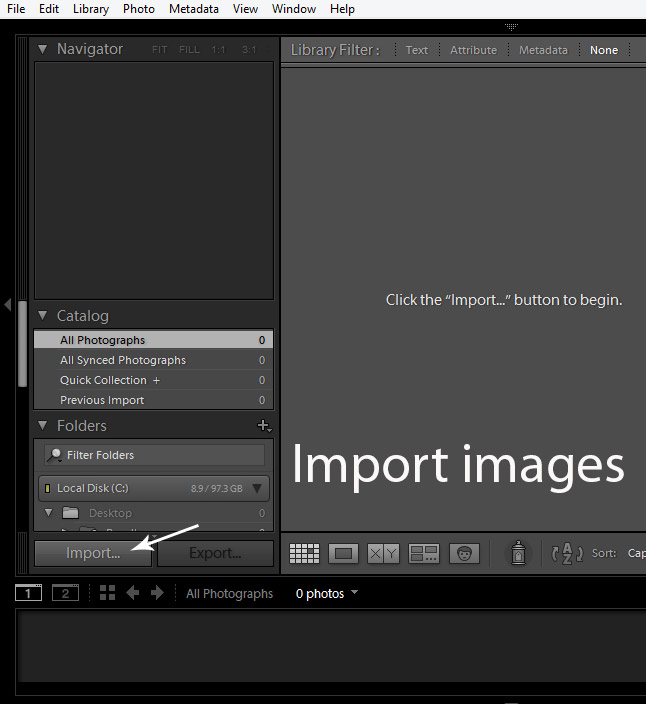
Open up the Lightroom Classic and then on the left side you can see the Import button. Just click on it to Import your images.
Step 2 – Import Images
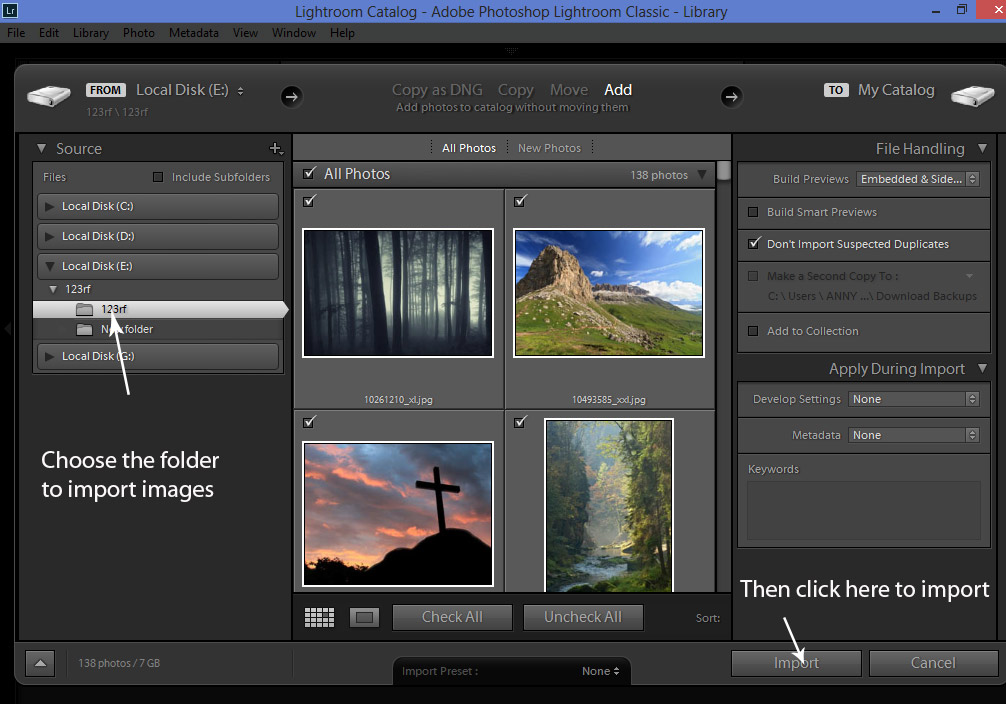
Once you click on the Import button, in the left you can see the sources to import your images. So you need to choose the folder in which you have got the images for watermarking, resizing etc. Just choose the folder so the Lightroom can import your images.
You can see I’ve chosen the folder called 123rf, once you click on the source folder, Lightroom by default check all the images to import. But you can also choose the which images you’d like to open in Lightroom by manually checking on them.
Once you selected the images to import, on the right-hand side click on the import button to load images in Lightroom.
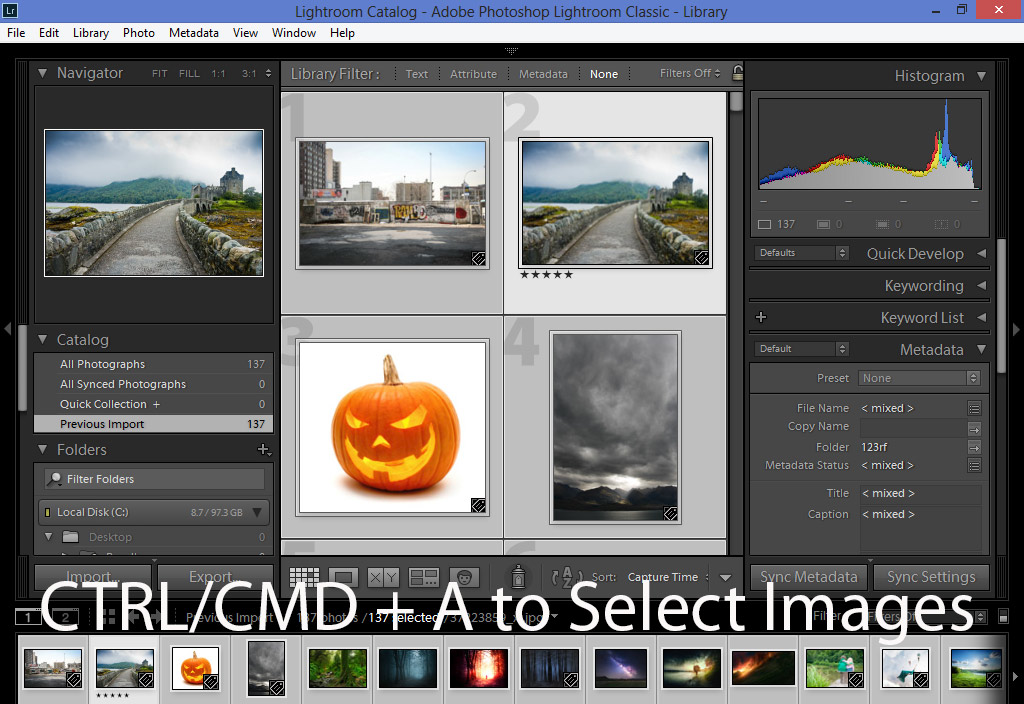
Here you can see that all the images have been imported. Now before we proceed we need to select all the images so we can export them at once. Press CTRL/CMD + A to select all the images.
Here you can see I selected all the images:
Step 3 – Creating Watermark Preset
So we need to create a watermark preset so we can use it when we export the images.
To create a watermark preset, go to Edit > Edit Watermarks.
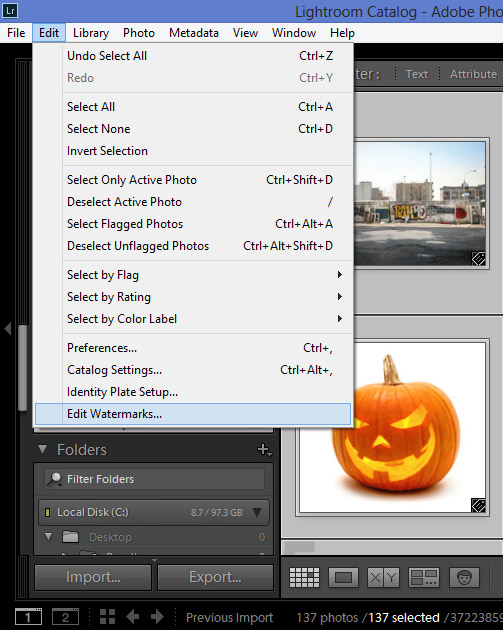
Now we are in the watermark editor, Lightroom by default will give you the option to create a custom preset.
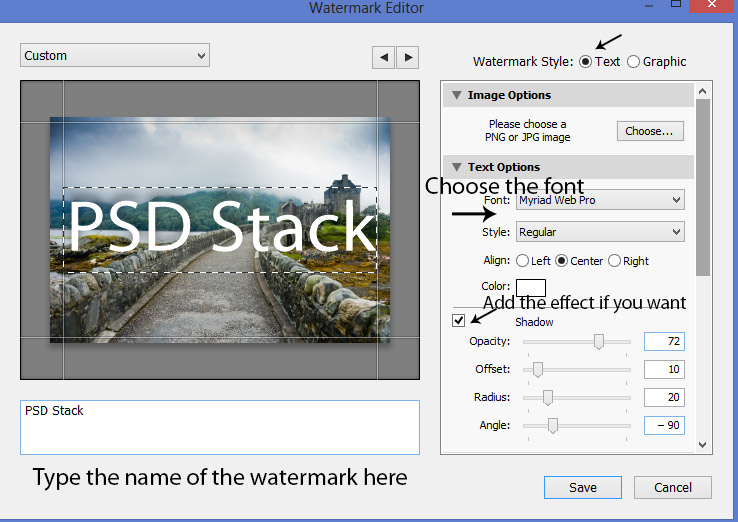
Set the Watermark Style to Text at the top as we are going to use the text to watermark our images. If you want to use an image as watermark then you can click on the Graphic and then you can use an image for the watermarking purpose.
At the bottom of the left side, type the watermark text, as I typed PSD Stack. Of course, you can choose your own text. Once you typed text, now you can set up your text how is it going to look.
For example, in the Text Option you can choose which font you want to choose, the size, color, style, etc.
Right beneath, the Text Option you have the Effect Option you can add drop shadow effect, adjust the opacity, angle and much more.
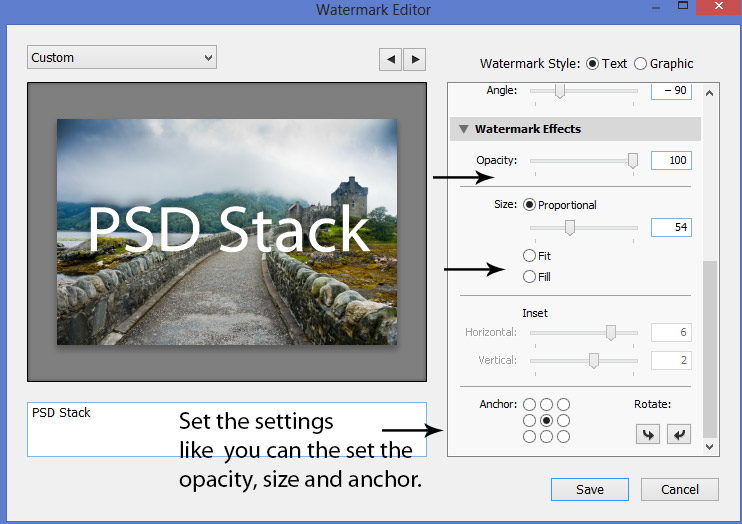
Under the Watermark Effect, you can set the watermark opacity, size, and anchor as well.
You can see that I increased the size of the text. Also, I set the anchor in the middle to make sure that my watermark text should be in the mid of the image. Similarly, you can set your own settings.
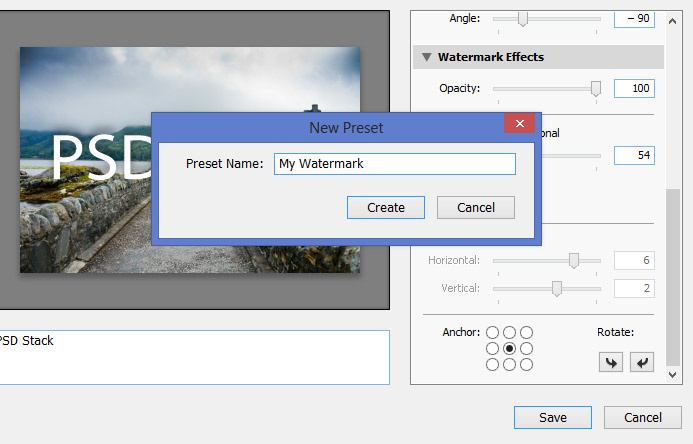
Once you’ve done with the settings, hit the Save button. Now name the preset to something meaningful like named it My Watermark and then hit the Create Button to save the preset.
Step 4 – Export for Watermarking, Resizing, and Optimization
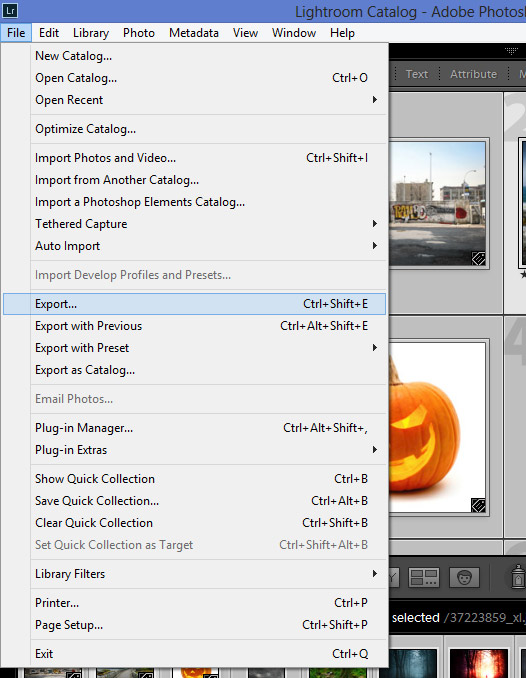
Go to File > Export but make sure you’ve selected all the images as we already did.
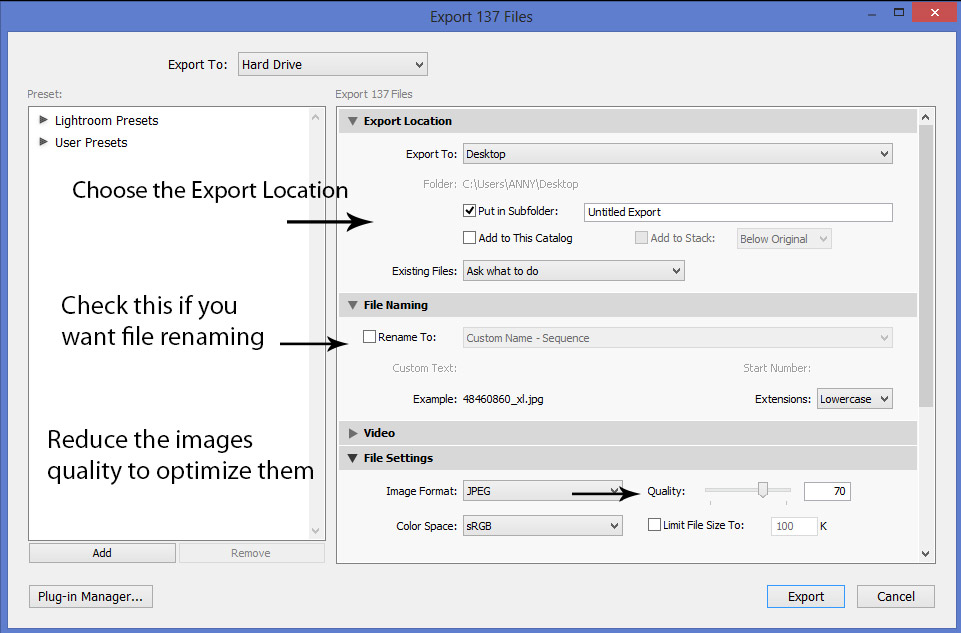
In the export editor, you’ll find many options.
Export Location: will tell Lightroom where you want to save exported images. You can choose a folder here, by default Lightroom will create an untitled export folder will save your images in there automatically.
File Renaming: allows you to rename the multiple files at once. Sometimes we need a custom naming sequence for our images, going through every image is time consuming. Thanks to this option as you only need to set the custom naming once and Lightroom will take care of the rest thus saving a lot of time.
File Settings: with the file settings, you can optimize multiple images at once by reducing their quality. You can see that I reduced the quality to 70. You can also change their format like JPEG to PNG as well as the Color Space. There are some really cool bunch of options to play with.
Step 5
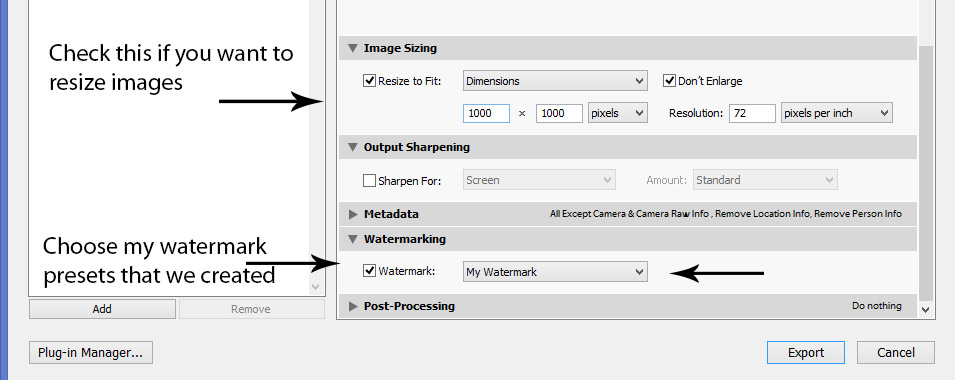
If you scroll down below you can see there are some more options.
Image Sizing: with this option you can resize images by changing the dimensions and resolution. I changed the dimensions of the image to 1000 X 1000.
In Watermarking: I’ve chosen the preset which we created in step 3. You can see “My Watermark” preset has been selected for applying the watermark effect on the images. Once you’ve set all the settings now simply click on the Export button at the bottom of the right to export all the images.
Here we have the images watermarked, resized, and optimized within no time. These steps will really gonna help you. That’s it for now!


waaoh great, i have learnt a lot planning to do it practicaly