
If you have used Photoshop, Lightroom, Luminar, or any other photo editing software, you might have come across a term called Masking and it is important for photography, compositions, and any edits that you want to do with your photos. In this article, we’ll learn everything about Masking, masking tools in Lightroom, how you can use them, and most importantly how they can bring your photos to life. Let’s get started!
What Is Masking?
Masking is a process of applying local adjustments to a part of a photo that needs to be enhanced without affecting the entire photo. Masking can make a huge impact in post-production and it allows us selectively target areas that need a bit of work. This skill is very important because the photos that you see on your favorite Instagram photographer are always edited using masking techniques.
Masking Tools In Lightroom
Adobe brought new masking tools such as Select Sky & Select Subject along with Masking Brush, Linear Gradient, Radial Gradient. The new masking panel in Lightroom’s classic 2022 update resembles the image below.
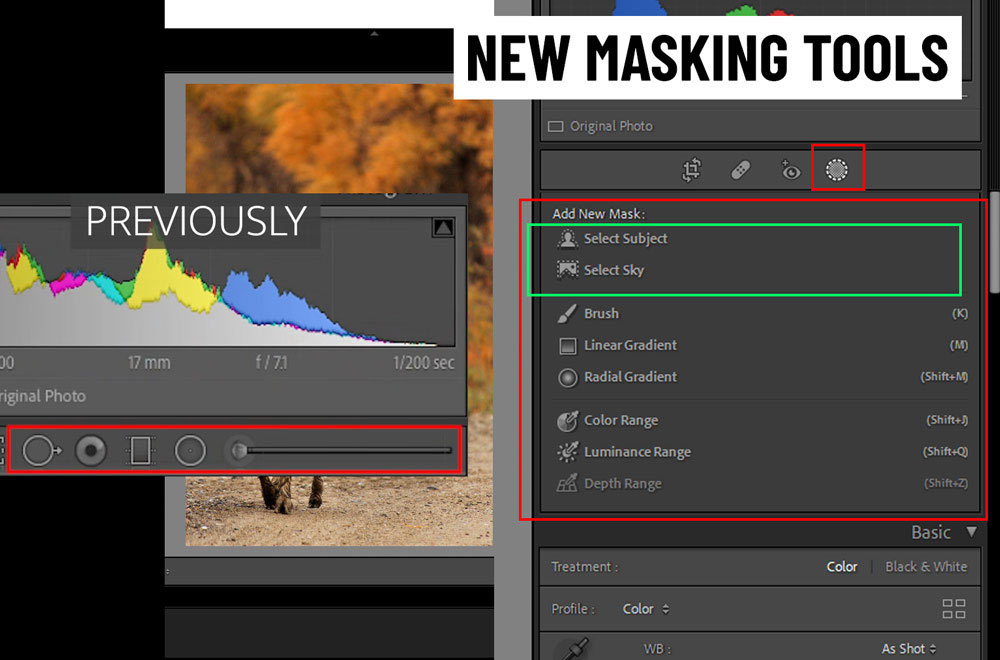
Before this huge update, masking wasn’t accurate especially if you want to make changes to the sky or subject of your photos. With the addition of these two tools, it has become a lot easy to select just the sky and subjects without affecting the entire image with the help of one-click. If you want to read more about Select Sky & Subject, please read this tutorial for full explanation.
Select Sky
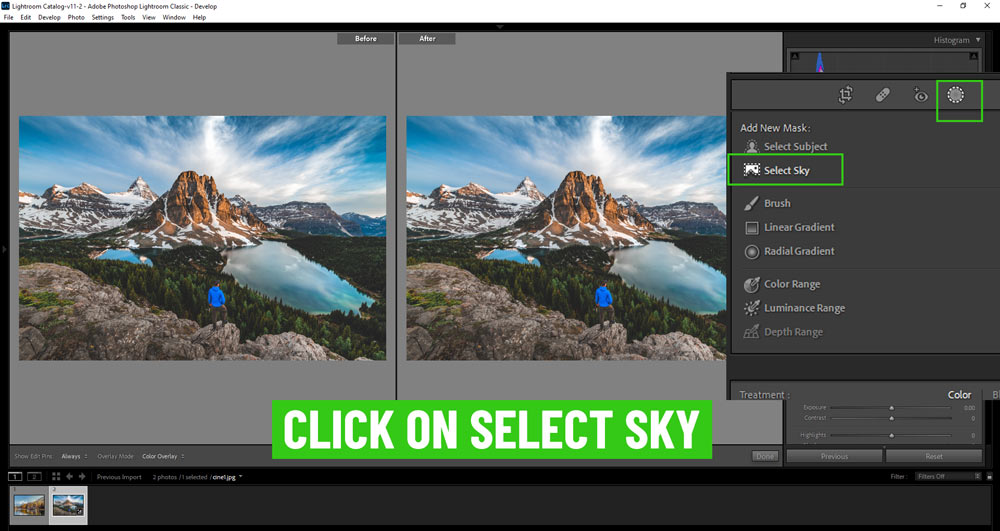
In Lightroom, Select Sky is the new addition to the masking panel. As the name suggests, it automatically selects the sky using Adobe Sensei technology. Select Sky promises to select the sky in just one click, yeah, just one-click and boom your sky is selected and ready to go for changes.
To select the sky, click on the new Masking Button, and in the drop-down, click on the Select Sky button.
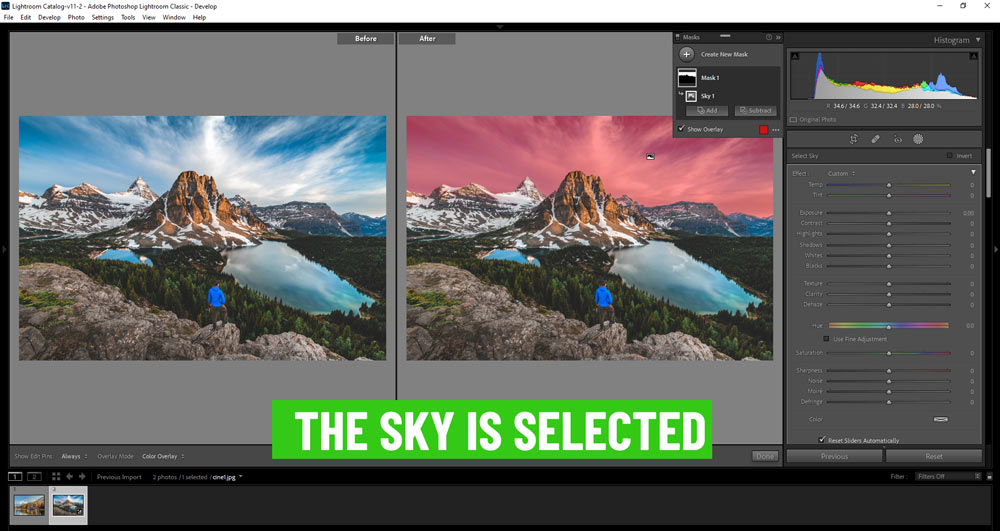
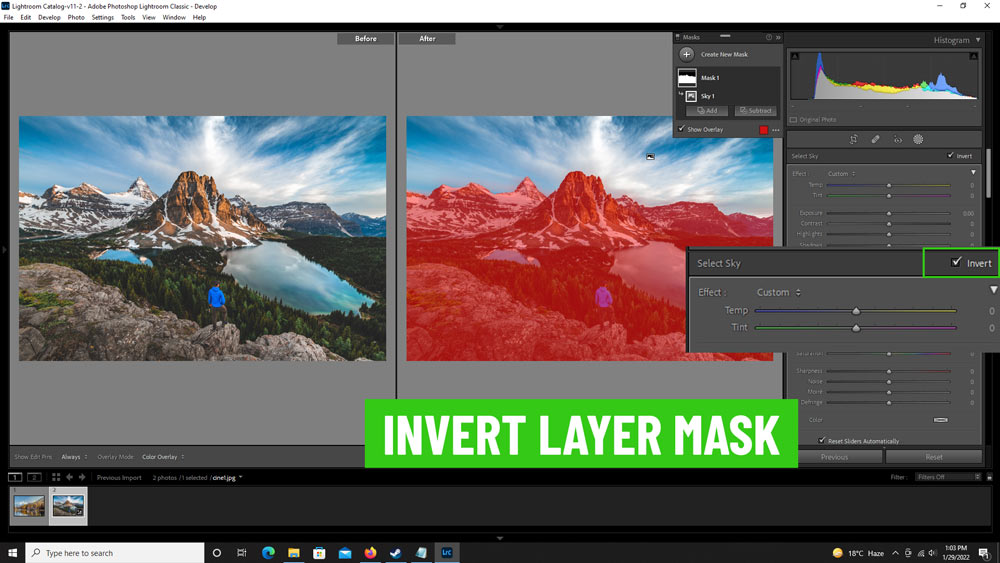
Here you can that the red areas indicate that we have selected the sky.
In the toolbox, you can make changes such as adjusting the exposure, temperature, and a lot more. Whatever changes you make will only affect the sky and the rest of the image will be unaffected. This is great when the sky in your landscape shots needs your attention or you’d like to make a change to it. This is how powerful the masking is!
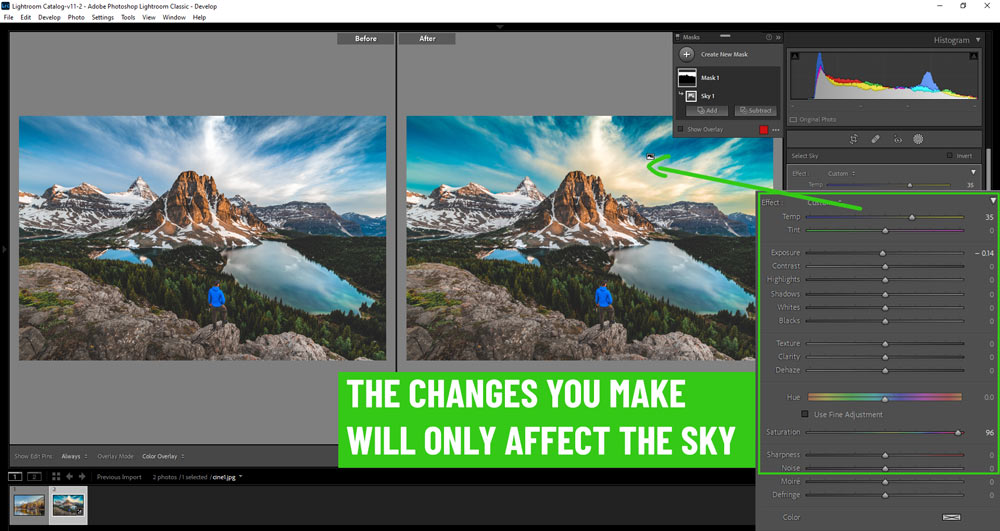
Tip: Invert the layer mask to select the rest of the image except the sky. Now, whatever changes you make won’t affect the sky at all. This is useful when the sky doesn’t need any adjustments but the rest of the areas need improvement.
Linear Gradient
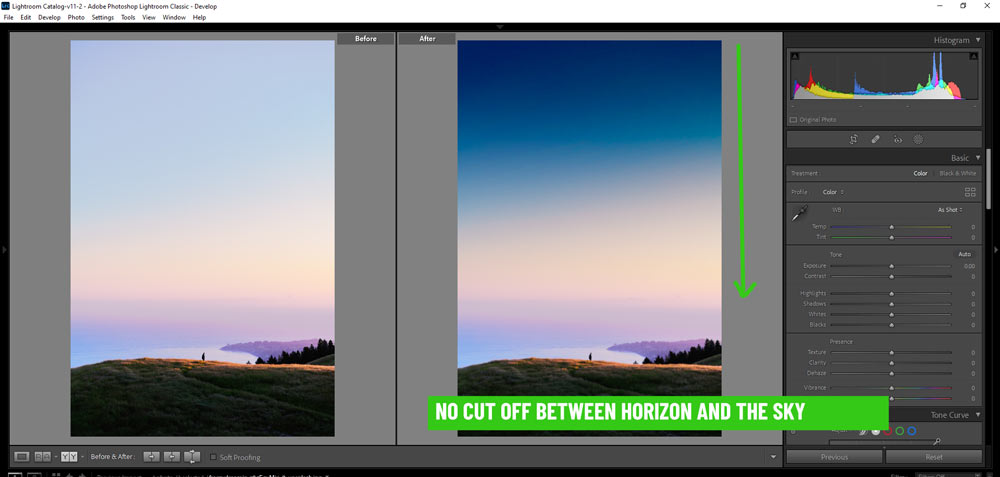
Linear gradient, previously Graduated Filter, is another great masking tool to apply selective adjustments but it fades the effect from starting point to the endpoint. This is useful when you want to make the transition of the adjustments as smooth as possible without making the effect like it is cutting off.
In landscape photography, if you have overexposed the sky, you can use this tool to correct the exposure by bringing the exposure down in the top and fading it away as it reaches the horizon of the landscape.
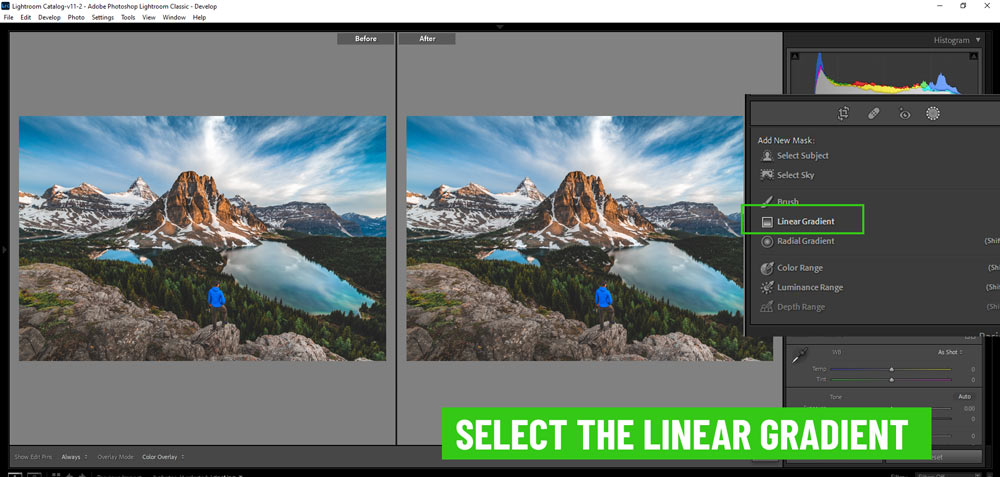
Select the Linear Gradient Tool from the Masking Panel:
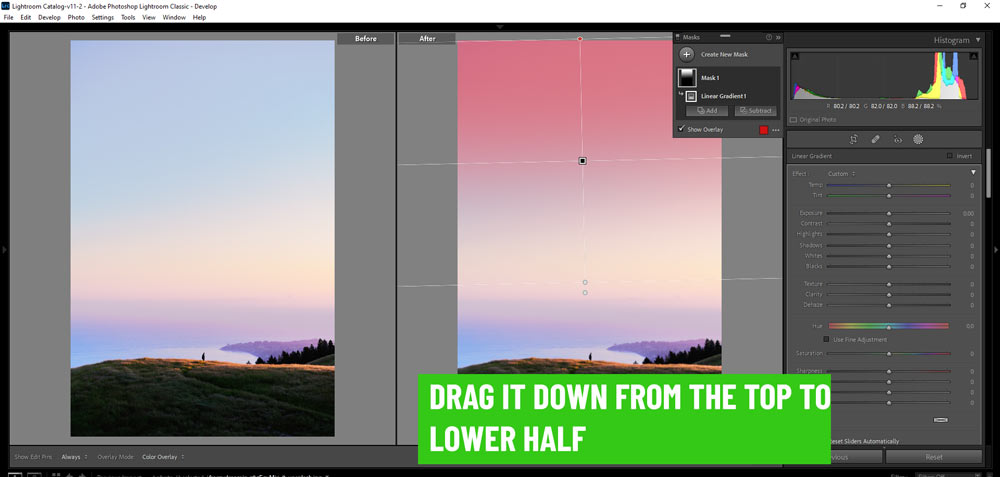
Once the tool is selected, you can drag it down from the top of the image to the lower half or to the point where you want the adjustments of this filter to be gradually fade away. Generally, the horizon is the point but you can drag it as low as you want. You can see in the image below I dragged it down to the horizon.
I made some changes such as I reduced the exposure, increased the saturation, and reduced the contrast a little. You can see the change it made to the image below.
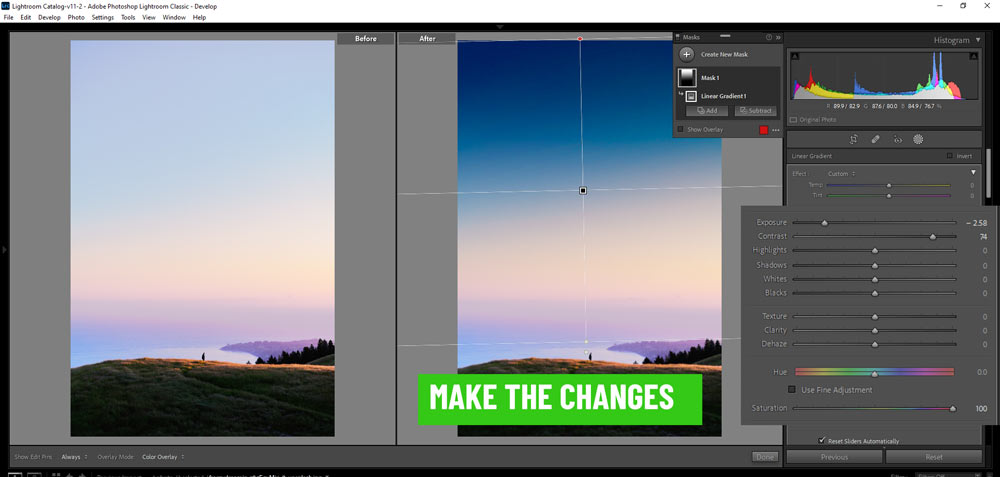
Notice the changes are being applied gradually, meaning the adjustments affect is stronger at the top but as it goes towards the horizon it starts to fade away.
You can even drag it diagonally as well, just hover the mouse near the midpoint and a rotation icon will pop up, use it to rotate the filter.

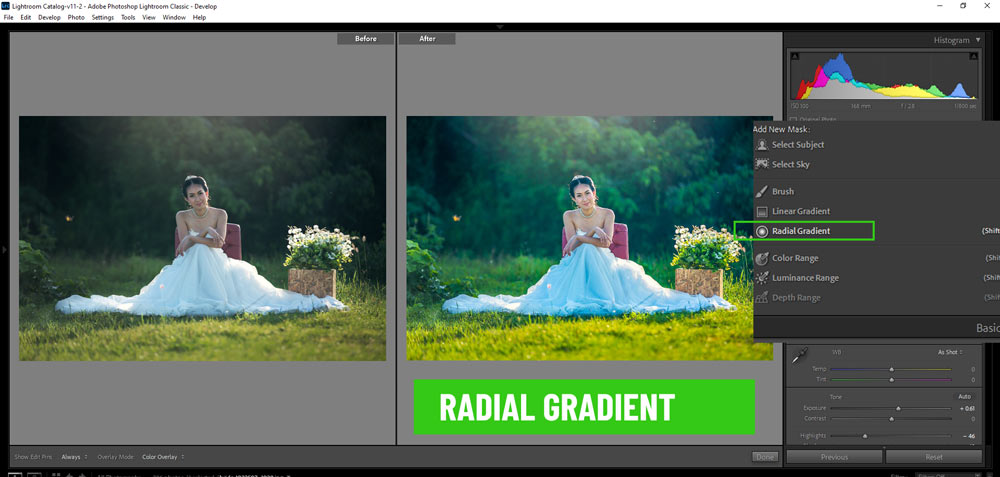
Radial Gradient
Radial gradient applies local adjustments inside or outside of a circle. It can be used to create dramatic effects such as vignette. You can select this tool from the masking panel and it sits right below the linear gradient.
Select the Radial gradient as shown in the image below.
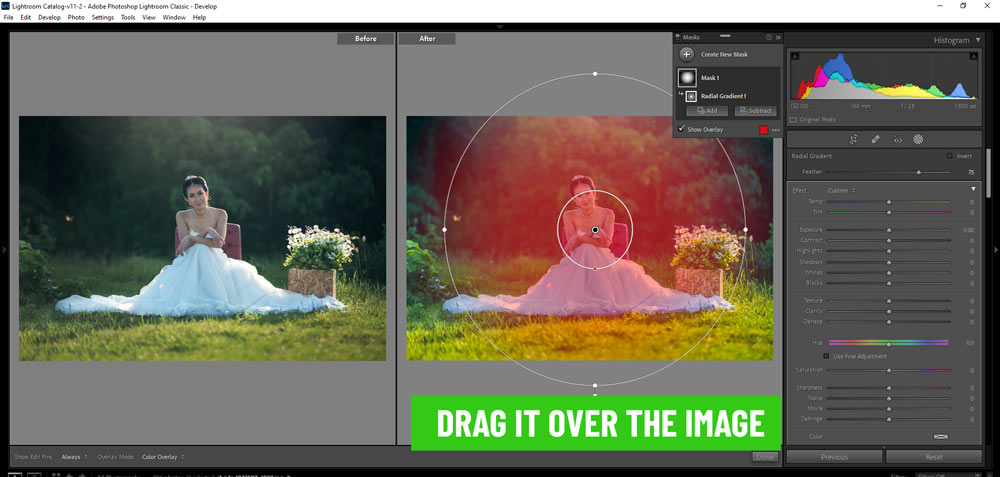
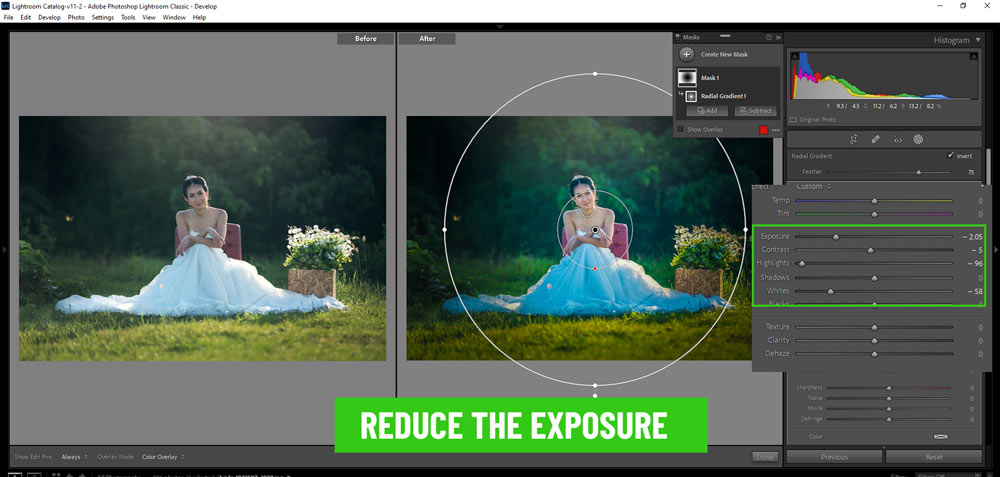
Now drag it over the image that you want to adjust. Initially, it will make the changes inside of the circle, but as you can see we have the subject in the middle and she looks perfect, I don’t want to make any changes in the middle instead I want to darken the corners of the image to bring more attention to the subject.
Since I am going for vignette effect here, I have to invert the selection so I can make changes outside of the circle. To invert the selection, click on the Invert Button:
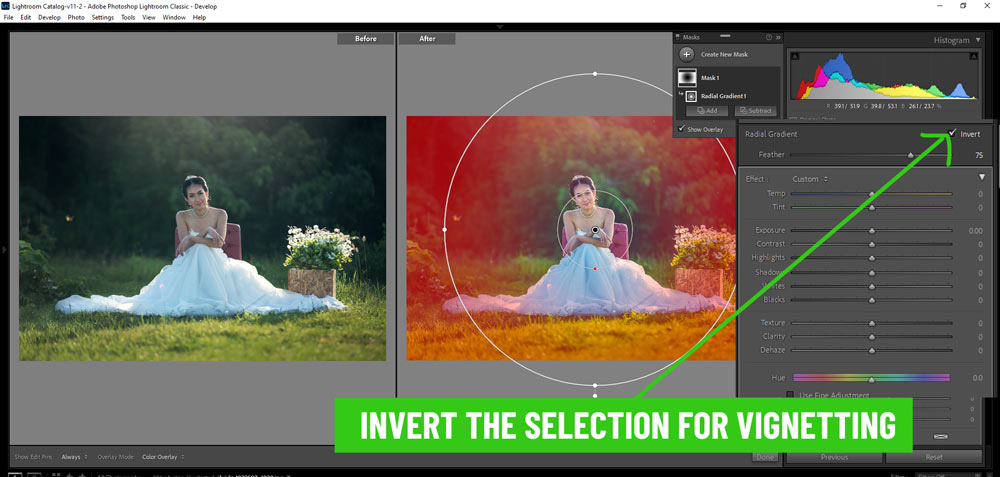
Now, I am gonna reduce the exposure to make the center bright and this will draw attention to the subject as the corners of the image won’t have much brightness. You can see I have the reduced the exposure, highlights, and whites.
Here you can see the before and after imagery.
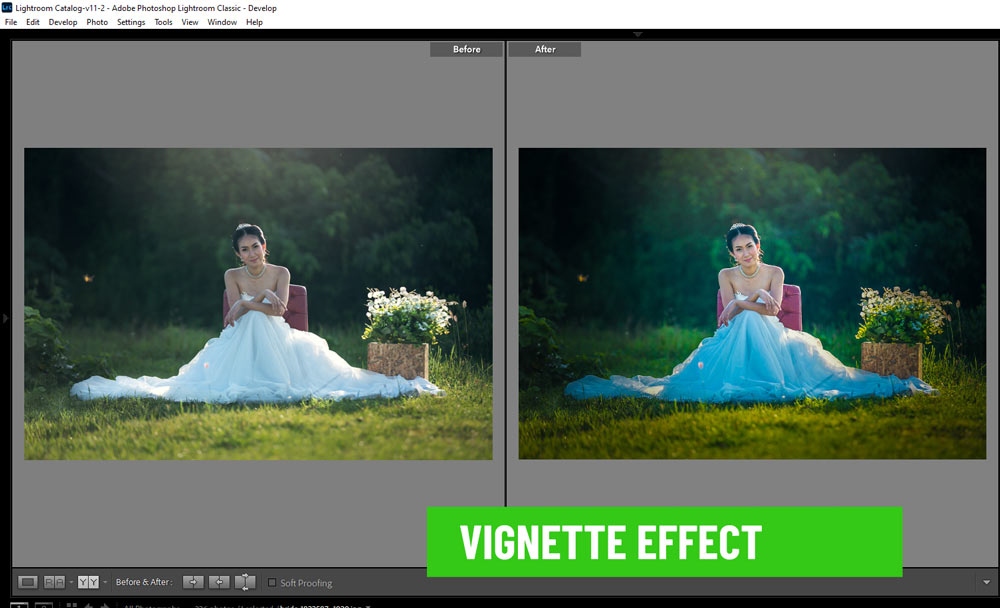
This is why masking is an important skill as it can apply local adjustments to a part of the image rather than affecting the entire photo. Select Sky, Linear Gradient, and the Radial Gradient are the most preferred masking tools in photography.
That’s why I covered them and of course, there are a lot of other ways to incorporate these tools in your photos. So keep editing yours photos and invent your own masking methods. I hope you like the tutorial. Let me know if you have questions by commenting down below!
Leave a Reply