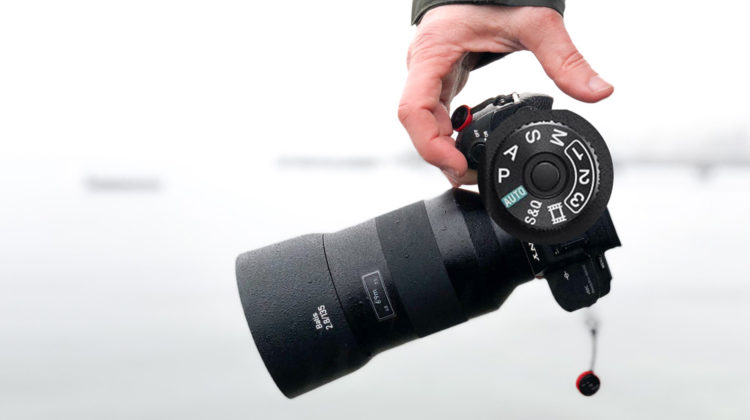
Do your photos ever come out blurry or subjects out of focus, or do you have motion blurs going on in the photo? You know, we all have been there. You might blame your camera or the camera lens but to be honest, it’s not your camera that takes the shot, it’s you!
In this article, we’ll learn how to take tack sharp photos using Aperture Priority (A/AV) & Shutter Priority (S/TV) modes. These 2 modes would be more than enough for most of your photos and especially when you are trying to get off Auto mode.
What are Camera Modes?
Camera modes give you total control of your camera settings. With camera modes, you can set Aperture, Shutter Speed & ISO manually instead of your camera doing the work. There is going to be a point when you really want to get off that Auto Mode and explore these two modes & Manual Mode (of course, you want to master it over time but it’s not necessary now) of the camera.
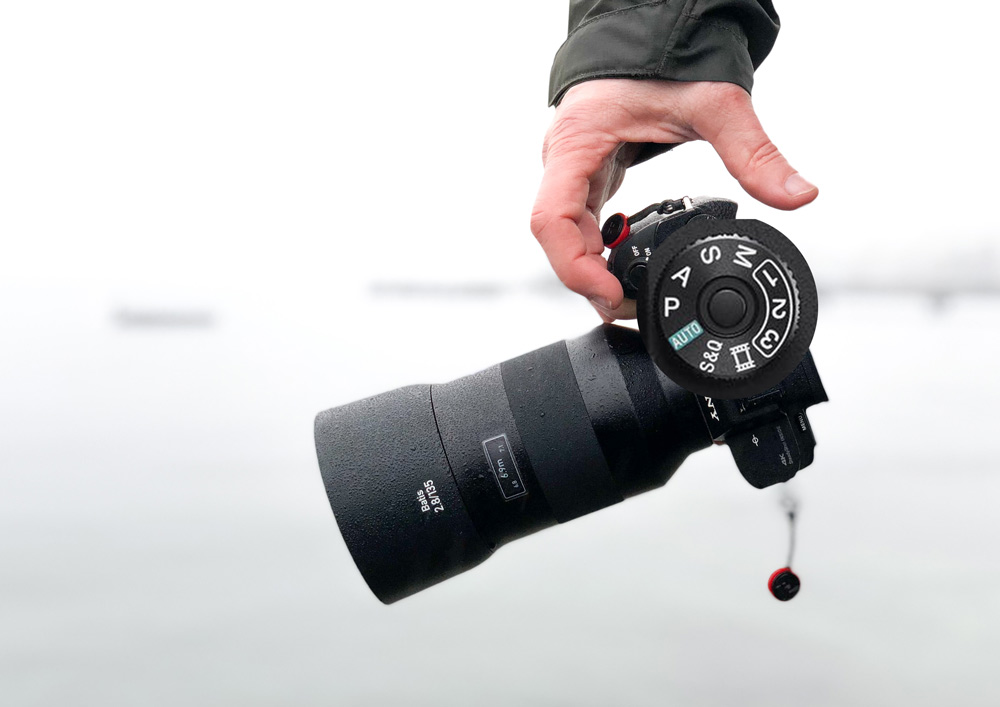
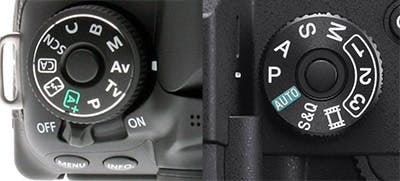
There are three main camera shooting modes: Aperture priority, Shutter priority, and Manual mode. For the sake of this article, I’ll skip auto mode (obviously) and programmed auto mode.
Please note: This article is a part of our Photography 101 series. If you are new here, then make sure you have a good understanding of Aperture, Shutter speed & ISO before following this article.You can use the index table below to read the series at your own convenience.
Recommended Reading:
Aperture Priority Mode (A/AV)
Aperture Priority Mode is a semi-manual mode that lets you choose Aperture f-number or f-stops. You set the aperture and your camera will automatically choose the optimal shutter speed while keeping the ISO constant. Also, You can manually set the ISO in the Aperture Priority mode or you can leave it to Auto ISO.
Remember that the aperture is a fundamental aspect to control your depth of field (DOF)/Background blur.
The lower the f-stops the more background blur there will be and the higher the f-stops the less background blur will be.
This camera mode is great for taking portraiture, sports, or maybe you want to draw viewers eyes’ to the subject of your photos. Most photographers use Aperture Priority mode to take the majority of their photos.
How to Select The Aperture Priority Mode (A/AV)
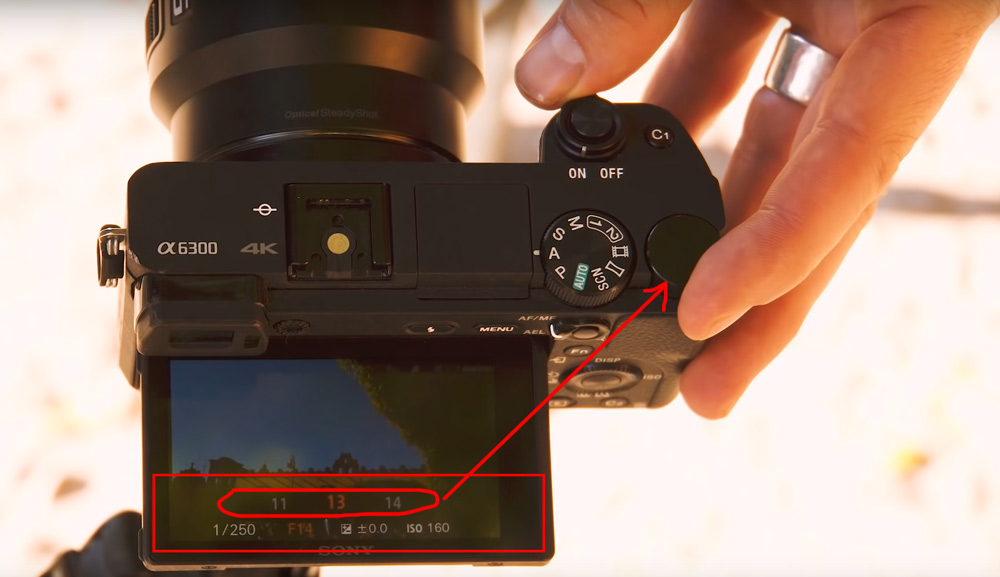
To choose the Aperture Priority you need to switch your camera dial to A (Nikon, Sony, Olympus) for most of the cameras or AV if you are a Canon user.
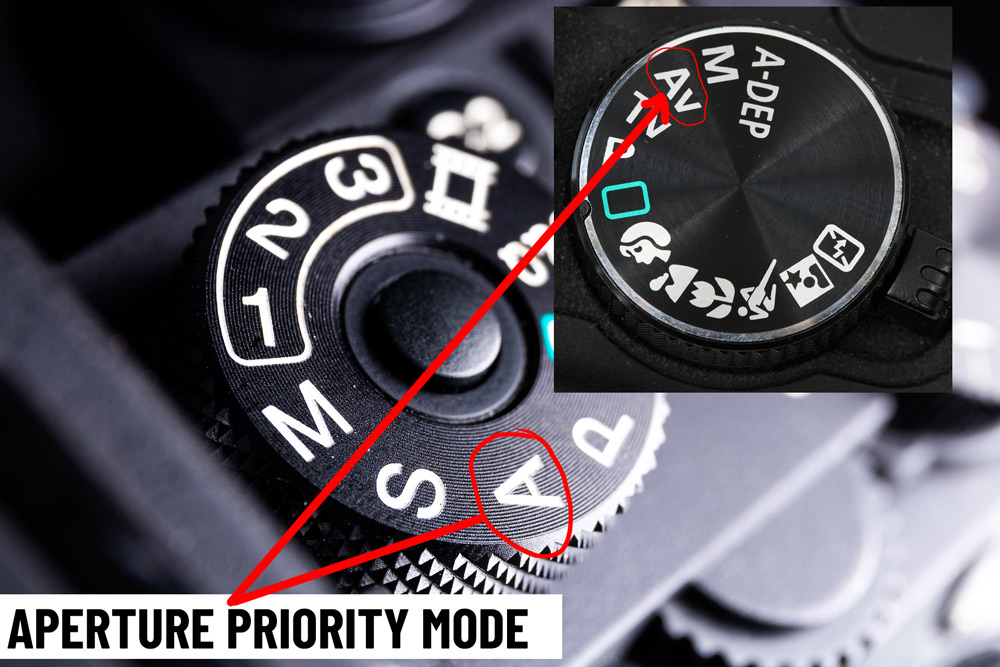
When you switch to A/AV, now you are able to change aperture using the dial in your camera or sometimes it’s like a joystick. Notice on the screen how the camera aperture is now changing.
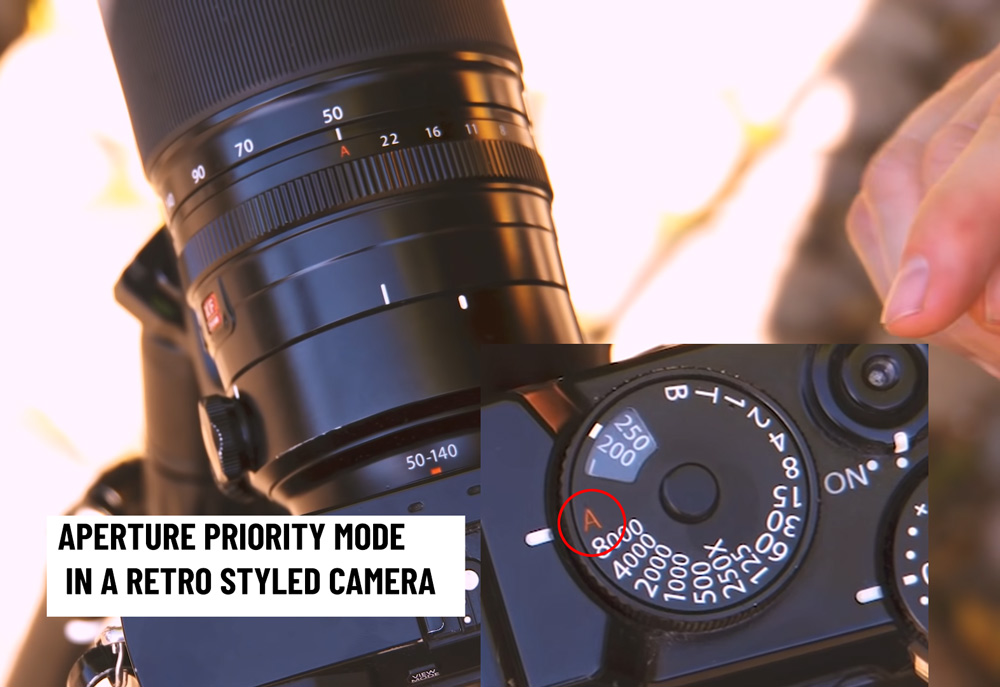
In retro-styled cameras such as Fujifilm switch to the A on your shutter speed dial to initiate Aperture Priority mode.
After that, make sure to choose any f-stop to be in aperture priority mode. Take a look at the aperture ring and turn it to a physical number.
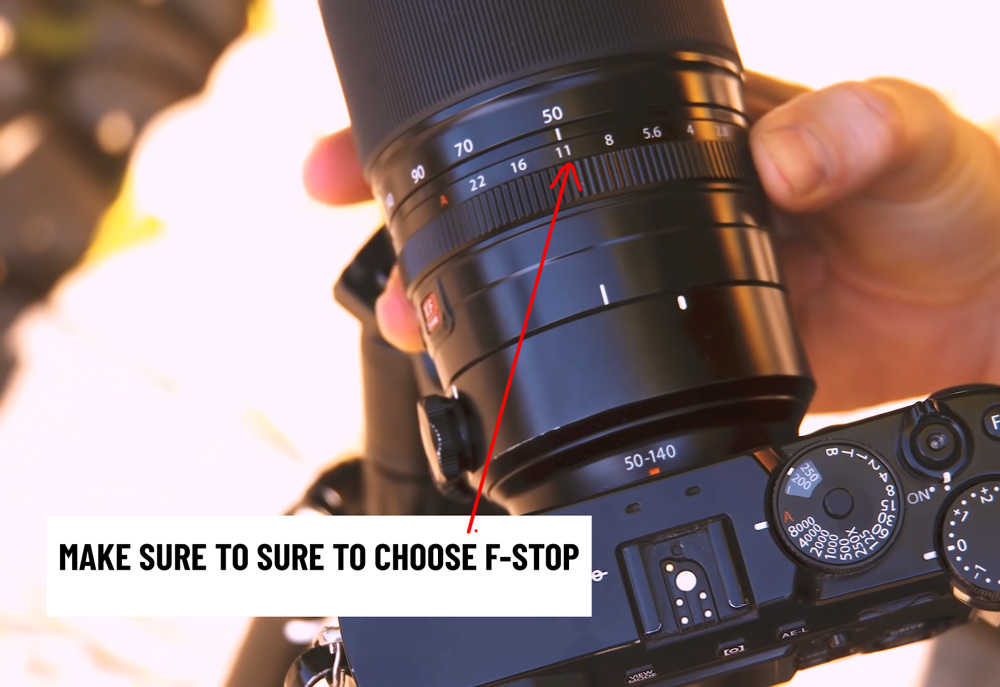
Aperture Priority Mode – Camera Settings Example
You can see in the image below, how aperture number affects photos:
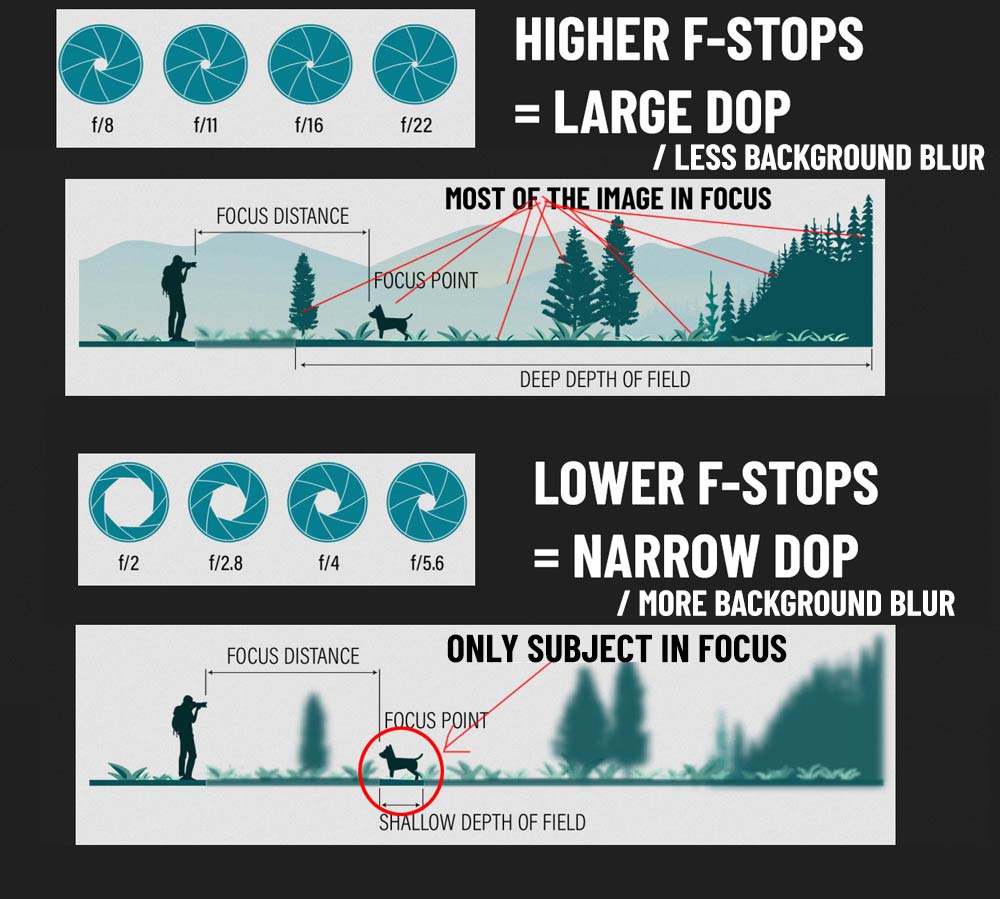
To produce background blur (i.e., shallow depth of field), choose a low aperture of f/2.8 or even f/4.0 (depending on your distance from the subject). A higher aperture (f/16) will give you a larger depth of field/less background blur, and both the foreground and the background will be sharp.
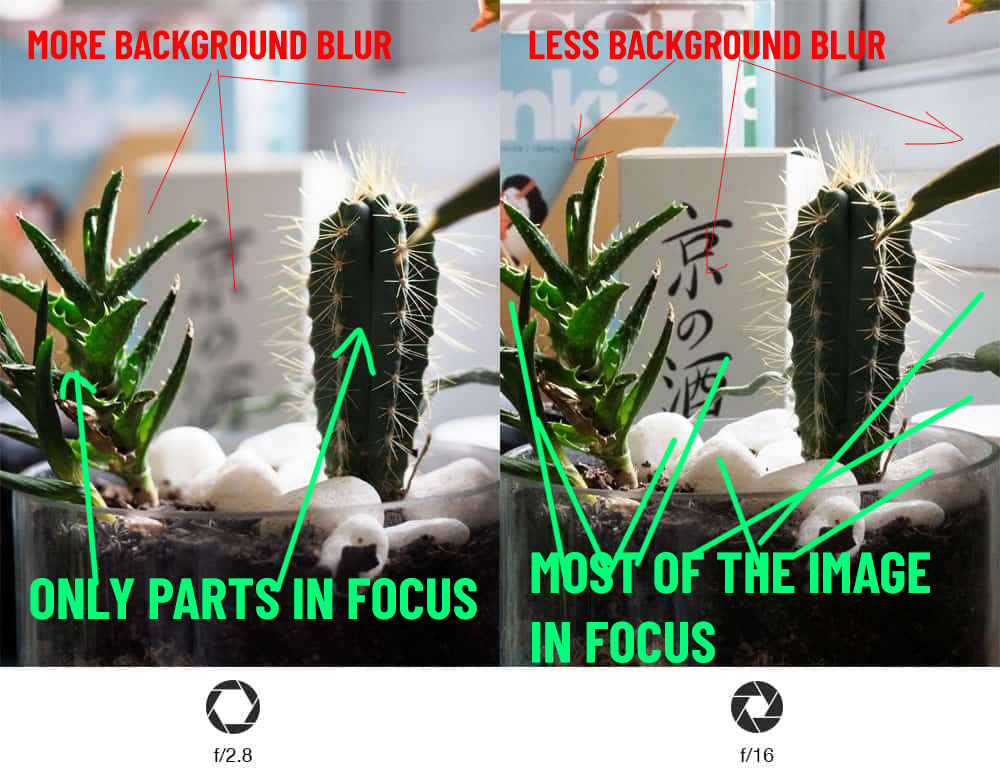
If you take a look at the image on the left, you see it has a nice amount of background blur but on the other hand, you see that the image has less background blur.
You can use the aperture priority mode to control how much background blur you want in your photos. With a low f-stops number, there will be more background blur and with high f-stops number, there will be less background blur.
When to Use & Avoid Aperture Priority Mode?
I use Aperture Priority mode 95% of my photos but there are some situations where using this mode makes sense and helps you capture tack-sharp photos every time.
When to Use:
1. Portrait Photography: If shooting sharp portraits is your goal, you should use A/AV mode. With lower f-stops, you can shoot beautiful portraits with soft & pleasing blur in the background.
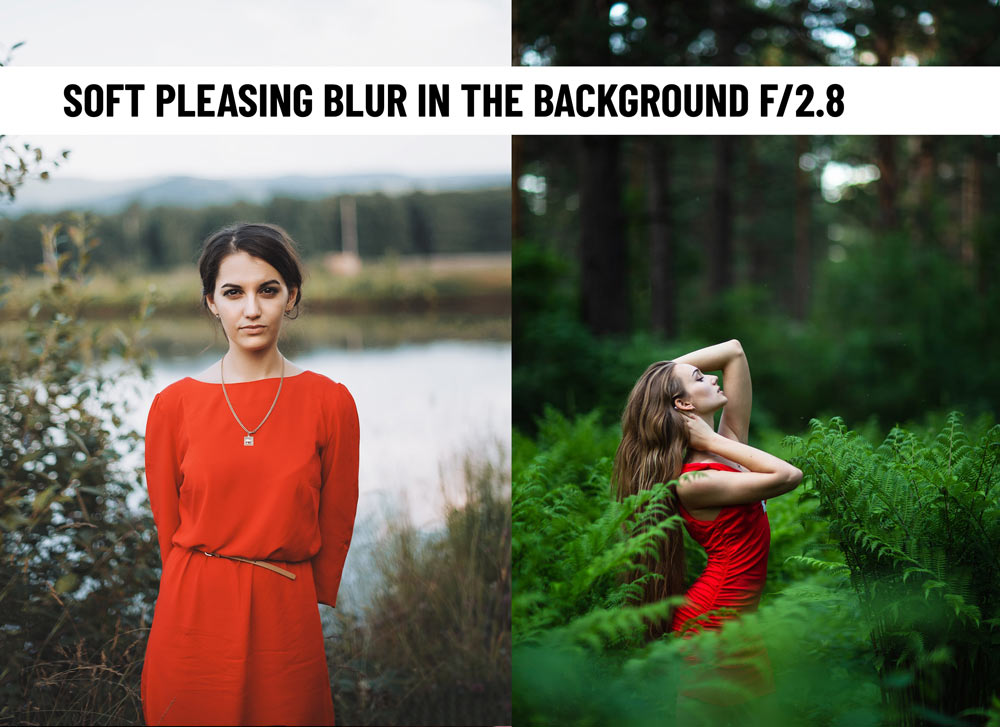
It could be a family session, wedding, or anything that requires subject isolation from the background. Make sure you stay below the f-8 value, going over it won’t produce any background blur.
2. Landscape Photography: Aperture priority mode is also perfect for landscapes where you can want everything in focus.
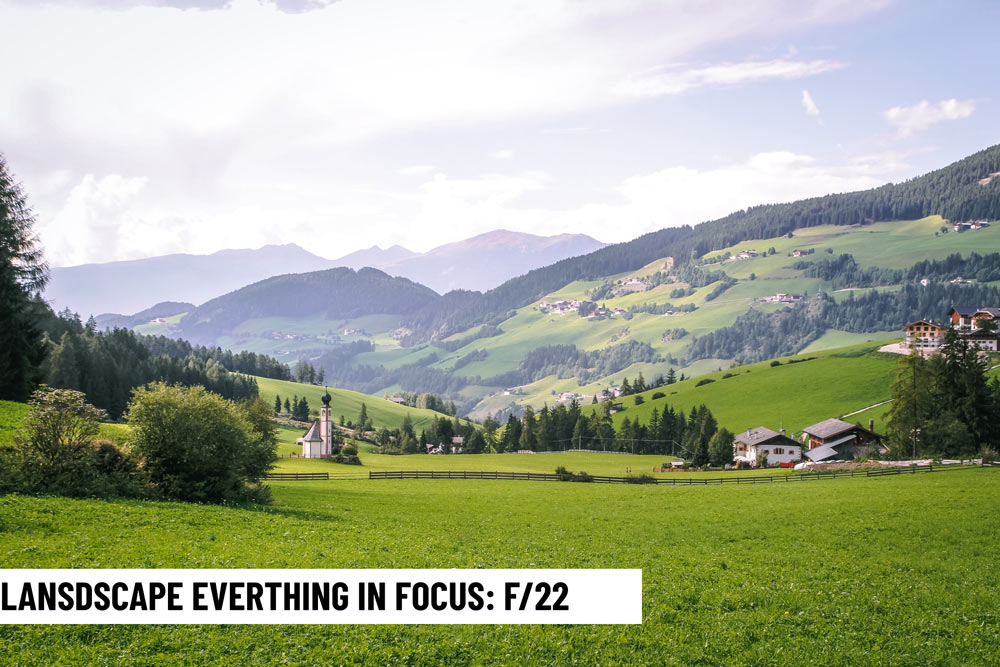
A higher f-stop number is most likely to be used here because we want most of the image in focus from the foreground all the way to the background. Make sure to go over f/8 to produce less background blur and sharp focus.
3. Daytime: During daytime or any bright day when there is sufficient light with your chosen shutter speed and ISO, you can go with this mode. In daylight time, you can use a big aperture f-stops to let less light into the camera as there is enough light especially with landscapes and photos of a group of people where you want everyone in sharp focus. Of course, when you want to involve in motion blurs you have to use the Shutter Priority mode but if the goal is shooting still life photos stick to the Aperture priority mode.
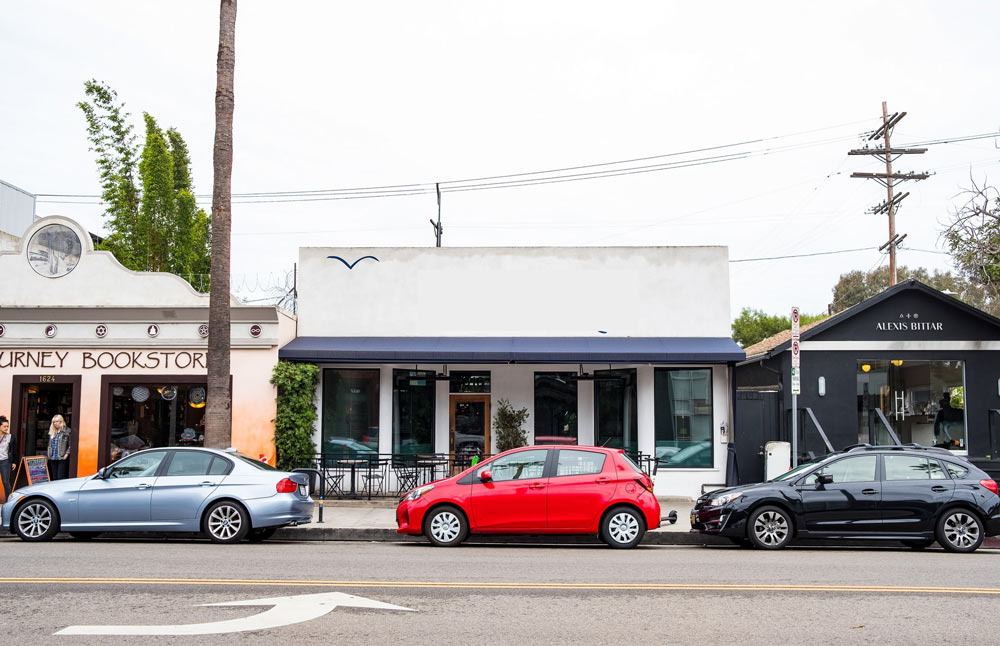
Tip: If the aperture priority is limiting you to a slow shutter speed, maybe you want to capture fast-moving subjects at that point you can avoid Aperture priority mode. Of course, whenever the motion blur is involved it is best to use the Shutter priority mode.
When to Avoid
Yes, sometimes you need to avoid the most preferred Aperture priority mode and it may not be ideal in some situations. The problem with the A/AV mode, that it automatically chooses the Shutter Speed, I know it is great for shooting in good light or when you are not shooting fast-moving subjects like cars, flying birds, people moving in the streets, wildlife, and so on.
It is likely that it won’t work in the following situations:
Low Lighting & Slow Shutter Speed: It is more difficult if you are trying to capture moving subjects in low lighting because AV/A mode at night will usually select a slow shutter speed (for a smaller aperture size) that can cause motion blur to appear in your photos.
Long Exposure/Motion Blur – When you want to freeze a subject actions like flying birds, fast-moving cars/motorcycles, sports, or even water you should use Shutter Priority Mode.
Shooting Handheld – When you are shooting handheld, it is best to use Shutter Priority mode because, in dark conditions, A/AV is going to select a long/slow shutter speed to get a lot of light into the camera. With slow shutter speed and on top of that shooting handheld (camera shake), the photos are going to be blurry. The solution is, you can increase ISO to unlock fast shutter speed or leave the aperture priority mode.
Shutter Priority Mode TV/S
Another semi-manual shooting mode is similar to Aperture-priority. In the Shutter Priority Mode, the camera sets the aperture depending on the shutter speed you choose, keeping the ISO constant by using shutter priority. Remember, the camera always tries to get the exposure right.
Shutter priority mode is helpful mainly for subjects in motion in wildlife, action, and sports photography since you have maximum control over the shutter speed, and you’re able to “freeze” the movement of your subjects.
How to Select The Shutter Priority Mode (S/TV)
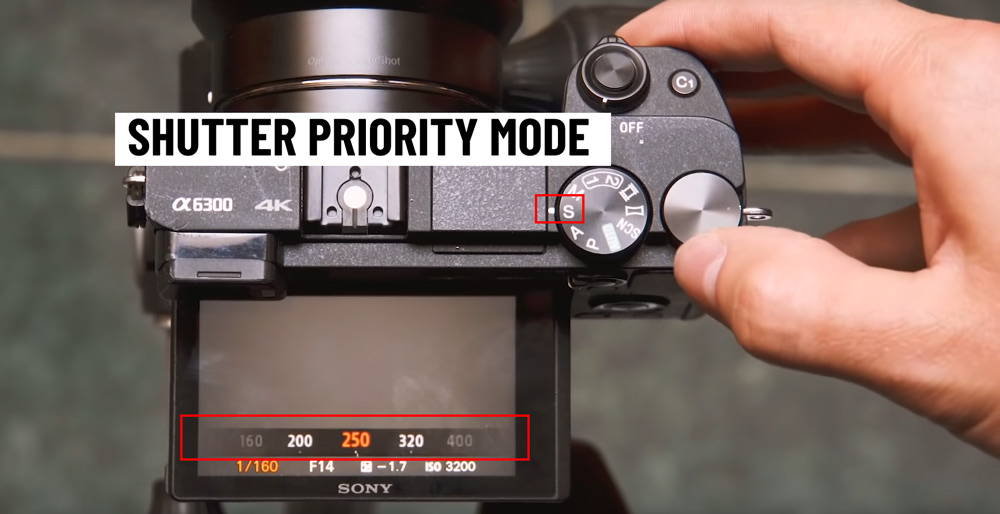
To select the shutter priority mode, you can change your PSAM dial to S for most of the cameras, and TV for Canon cameras.
In a retro style camera, change shutter speed dial to a physical number to initiate Shutter Priority mode:
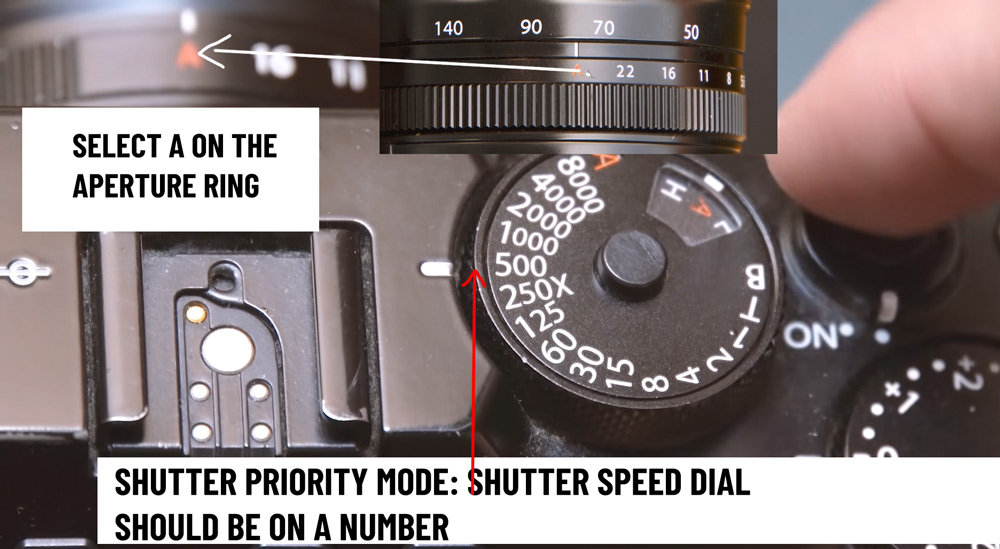
Shutter Priority Mode – Camera Settings Example
In certain situations, like capturing birds, you might need to set it as fast as 1/2000 sec, for example. Similarly, if you’re using a telephoto lens to shoot moving objects, often you might require a tripod to avoid camera shake.
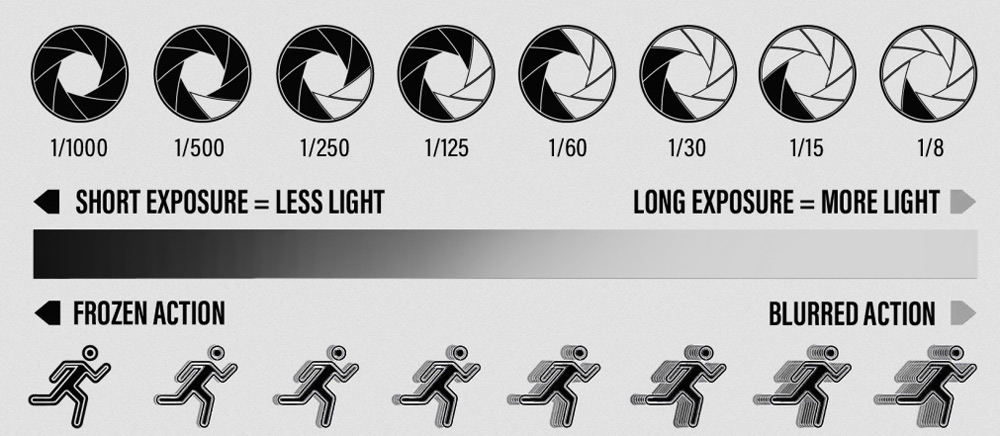
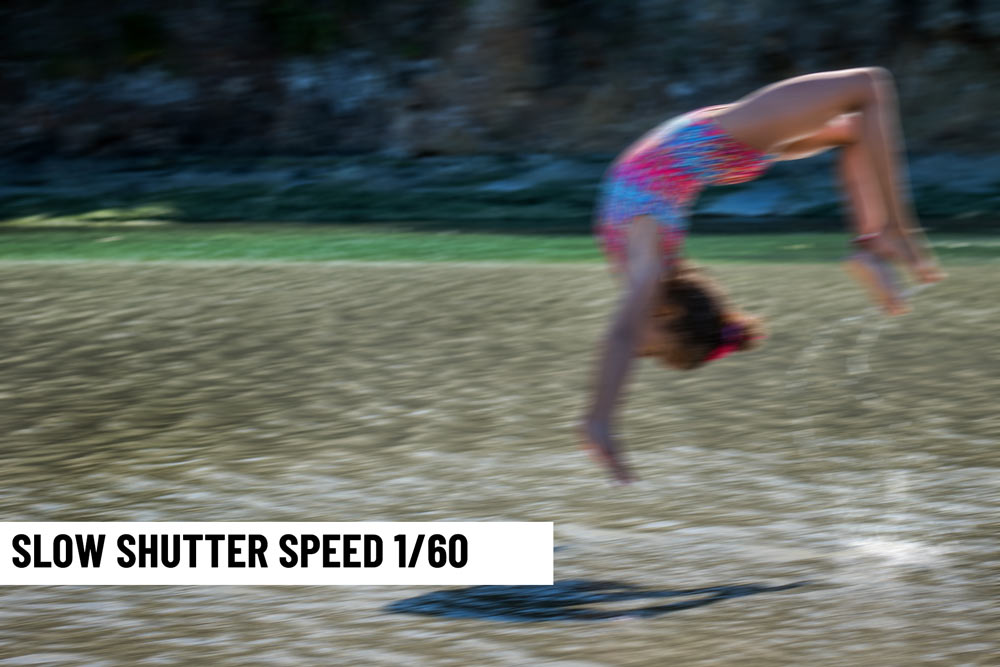
Take a look at the image below captured using a slow shutter 1/60 of second, notice the blur in the image. It’s because a slow shutter makes the shutter of the camera open for a long period of time allowing the subject more time to move and thus leading to motion blur.
Now, take look at the image again, but this time using a fast shutter speed, the subject is in sharp focus and there is no motion blur.
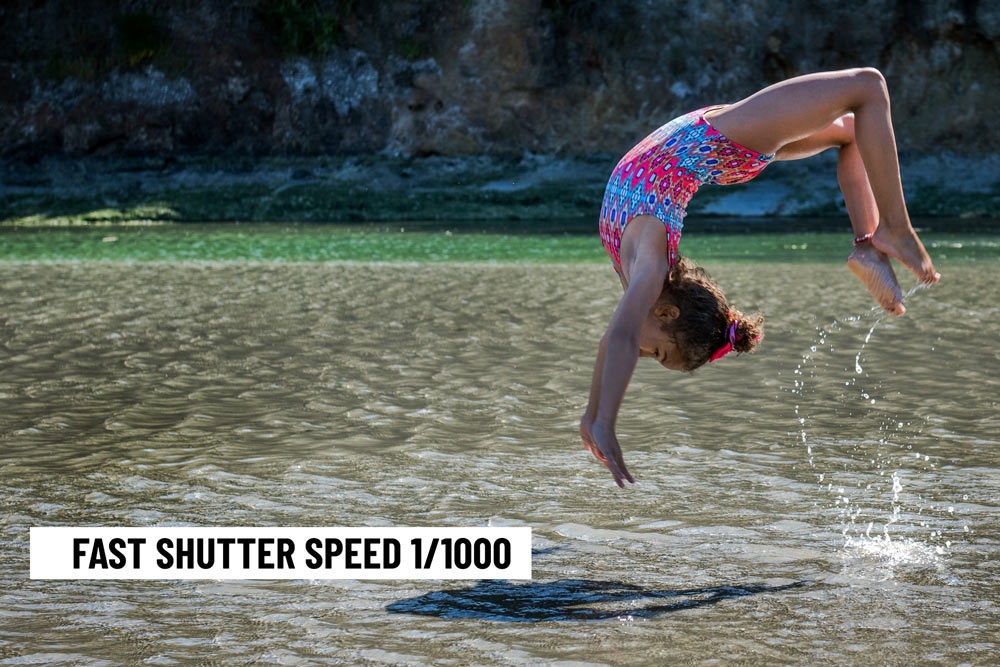
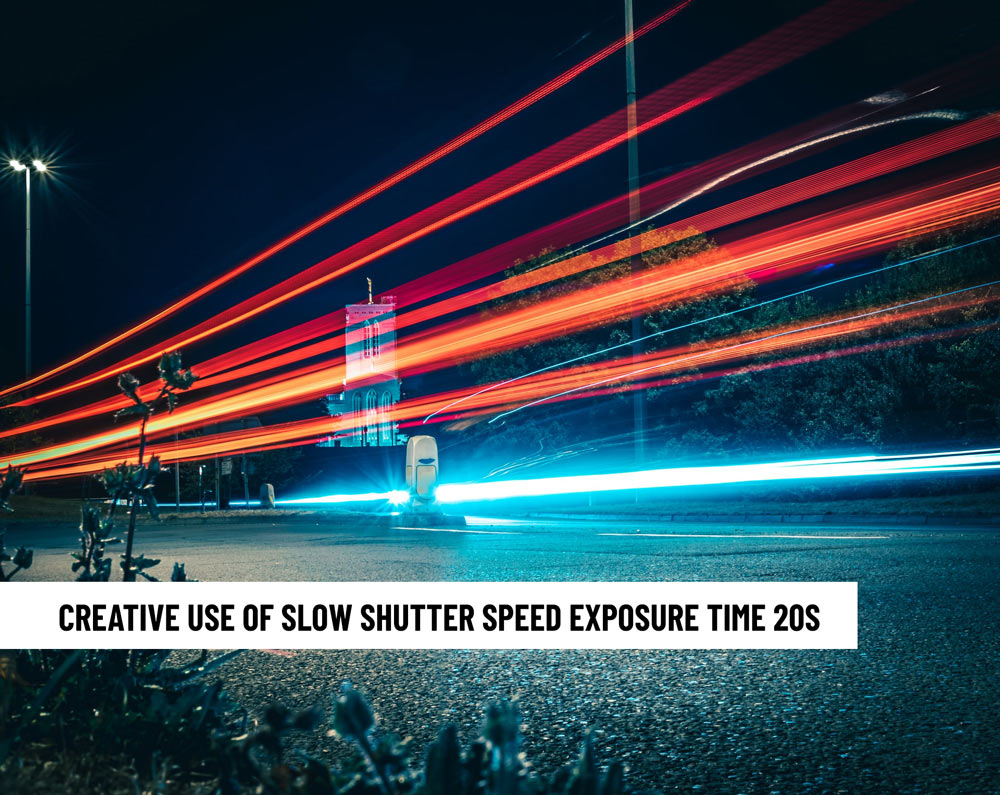
Slow shutter speed can be used creatively such as creating a light trails effect or freezing water or creating a smooth silky water effect.
When to Use & Avoid Shutter Priority Mode?
When to Use:
1. Freeze Movements: When you want to freeze the movement of your subjects, this is when you should shutter priority mode.
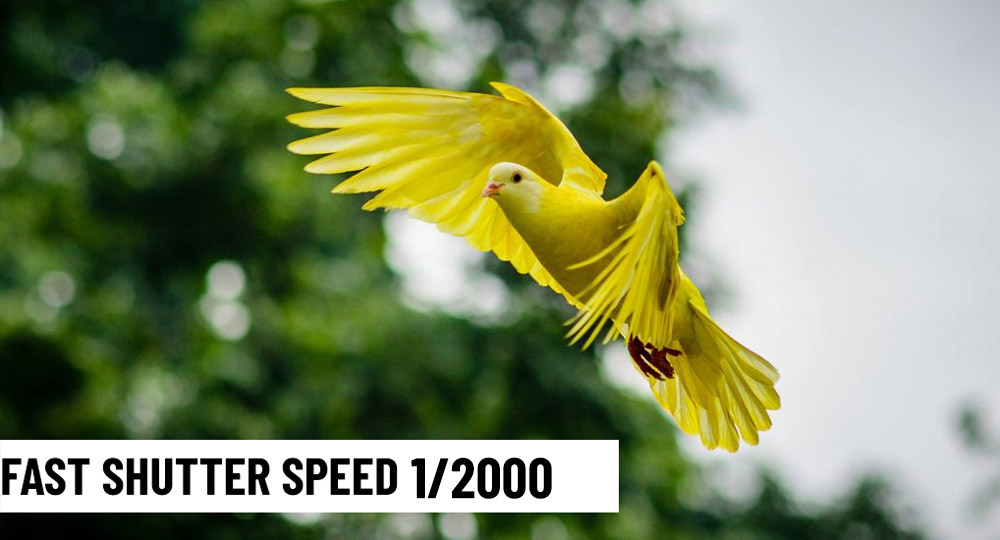
Fast-moving subjects can’t be captured sharply using Aperture Priority, Program & Auto mode. Using fast shutter speed you can freeze water, fire, cars, animals, birds, and so much more.
2. Motion Blur: Blur can add dramatic effects to your photos and you might have come across shots of light trails, or smooth water of waterfalls, that can be achieved using a slow shutter speed in Shutter priority mode. When you use slow shutter speed, but it is necessary to carry a tripod to avoid camera shake.
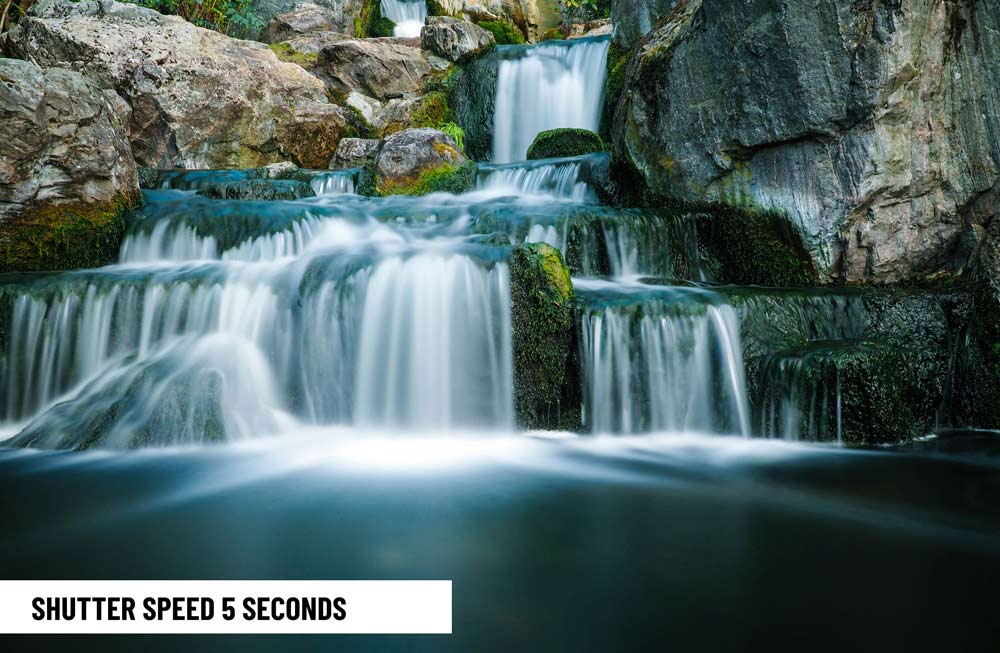
Long exposure example of slow shutter speed:
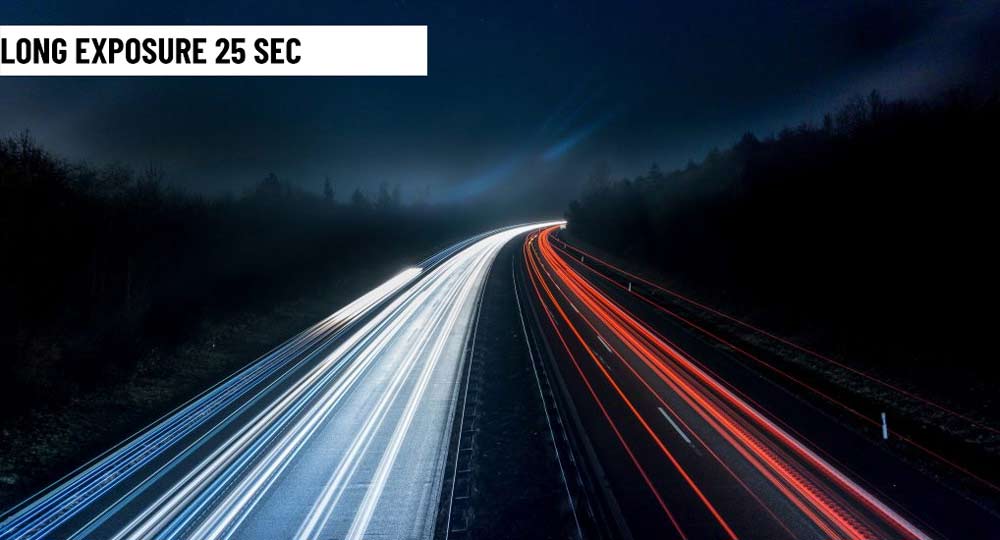
3. Panning: It is a technique that adds motion blur to the background while keeping your subject in focus. Think of a rider riding a bike, the rider stays in sharp focus while the rest of the background is blurry with a lot of motion blur.
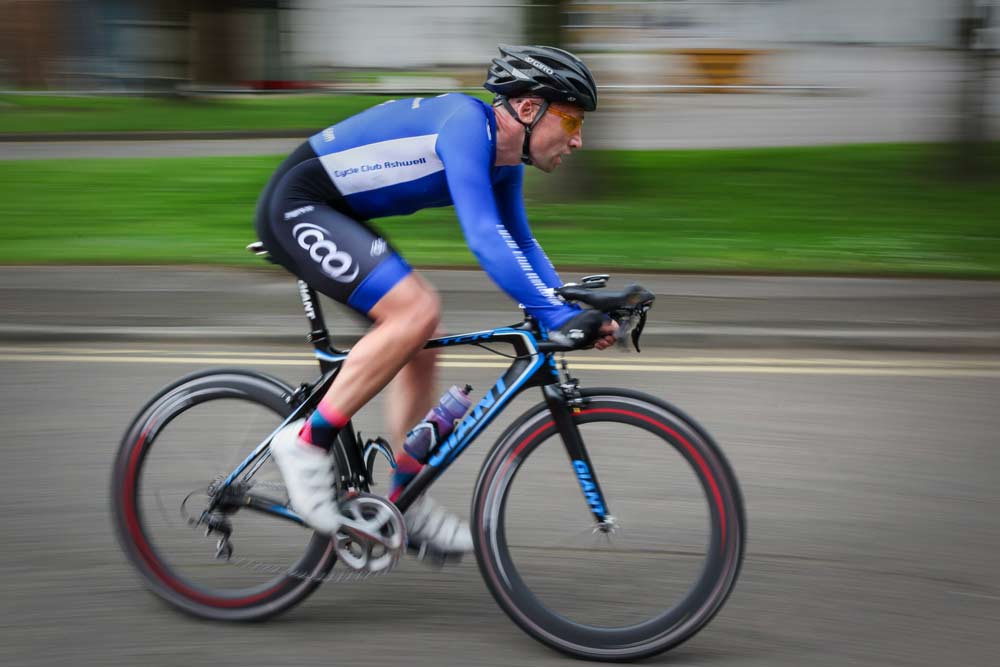
Panning can be done in Shutter priority mode, but you gotta select just the correct shutter speed to get it right. It’s a tricky situation, and there is no optimal shutter speed for panning. You even have to move along with your subjects for the best results.
4. Shooting Handheld: If you use a fast shutter speed, then you don’t need a tripod every time. Because a fast shutter can avoid camera shake and you can take photos without worrying about any motion blur. The risk of the camera shake in Shutter Priority mode doesn’t exist especially with a fast shutter speed.
When to Avoid:
1. Shallow Depth of Field: As you know, Shutter Priority works amazingly if there is a motion blur involved in your photos, but with everyday still life photos like portraits Aperture Priority should be used. It can add soft pleasing background behind subjects while keeping them nicely sharp. Shutter priority won’t work if you are trying to achieve a narrow depth of field or want to add blur to the background.
2. Greater Depth of Field: In landscapes, you want everything in focus to keep every element sharp as much as possible. This can’t be achieved in S/TV mode, the faster your shutter speed, the lower the f-stop number your camera will choose. That’s not suitable for landscapes, panorama, or maybe you want take a shot of a group of people. When you want everyone/everything in focus, use the Aperture Priority mode instead.
3. Low Lighting Conditions: A fast shutter speed lets a little light into the camera, because of that the images will often come out dark or underexposed. In that case, you should avoid Shutter Priority mode. However, this can be solved using exposure compensation. Exposure compensation is symbolized with the (+/-) sign on your camera, you can use this dial to slightly increase/decrease the exposure when your camera can’t.
Shutter Priority Mode: Tripod & Shooting Handheld Situation
A general rule of thumb is for fast-moving subjects, use faster shutter speed to freeze subjects. With fast shutter speeds, you can use shoot while holding the camera in your hand as the camera shake will be taken care of.
Let’s say that the goal is not to shoot a moving subject, then you can use relatively slow shutter speed such as 1/250 or 1/200. Even a cut-off point between using a tripod and shooting handheld could be 1/250 or 1/200 shutter speed. If you are shooting lower than 1/200 use a tripod, otherwise with a fast shutter shooting handheld is perfect.
That’s it for the article. I hope you have now a good understanding of Aperture & Shutter Priority mode. If you have questions, do comment below.

Leave a Reply