
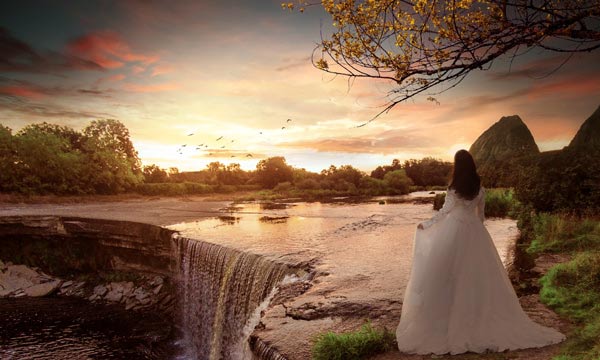
In today’s Photoshop tutorial, I’ll show you how to create a beautiful landscape matte painting in Photoshop. You’ll learn how to achieve vibrant and relaxing scene of the sunset using basic and advanced photo manipulation techniques.
Tutorial Resources
Preparing Background
Step 1
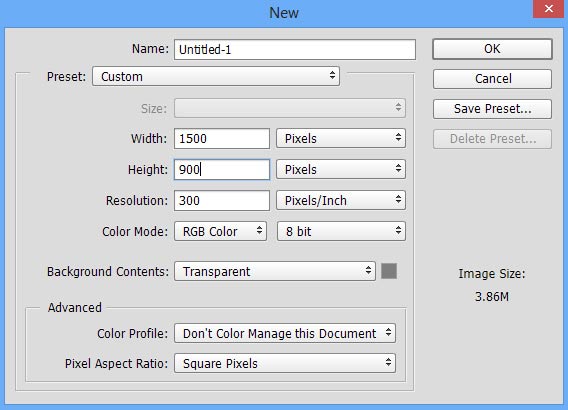
Create a new 1500 x 900 document in Photoshop.
Use the following settings or feel free to choose your own:
Step 2
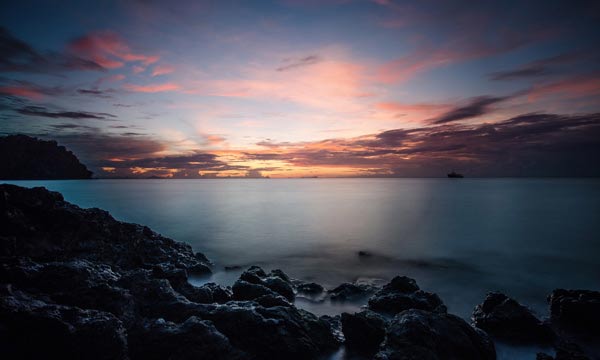
Place the sky image to main document. Go to File > Place Embedded and place the sky image.
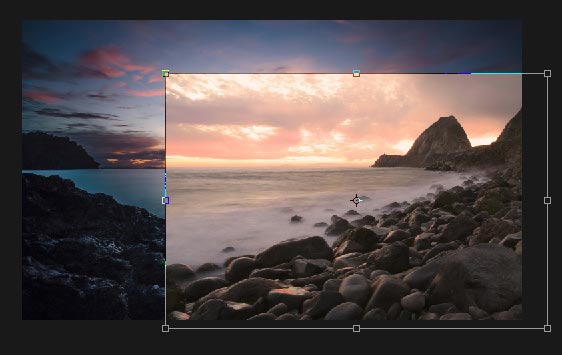
Add the coast image to the main document and place it as shown below. Use the Transform Tool (CTRL + T) to position it as shown below. The aim here is to add the mountain from coast stock and this will also help us to blend the bush parts of the landscape which we are going to place later, in this tutorial.
Step 3
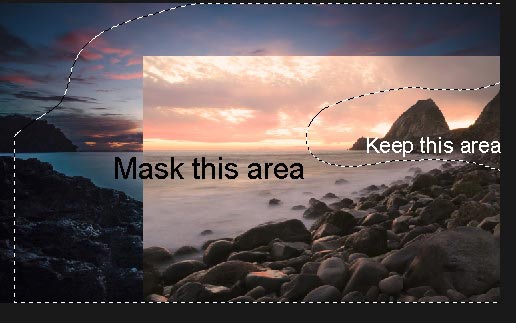
Add a mask to coast image by clicking on the second button at the bottom of layer panel or go to Layer > Layer Mask > Reveal All. Activate the Brush Tool (B). Using a soft round black brush mask the selected parts as shown below.
Results:
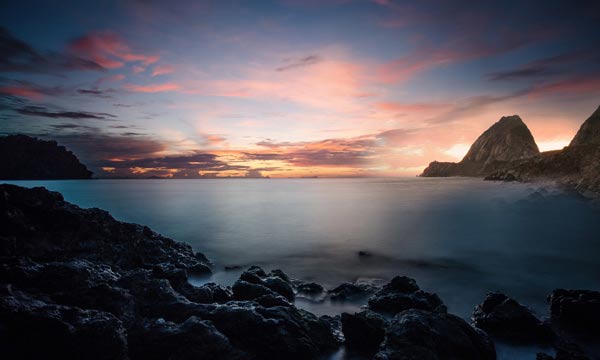
Results with 200% zoom:
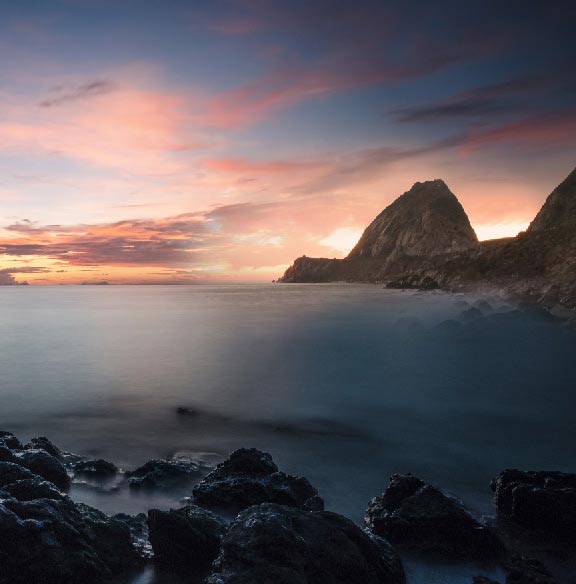
You can notice that I didn’t mask the sky parts of the coast completely because we’ll blend them using an adjustment layer with the existing scene. Just try to leave soft sky part of the coast. For better masking lower the brush opacity to 30%-40%.
Step 4
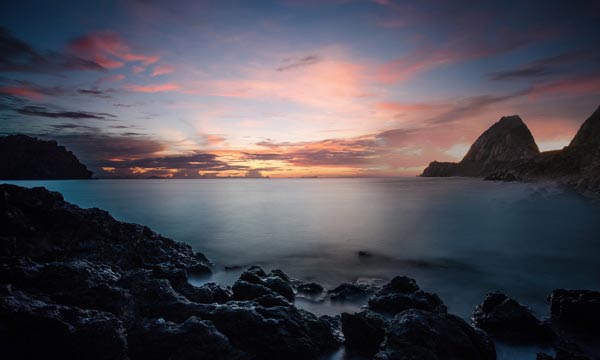
Make a Curves adjustment layer for coast and set it as Clipping Mask (press the red icon). To add an adjustment layer, go to Layer > New Adjustment Layer > Curves or click the third icon at the bottom of layer panel. Now use the Red and Green channel to match the color with the background.
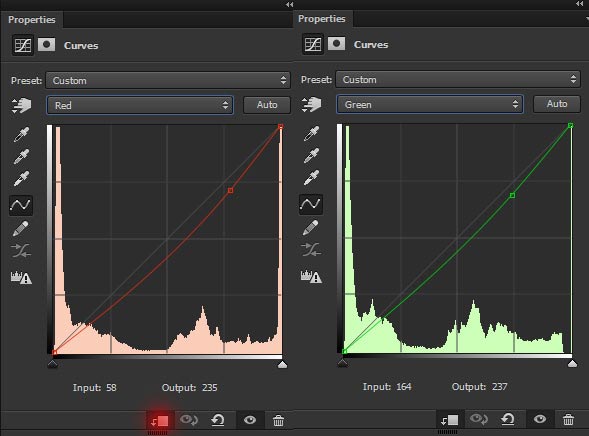
Also, use the RGB channel to reduce the brightness.
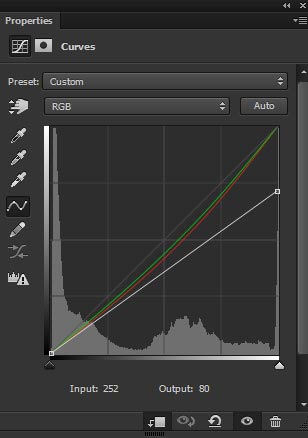
Results:
Step 5
On the layer mask of Curves, mask the effect on the front parts of the coast and leave the dark effect on the back parts. Use a soft, basic brush to mask the effect and mask it on the highlighted parts as shown below.
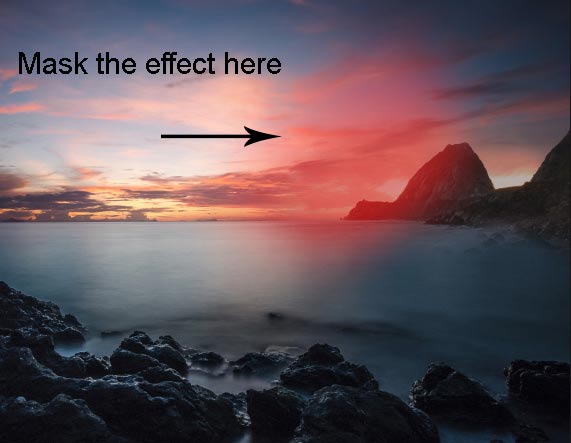
Results with more light on front parts:
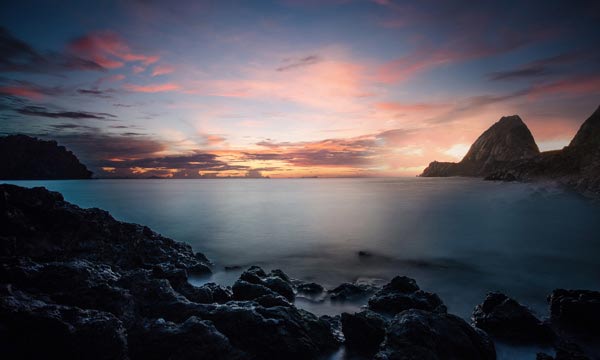
Step 6
Make a Color Balance adjustment layer to coast and match the colors with existing background. Only alter the values of Midtones and Highlights.
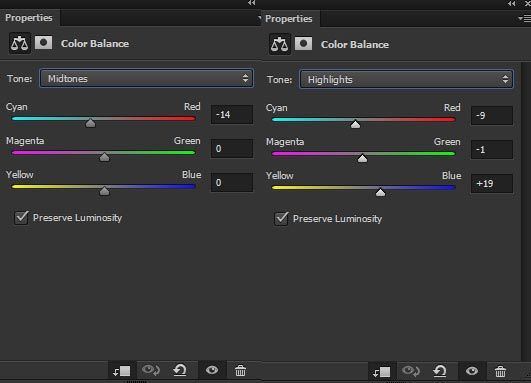
Results:
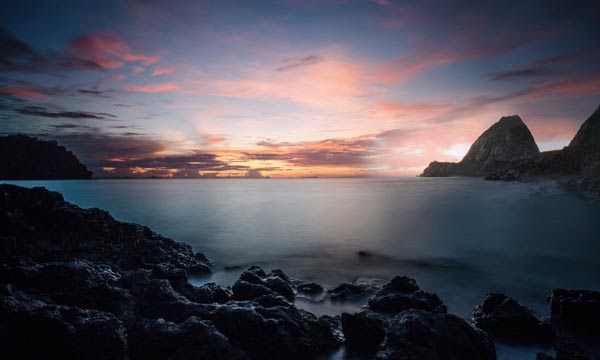
Step 7
Make a Color Balance adjustment layer on top of all layers and don’t clip it to any layer as I want to affect all layers below it. Use it with following settings and enhance the colors of the whole scene.
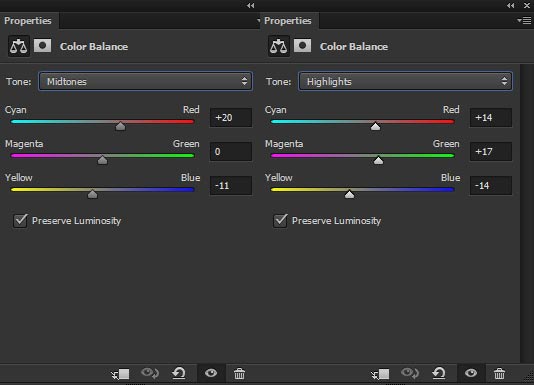
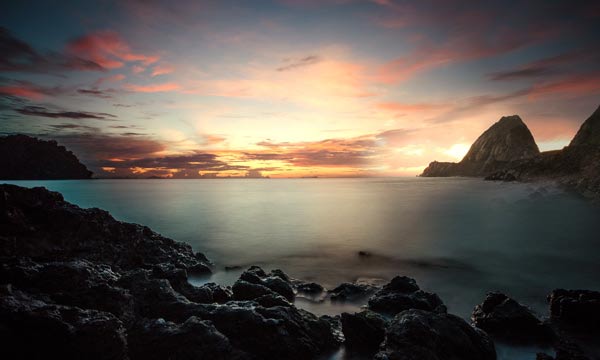
I am aiming to add golden sunset colors tones to the scene but if you need different colors then simply alter the values according to your way.
Results:
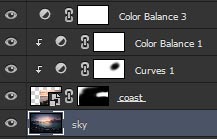
Layer panel arranged so far:
Step 8
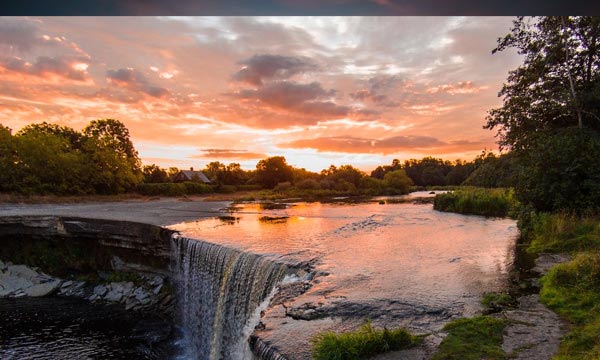
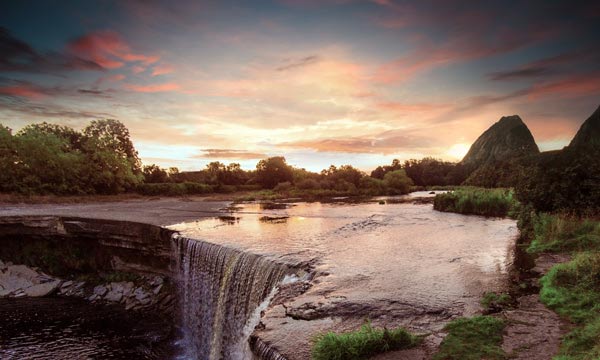
Place the landscape to main document as shown below.
Step 9
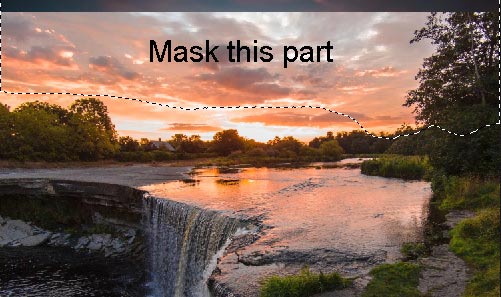
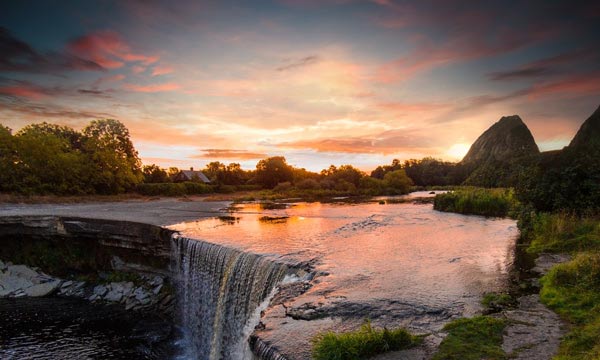
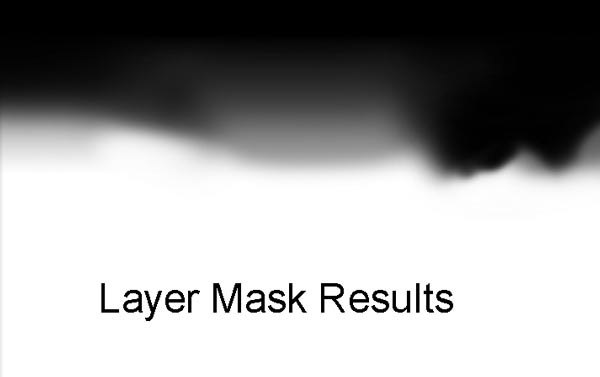
Give a layer mask to landscape image. Using a soft round black brush mask the selected effect as shown below. Use the Brush Tool (B) with opacity around 30%-40% for better masking results. As I said earlier that coast mountain parts will help us to easily blend the bushes parts of the landscape. So there should be not the problem for masking the bushes or the right side of the landscape.
As you can see we’ve decent masking results and you can notice that I blended right part of the landscape with mountains of the coast. So the aim of adding mountain is completed and we got our landscape blended with our background.
Results on layer mask:
Step 10
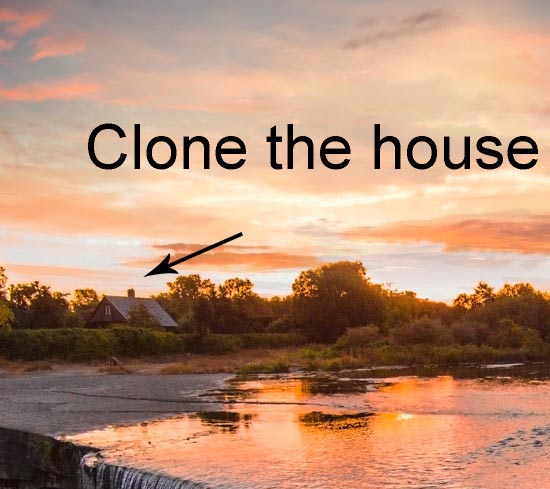
On the left side of the landscape, there is house and we need to clean up these details. Create a new layer by pressing (CTRL + Shift + N) and check the ‘use previous layer as clipping mask’.
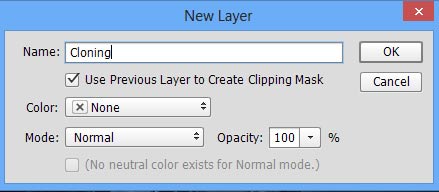
Activate the Clone Stamp Tool (S) and now start cloning the house by sampling the bushes parts.
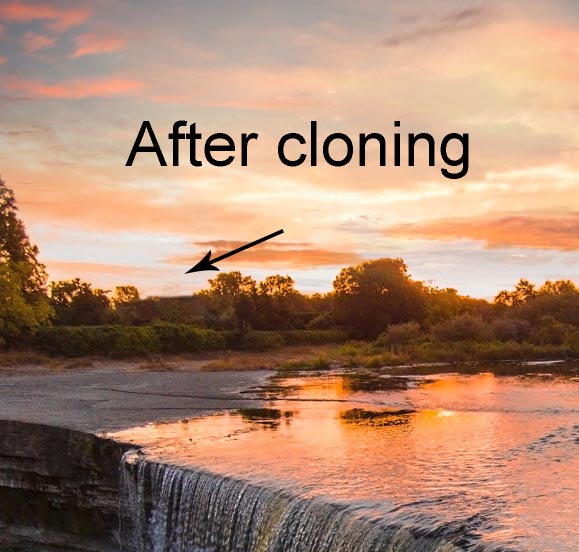
Results after cloning:
Step 11
Add a Selective Color adjustment layer to landscape. Now reduce the yellow colors from the landscape using the following settings.
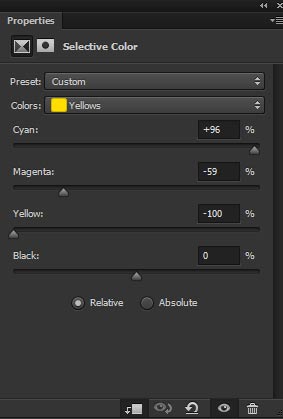
Reduce the opacity to 76%.
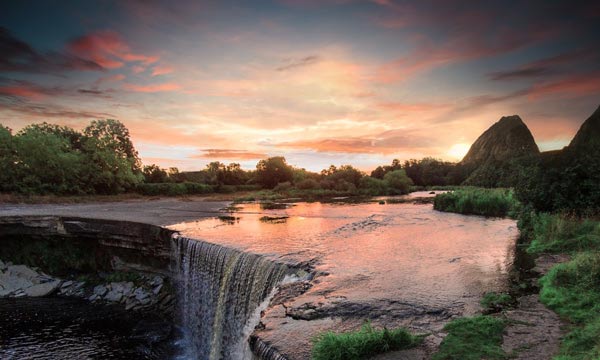
Step 12
Make a Hue/Saturation adjustment layer and reduce the red colors from the landscape.
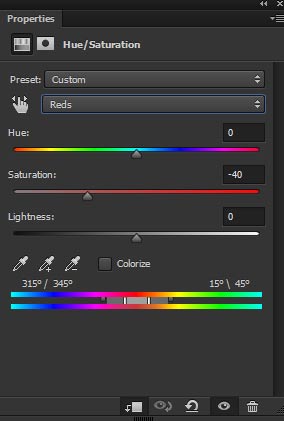
Results:
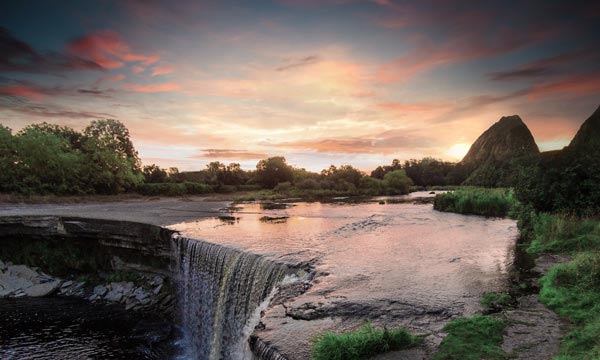
Step 13
Add Color Balance adjustment layer and match the color with the rest of the background.
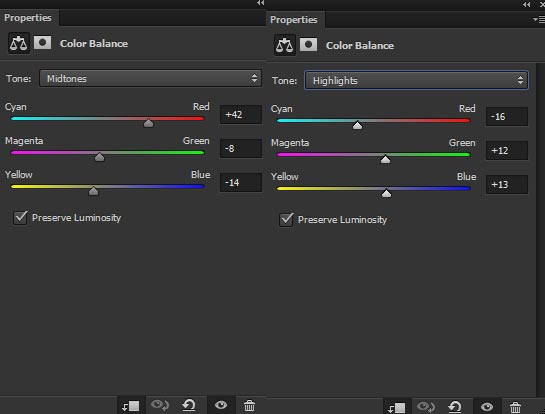
Results:
Step 14
Isolate the tree from its background and place it at the top right corner.

Step 15
Now we’ll turn the green colors of tree into yellow using Selective Color adjustment layer. So add a Selective Color adjustment layer to tree and use it with following settings :
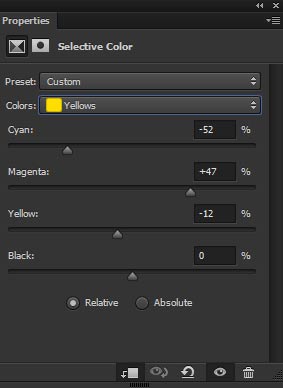
Reduce the opacity to 71%.

Step 16
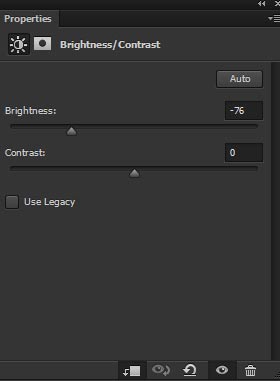
Add a Brightness/Contrast adjustment layer to tree. Now reduce the brightness by dragging the brightness slider down to -76.
On the layer mask of Brightness/Contrast, hide the effect on the front parts to maintain light there and bring more shade to back parts. Use a soft round basic black brush for masking.
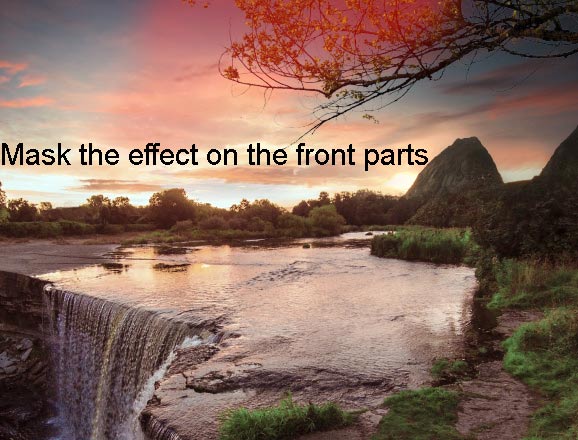
Results:

Step 18
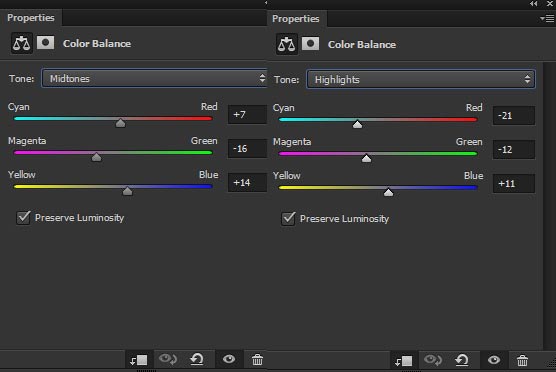
Continue coloring the tree using Color Balance adjustment layer.
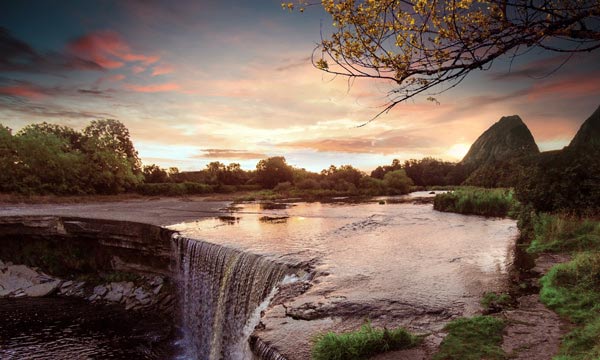
Results:
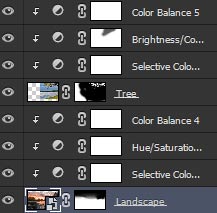
Layer panel arranged so fa :
Step 19
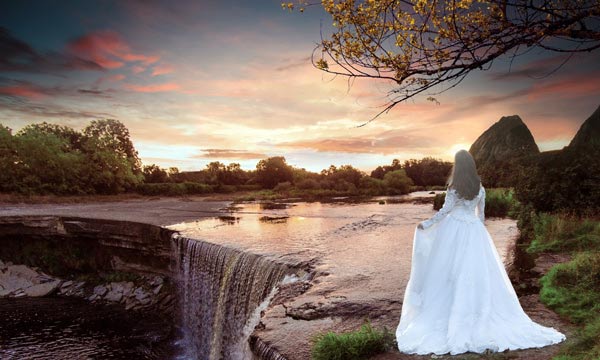
Extract the model from the background and don’t forget to leave some area around the dress. This will help us to blend the model with the landscape.
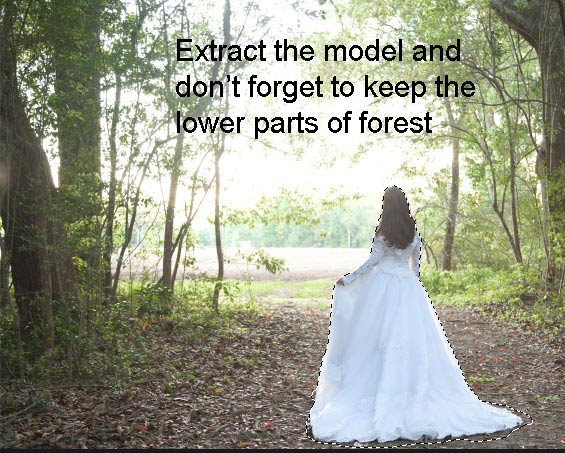
Now add her to main document:
Step 20
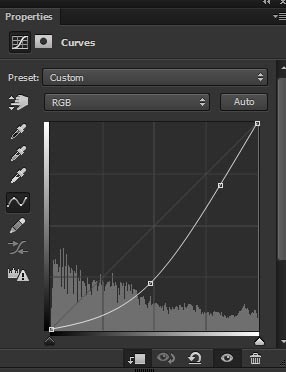
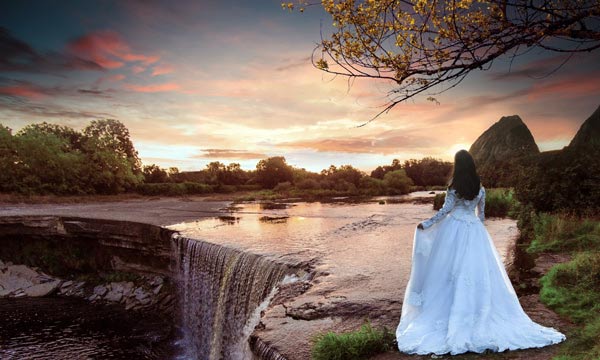
Make a Curves adjustment layer for model. Increase the contrast using the following settings:
Results:
Step 21
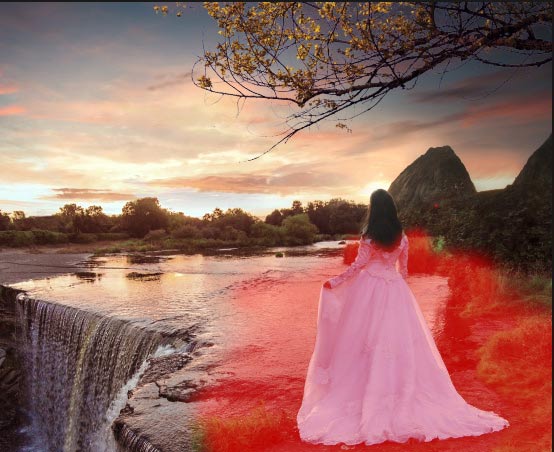
Mask the effect of Curves on the dress and keep it visible on the hair. Use a soft round black brush for masking. Mask the effect on the highlighted parts as shown below.
Results:
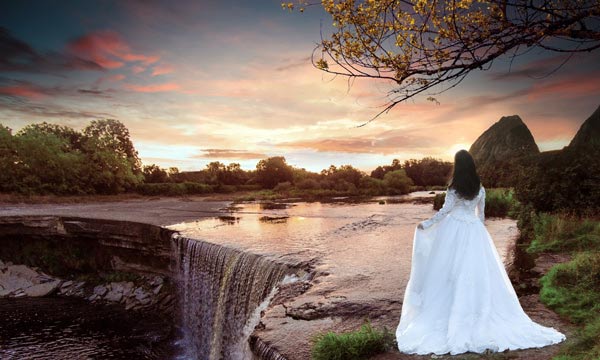
Step 22
Make another Curves adjustment layer for model and reduce the brightness.
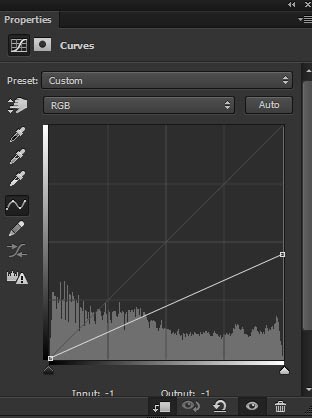
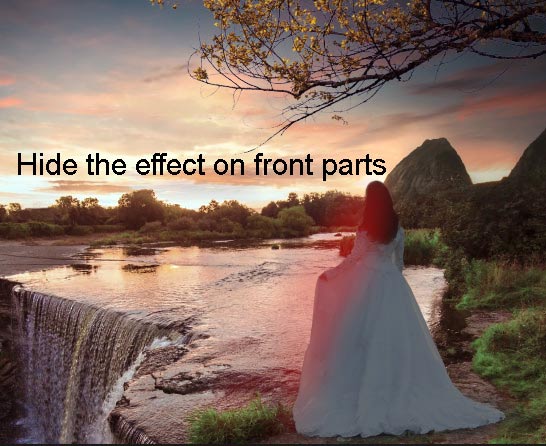
On the layer mask of Curves, hide the effect on the front parts as shown below. Use a soft, basic black brush for masking.
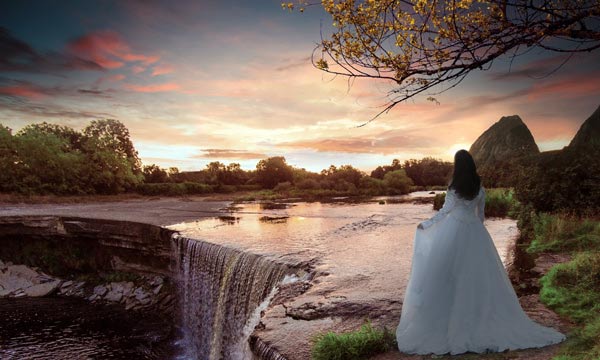
Results:
Step 23
Continue coloring the model using Color Balance adjustment layer and match the color with background.
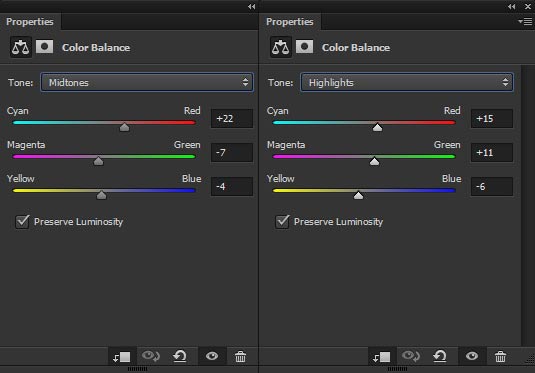
Results:

Step 24
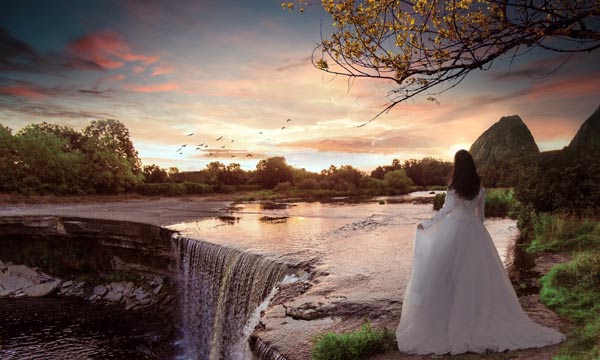
Create a new layer and paint some birds using birds brushes. Feel free to paint them wherever you want to.
Step 25
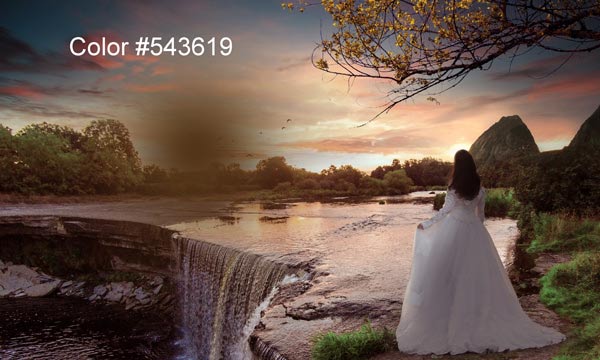
Create new layer and name it ‘light’. Set your foreground color to #543619. Use a soft round brush to paint the light as shown below.
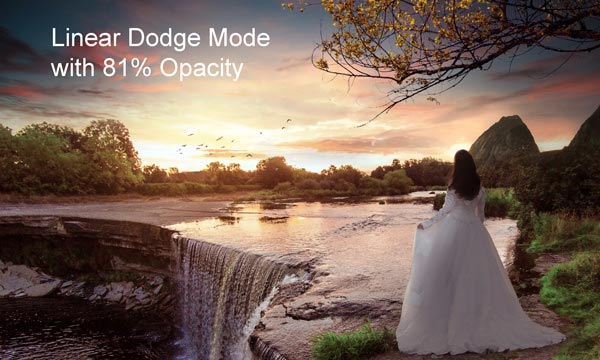
Change the blending mode to Linear Dodge and reduce the opacity to 81%.
Final Adjustments
Step 26
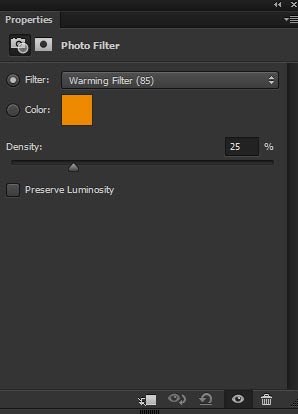
It’s time for final adjustments. Add a Photo Filter adjustment layer (top of all layers) and use the Warming Filter (85) with density 25%.
On the layer mask of Photo Filter, mask the effect on the highlighted middle parts of the background.
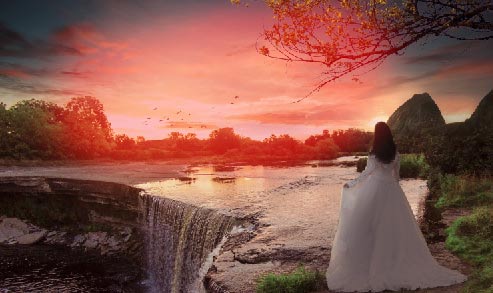
Results:
Step 27
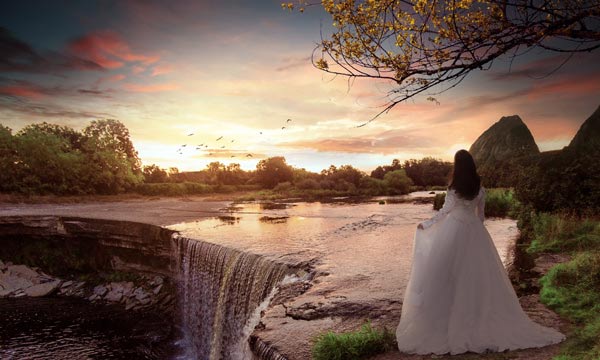
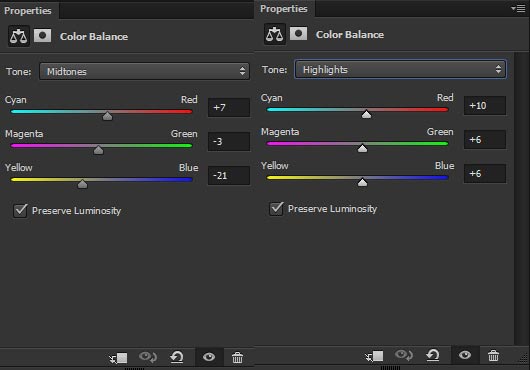
Finally, make a Color Balance adjustment layer and colorize the whole scene using the following settings. I am aiming to achieve golden sunset effect.
Results:
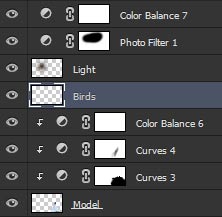
Layer panel arranged:
Conclusion
Thanks for following the tutorial. Hope you enjoyed and feel free to let me know if need any help. Have a great day!

Leave a Reply